Method Statement – Standing Seam Metal Roof Cladding System Installation – Method Statement
AI-assisted method statement with matching ITP, PDF download, and Excel export.
More than a static template
Unlike a downloadable Word or PDF template, this method statement is an AI-assisted editable starting point connected directly to a matching Inspection and Test Plan. Every section is structured, project-adaptable, and ready to export.
- AI-assisted drafting — Customize every section with AI for your specific project scope.
- Linked ITP — A matching inspection and test plan is generated alongside the method statement.
- Multiple export formats — Download as a formatted PDF or editable Excel spreadsheet.
- Editable starting point, not a final document — Review, verify, and adjust all content against your project requirements before use.
Static template vs. Quollnet workflow
| Feature | Static template | Quollnet |
|---|---|---|
| Project-specific content | Manual fill-in required | AI-assisted customization |
| Linked ITP | Separate document, no link | Matching ITP included |
| Export formats | Usually PDF only | PDF and Excel |
| Structured sections | Free-form layout | 13 standardized sections |
| Saved to your account | Local file only | Cloud-saved, reusable |
| Content accuracy | You verify everything | AI-assisted, you still verify |
| Cost | Often free but time-intensive | Free to customize and download |
What you can customize
When you save this method statement to your account, every section becomes editable. The following 13 sections are included:
- Scope — Defines the activity and its boundaries.
- References — Standards, specifications, and drawings.
- Responsibilities — Roles and accountabilities.
- Resources — Labour, plant, and equipment summary.
- Materials — Materials and compliance requirements.
- Equipment — Tools and equipment details.
- Prerequisites — Hold points and pre-conditions.
- Method sequence — Step-by-step construction sequence.
- Safety controls — HSE risk controls and PPE.
- Environmental controls — Environmental mitigation measures.
- QA/QC — Quality inspection and test requirements.
- ITP — Inspection and Test Plan table (has its own page).
- Attachments — Referenced drawings and documentation.
Why this method statement is used
This method statement is used to define and communicate the approved procedure for carrying out method statement – standing seam metal roof cladding system installation on site. It ensures the work is planned in advance, the correct resources and controls are in place, and all personnel understand responsibilities, sequence, quality requirements, and safety controls before work begins. It aligns site execution with the documented scope and acceptance expectations.
Who uses this method statement
This method statement is used by contractors, site supervisors, project engineers, QA/QC engineers, HSE officers, consultants, and client representatives. It serves as a shared reference for planning, execution, supervision, inspection, and approval of the activity on site.
When it is prepared and submitted
The method statement is prepared before the work activity starts and submitted as part of the pre-construction documentation package for review and approval.
Who reviews or approves it
The method statement is usually submitted to the client representative, consultant, resident engineer, or project management consultant for review and approval before the work commences.
Important approval note
This method statement is an AI-assisted editable starting point, not a pre-approved document. Before use on any project, all content must be reviewed and approved by the relevant parties (superintendent, principal contractor, or client representative) in accordance with your contract and project quality plan.
For example: if your specification requires a departure from a referenced standard, that departure must be documented and approved separately — this method statement will not capture that automatically. Always verify against your applicable drawings, specifications, and regulatory requirements.
Method statement content
Scope
Work Summary
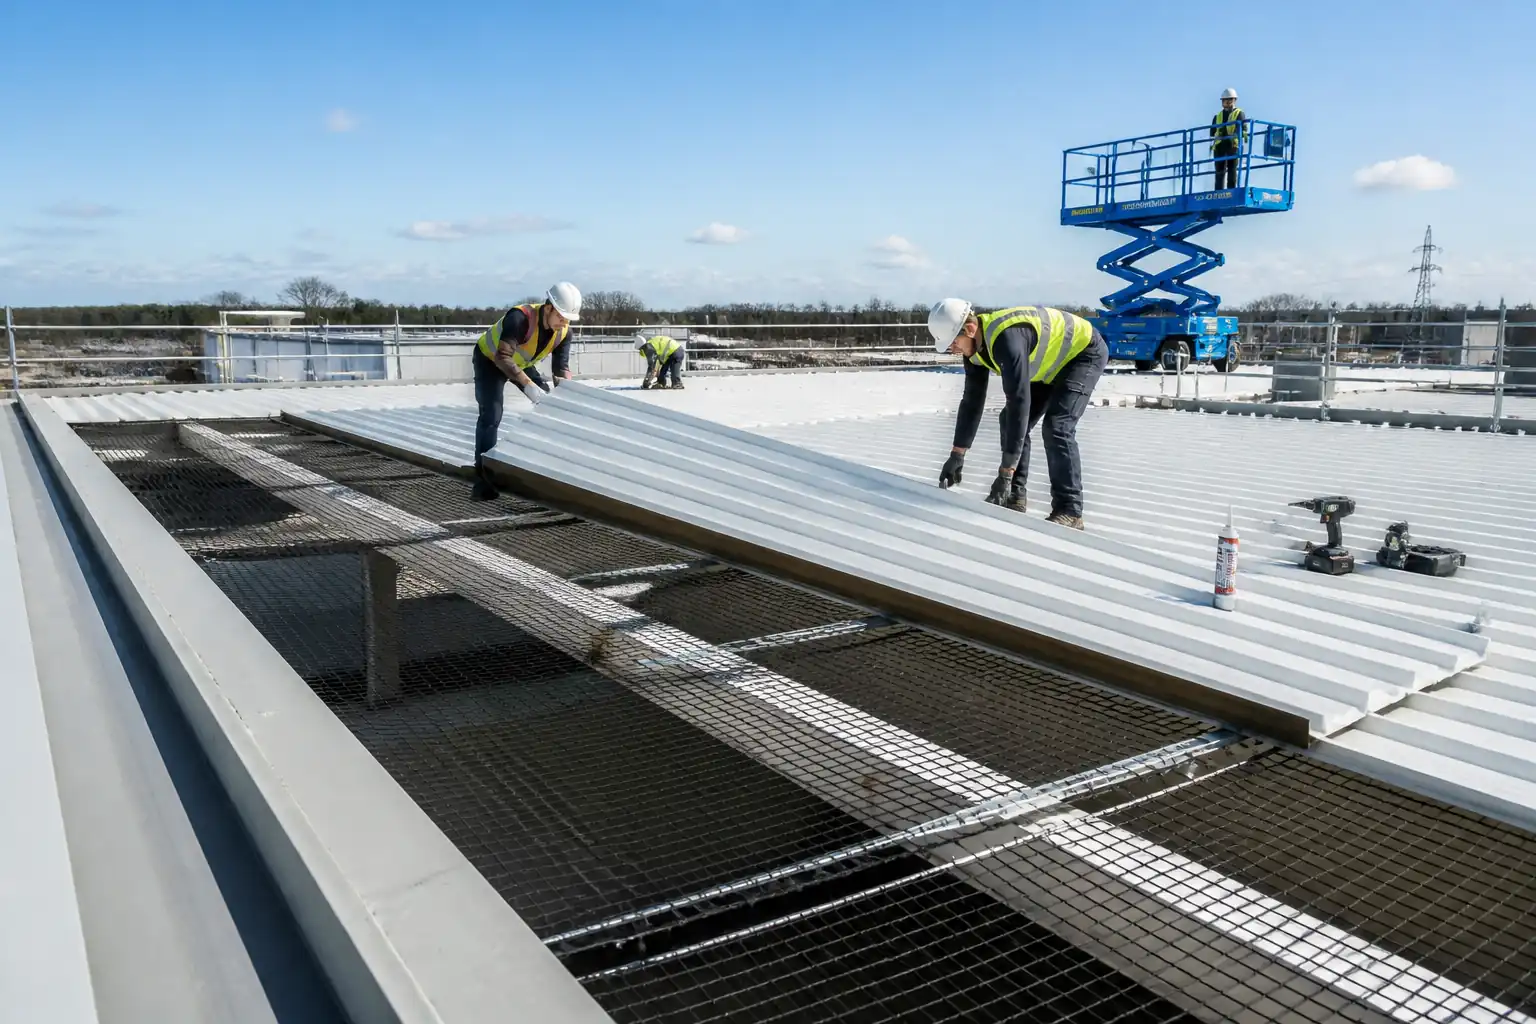
- Install a warm-roof standing seam metal cladding system over aligned structural purlins/liner tray or solid deck.
- Activities: purlin alignment check, substrate acceptance, VCL placement and sealing, spacer/clip (halter) system installation, insulation laying, breather membrane (if specified), standing seam panel delivery/handling/profiling, panel installation and mechanical seaming, and installation of ridge/valley/eaves/abutment flashings and closures.
System Compatibility
- Panel material: pre-finished steel, aluminum, or zinc-titanium, per approved submittals.
- Seaming: double-lock standing seam, typical seam height 50 ± 2 mm [Verify per system].
- Minimum roof pitch: typically ≥ 3° for double-lock systems; some systems certified down to 1.5° with enhanced detailing [Verify per supplier certification and project specs].
Deliverables
- Completed weather-tight standing seam roof with integrated details, QA/QC records, ITP sign-offs, as-built drawings, warranties, and O&M manuals.
References
| Document Type | Reference / Number | Revision | Notes |
|---|---|---|---|
| Standard | BS EN 14782 [Verify latest edition] | ||
| Standard | BS EN 508 series [Verify latest edition] | ||
| Standard | BS EN 1090-2 | ||
| Standard | EN 1991-1-3 and EN 1991-1-4 | Design by others; installation to follow issued clip/fixing schedules. | |
| Standard | BS EN 13859-1 | ||
| Standard | ISO 12944 | ||
| Standard | ASTM E1592 | Use as reference where specified; not a field test. | |
| Manual | Approved system manual [Project-specific] | Overrides generic guidance where conflict exists. | |
| Contract Docs | Approved IFC documents |
Responsibilities
| Role | Responsibility | Name / Party |
|---|---|---|
| PM | Ensure prerequisites met; coordinate with stakeholders | Contractor |
| Engineer | Check purlin alignment and datum lines; control tolerances | Contractor |
| Supervisor | Method compliance, sequencing, workmanship | Contractor |
| QA/QC | Verify materials, clip patterns, seam quality, records | Contractor |
| HSE | Implement task-specific controls, toolbox talks, audits | Contractor |
| AP | Prepare lift plans, coordinate crane/banksman | Contractor |
| Supplier Rep | Attend mock-up/initial bay; verify seaming setup | Supplier |
| Consultant | Approve inspections, variations, and key stages | Engineer |
Resources
| Resource Type | Description | Quantity | Remarks |
|---|---|---|---|
| Manpower | Skilled standing seam installers | 4–12 | |
| Manpower | Flashings fabrication (on/off site) | 1–2 | |
| Manpower | Panel and coil lifting | 3–5 | As per lift plan |
| Manpower | Powered access operation | 2–4 | |
| Manpower | Dimensional control | 1–2 |
Materials
| Material | Specification / Grade | Quantity | Remarks |
|---|---|---|---|
| Metal panels | Profile per approved drawings | As per BOQ | |
| Clips/halters | As per clip schedule | ||
| Cold-formed steel | As required | ||
| Membrane | As per roof area | ||
| Insulation | As per U-value | ||
| Membrane | As required | ||
| Fasteners | As per schedule | ||
| Sealants | As required | ||
| Flashings | As per details |
Equipment
| Equipment | Capacity / Type | Quantity | Inspection Required |
|---|---|---|---|
| All-terrain crane | ≥35 t | 1 | LOLER certs valid |
| Vac lifter | ≥500 kg | 1 | Thorough exam cert |
| Seamer | 1–2 | Pre-use check | |
| Roll-former | 1 | Calibration log | |
| Access | As required | Daily TAG checks | |
| Drivers | 2–4 | Calibration cert | |
| Hand tools | Set | Pre-use check | |
| Tester | 1 | Calibration cert | |
| Survey | 1 | Calibration cert | |
| Cutting tools | 2–3 | Pre-use check |
Prerequisites
Before Starting
- Approvals: Method Statement, ITP, risk assessments, shop drawings/details, clip/fixing schedules, and material submittals approved.
- Access & Permits: PTW issued; lift plan approved; edge protection installed and tagged; rescue plan for work at height.
- Substrate Release: Structural steel/purlins erected, tightened/torqued, and released by steel contractor; liner tray or deck installed and signed-off if applicable.
- Calibration & Tools: Seamer(s), torque tools, pull-out tester, survey equipment calibrated and logged.
- Training: Installers trained/inducted by system supplier where required; MEWP and crane qualifications verified.
- Weather: Forecast checked; works planned below wind speed thresholds; lightning protocol established.
- Materials: Batch numbers recorded; protective films inspected; storage dry, off ground, ventilated; long panels supported at multiple points (min 1.5 m spacing [Verify]).
- Mock-up: If specified, construct and obtain approval before main works.
- Coordination: Penetration and interface details coordinated; penetrations and curbs installed before roofing where possible.
- HSE: Task-specific TBT conducted; COSHH for sealants/cleaners; emergency equipment and spill kits in place.
Method Sequence
| Step | Activity | Description | Responsibility | Inspection / Hold Point |
|---|---|---|---|---|
| 1 | Set-out and control lines | Establish datum, eaves/ridge lines, panel module lines using total station/laser. | Site Engineer | Internal check |
| 2 | Purlin survey and acceptance | Check line/level, spacing, and top-flange flatness; verify bolt torques if applicable. | Site Engineer | Joint site/consultant walkdown |
| 3 | Edge protection and access | Install/verify guardrails, safety nets or MEWPs as planned. | HSE/Access Sub | HSE inspection |
| 4 | Substrate/liner tray (if present) | Inspect liner tray/deck condition; ensure dry, clean, and fixed. | QA/QC | Visual |
| 5 | Vapor Control Layer (VCL) install | Lay VCL over substrate; seal at laps/penetrations and perimeters with compatible tapes/primers. | Roofing Supervisor | QC + Consultant witness |
| 6 | Penetration sealing | Seal sleeves/collars to VCL around penetrations; ensure continuity to curbs. | Roofing Supervisor | QC |
| 7 | Spacer brackets/rails | Fix brackets to purlins with specified fasteners and thermal pads; install rails to achieve plane. | Roofing Supervisor | QC + survey |
| 8 | Clips/halters installation | Install fixed and sliding clips per clip schedule; define fixed-point line. | Roofing Supervisor | QC + Consultant witness |
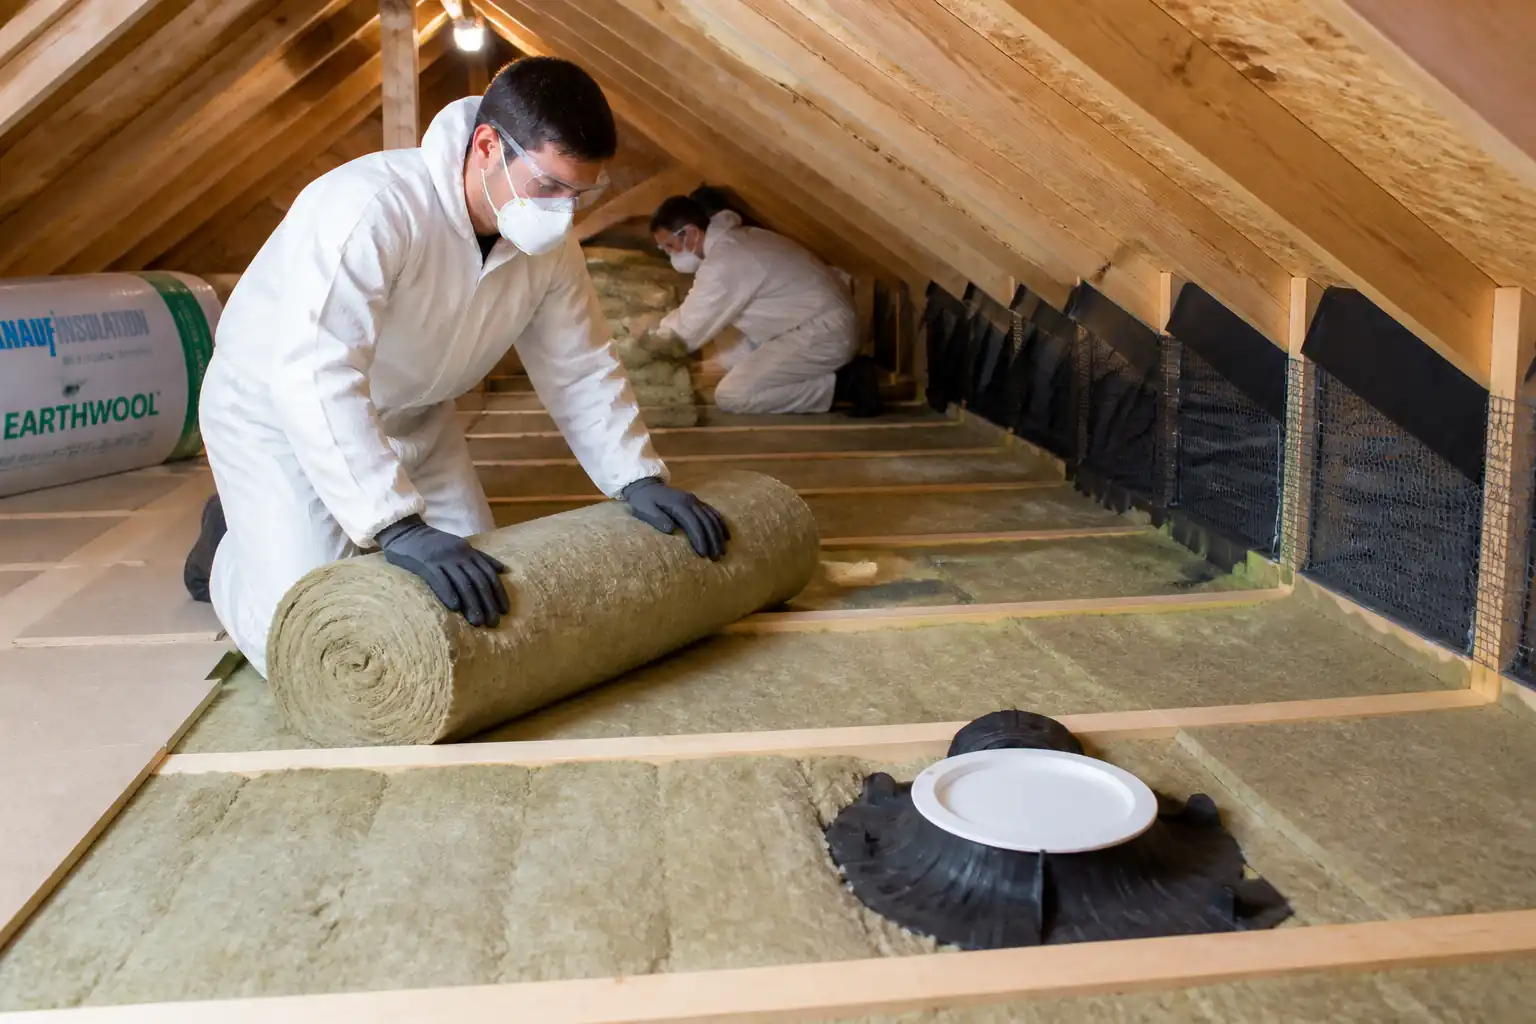
| 9 | Insulation installation | Lay boards in multiple layers, staggered joints; fit tightly around brackets; avoid gaps. | Roofing Supervisor | QC |
| 10 | Breather membrane (if specified) | Install over insulation; lap and tape per datasheet. | Roofing Supervisor | QC |
| 11 | Panel profiling (factory or site) | Profile panels to specified length/geometry; check rib and seam dimensions; apply protective film. | Roofing Supervisor | QC + Supplier rep |
| 12 | Panel lifting and placement | Use vacuum lifter/spreader; position first panel to line; temporary restraints as needed. | AP / Riggers | Pre-lift checks |
| 13 | Panel fixing to clips | Engage panels on clips; fix fixed-point clips; ensure sliding clips free for thermal movement. | Roofing Supervisor | QC |
| 14 | Mechanical seaming | Pre-crimp by hand tools; machine seam in two passes to full lock along panel length. | Roofing Supervisor | QC + Supplier rep |
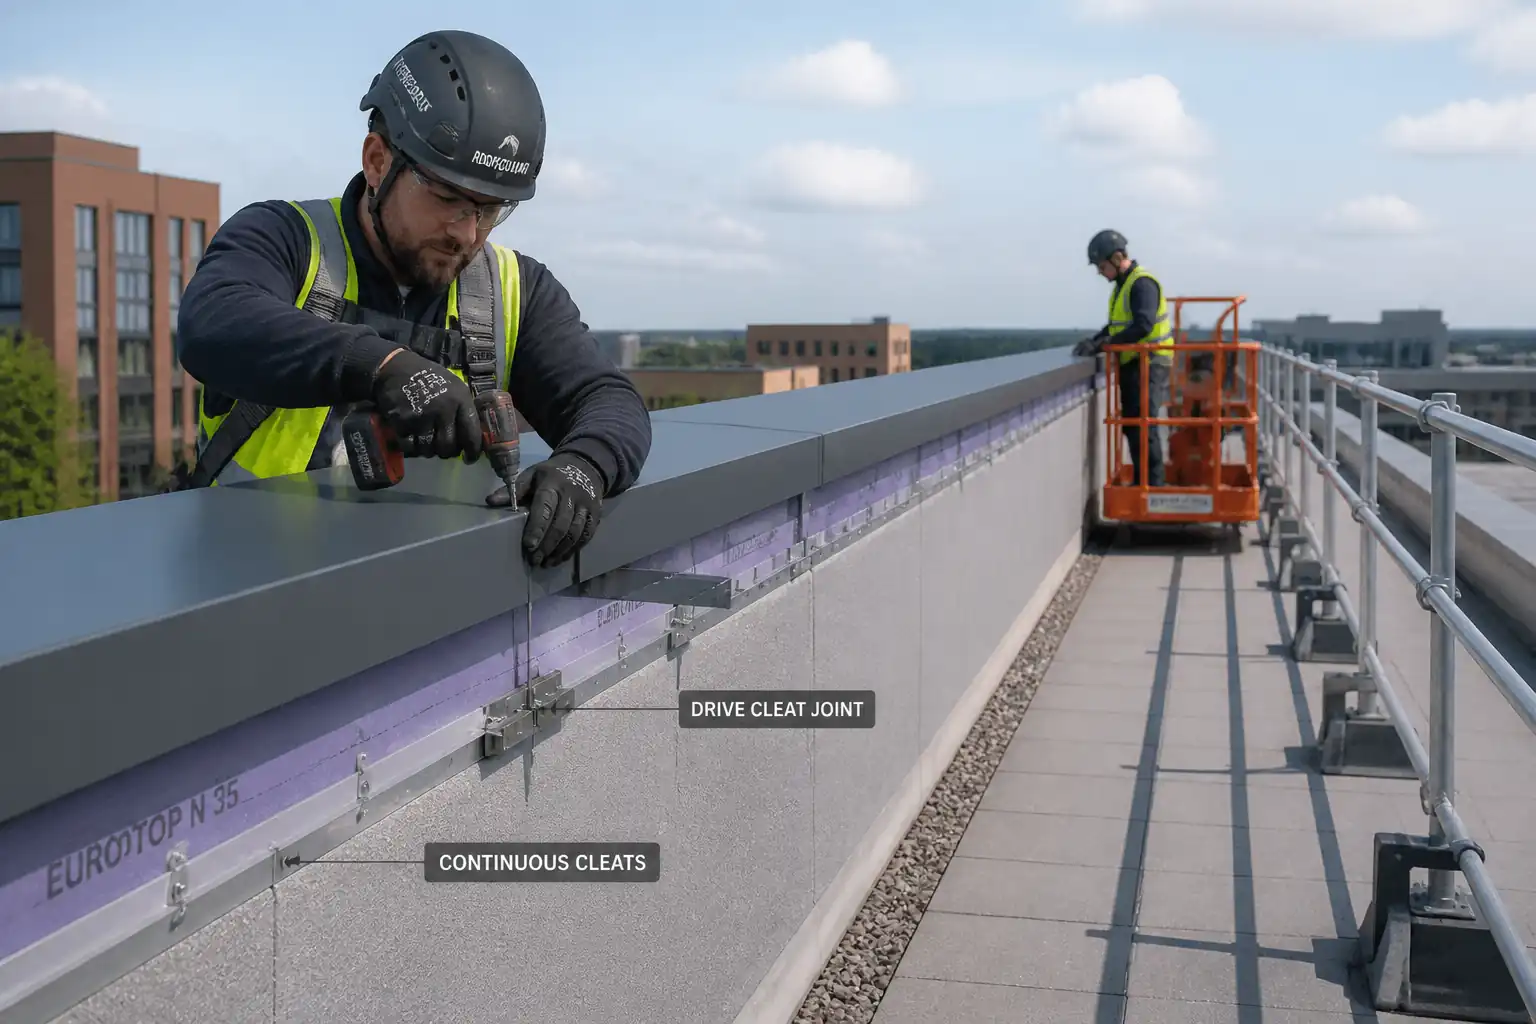
| 15 | Ridge/eaves/verge details | Install closures, undercloaks, and flashings with concealed fix; maintain expansion allowances. | Sheet Metal Lead | QC + Consultant witness |
| 16 | Valley/abutted upstand details | Form valley trays/turn-ups; fit support boards if required; seal laps; ensure drainage capacity. | Sheet Metal Lead | QC |
| 17 | Penetrations and accessories | Install snow guards, walkways, and pipe flashings using compatible brackets; seal to VCL above/below as required. | Roofing Supervisor | QC |
| 18 | Cleaning and swarf control | Remove swarf and debris daily; clean sealant smears; remove protective films timely. | Roofing Supervisor | QC |
| 19 | Final QA/QC and handover | Complete punch list, as-builts, warranties; conduct joint final inspection. | QA/QC Engineer | Consultant walkdown |
Safety Controls
Task-Specific Hazards and Controls
1) Hazard: Work at height and roof edges; falls through openings/valleys
- Likely consequence: Major injury or fatality
- Engineering/procedural control: Install collective edge protection (guardrails to EN 13374 or local equivalent); use safety nets or fully boarded platforms where practicable; controlled access with MEWPs; demarcate exclusion zones and skylight/valley openings; maintain 3 points of contact.
- Required PPE: Full-body harness with twin lanyards or SRL when collective protection not practicable; non-slip safety boots; helmet with chin strap.
- Collective preventive measure: Edge protection, safety nets, fixed access ladders with cages.
- Inspection/permit/supervision: Daily scaffold/MEWP TAG; PTW for work at height; supervisor to verify anchor points and rescue plan readiness.
2) Hazard: Wind uplift of long metal panels during lifting/placement
- Likely consequence: Loss of control, strikes, falls, product damage
- Engineering/procedural control: Use vacuum lifter with spreader beam and tag lines; observe OEM wind limits; suspend lifts above 10–12 m/s or during gusts/thunderstorms [Verify]; store panels restrained; increase manpower on tailing lines.
- Required PPE: Gloves cut level ISO 13997 C or higher; eye protection; helmets.
- Collective preventive measure: Exclusion zone under load path; banksman control; radio comms.
- Inspection/permit/supervision: Lift plan approved by Appointed Person; pre-lift toolbox; lifting gear certifications current.
3) Hazard: Slips, trips, and stepping on seams/insulation voids
- Likely consequence: Sprains, falls, panel damage
- Engineering/procedural control: Provide temporary walk-boards; sequence works to avoid open areas; remove debris promptly; prohibit stepping on seams/ribs.
- PPE: Non-slip footwear; gloves.
- Collective preventive measure: Housekeeping regime; marked walkways.
- Inspection/permit/supervision: Supervisor daily inspection; housekeeping checklist.
4) Hazard: Sharp metal edges and cutting operations
- Likely consequence: Lacerations, eye injury
- Engineering/procedural control: Use shears/nibblers (no abrasive cutting); deburr edges; maintain guards; use magnetic swarf mats.
- PPE: Cut-resistant gloves; long sleeves; safety glasses with side shields.
- Collective preventive measure: Controlled cutting area with screens; swarf collection bins.
- Inspection/permit/supervision: Tool pre-use checks; PAT where applicable.
5) Hazard: Mechanical seaming equipment pinch/entanglement
- Likely consequence: Crush injuries
- Engineering/procedural control: Only trained operators; keep hands/tools clear of seam path; lock-out during adjustments; cable management.
- PPE: Gloves snug-fitting; eye protection; hearing protection if >85 dB.
- Collective preventive measure: Exclusion strip during seaming pass.
- Inspection/permit/supervision: Toolbox talk; OEM manual on site.
6) Hazard: Drilling/fastening noise and flying swarf
- Likely consequence: Hearing loss; eye injury
- Engineering/procedural control: Use torque-limited drivers; magnetic swarf catchers; maintain bits.
- PPE: Hearing protection (SNR ≥ 25 dB) and safety glasses.
- Collective preventive measure: Noise management plan with restricted hours.
- Inspection/permit/supervision: HSE spot checks; noise monitoring if required.
7) Hazard: Electrical hazards from temporary power/tools
- Likely consequence: Shock, burns
- Engineering/procedural control: 110 V center-tapped supply or RCD protection; weatherproof connectors; cable routing to avoid pinch points/water.
- PPE: Dielectric gloves when testing; dry work gloves.
- Collective preventive measure: Lockable distribution boards.
- Inspection/permit/supervision: PAT testing records; daily visual checks.
8) Hazard: Heat/cold stress and UV exposure on roof
- Likely consequence: Dehydration, heat exhaustion/hypothermia
- Engineering/procedural control: Work/rest regime; shade/warm shelters; hydration; sunscreen; cold-weather gear.
- PPE: Weather-appropriate clothing; sunscreen.
- Collective preventive measure: Canopies or shelters at access points.
- Inspection/permit/supervision: HSE monitoring; first-aid ready.
9) Hazard: Interface with other trades and falling objects
- Likely consequence: Strikes, injuries
- Engineering/procedural control: Controlled access; exclusion zones below roof; tool lanyards; staggered work fronts.
- PPE: Helmets with chin straps; safety boots.
- Collective preventive measure: Debris nets; toe boards.
- Inspection/permit/supervision: Daily coordination meeting; permit to work in shared zones.
[All controls to be verified per project HSE plan and local regulations.]
Environmental Controls
- Metal swarf and offcuts: Collect at source using magnetic sweepers and swarf mats; dispose/recycle daily; prevent entry to gutters/drains.
- Noise and vibration: Limit working hours; use maintained equipment; provide hearing protection; monitor if near receptors [Verify per consent].
- Dust and air quality: Prefer shears/nibblers over abrasive cutting; no dry sweeping—use vacuums/soft brushes.
- Sealants/adhesives VOCs: Use low-VOC where possible; keep containers closed; follow COSHH; prevent spills with trays.
- Stormwater protection: Install drain covers/filters during works; prevent butyl sealant and insulation debris from entering rainwater goods.
- Waste management: Segregate metals, plastics, membranes, and general waste; recycle metals and cardboard; maintain waste transfer notes.
- Storage: Keep coils/panels on dunnage under breathable covers; prevent ground contamination from oils; spill kits available.
- Wildlife/light pollution: If working near habitats, schedule to avoid nesting seasons; minimize night lighting glare [Verify per environmental plan].
QA/QC
Quality Objectives
- Provide a durable, watertight standing seam roof meeting structural, thermal, and aesthetic requirements of the project and supplier.
Material Control
- Verify delivery against approved submittals; record batch/coil numbers; check coatings and protective films.
- Certificates: MTCs for metals to BS EN 14782/508; insulation declarations (EN 13165/13162); fastener compliance and corrosion class per ISO 12944 exposure.
Workmanship and Tolerances [Verify per project]
- Purlin/rail plane: within ±3 mm over 10 m; overall line/level within ±5 mm over 10 m.
- Insulation: thickness as per U-value; board gaps <2 mm; staggered joints.
- Panel dimensions: width/length within ±3 mm; rib height within ±2 mm.
- Seams: final height typically 50 ±2 mm; uniform lock; probe cannot insert >5 mm; no coating micro-cracks.
- Fixed/sliding clips: fixed-point row per design; sliding clips free with no clamp from seam.
- Fasteners: torque within OEM range; embedment to provide ≥3 full threads visible beyond steel support [Verify].
Testing and Inspections
- Fastener pull-out tests: minimum 3 tests per roof area or 1% of fasteners, whichever greater [Verify]; capacity ≥ design unfactored load × factor of safety per spec [typ. ≥1.5, Verify].
- VCL adhesion checks: random peel test of tape ≥10 N/25 mm [Verify]; visual continuity including penetrations.
- Seaming verification: first 10 m hold point with supplier rep; seam gauge/probe checks every panel; retain trial seam coupon.
- Dimensional surveys: initial bay and then at 1 bay per day or 10% of areas [Verify].
Mock-up and First-Article
- Construct representative bay including details; obtain written approval before production.
Nonconformance and Corrective Action
- Log NCRs; propose corrective method; do not reseam damaged panels without supplier approval; replace panels with coating damage beyond repair limits.
Documentation and Handover
- ITP signed; checklists; photos; as-builts showing fixed-point lines and clip densities; warranties from panel and installer; O&M manuals including cleaning and maintenance schedule.
Attachments
- Approved shop drawings and details (eaves, ridge, verge, valleys, penetrations)
- Clip/fixing schedules and wind uplift design calculations
- Panel layout and setting-out drawings; fixed-point line diagrams
- Manufacturer installation manual and seaming guide
- Mock-up approval and first-article inspection report
- Material approvals (MTCs, datasheets), fastener compliance certificates
- Calibration certificates (seamer, torque tools, pull tester, survey equipment)
- Lift plan, crane and lifting gear certifications, MEWP/scaffold tags
- Risk assessments, method statement sign-off, COSHH sheets
- As-built drawings, O&M manuals, warranties, maintenance schedule
This content is a read-only public reference. Download or customize to get an editable version.
ITP preview
The first inspection activities from the linked ITP for Method Statement – Standing Seam Metal Roof Cladding System Installation:
| Activity | Inspection / Test | Acceptance Criteria | Responsibility | Record |
|---|---|---|---|---|
| Materials receipt and storage | Verify approvals, batch numbers, storage conditions, certificates | Conform to approved submittals; no damage; certificates available | Contractor QA/QC; Consultant witness | IR, MTCs, delivery notes |
| Purlin alignment and substrate acceptance | Survey line/level/spacing; torque spot checks | Line/level within specified tolerances; substrate dry/clean; torques verified | Contractor Engineer; Consultant hold | IR, survey sheet, photos |
| VCL installation | Lap width, tape adhesion peel checks, continuity at penetrations | Laps ≥150 mm; continuous seal; adhesion ≥10 N/25 mm [Verify] | Contractor QA/QC; Consultant witness | IR, checklist, photos |
Showing 3 of 13 inspection activities. View full ITP →
Related Inspection and Test Plan
An Inspection and Test Plan (ITP) is available for Method Statement – Standing Seam Metal Roof Cladding System Installation. The ITP defines the inspection activities, acceptance criteria, hold and witness points, responsible parties, and records required to verify the work described in this method statement.
View the Method Statement – Standing Seam Metal Roof Cladding System Installation ITP →Frequently asked questions
Continue with related Quollnet resources connected to this method statement.