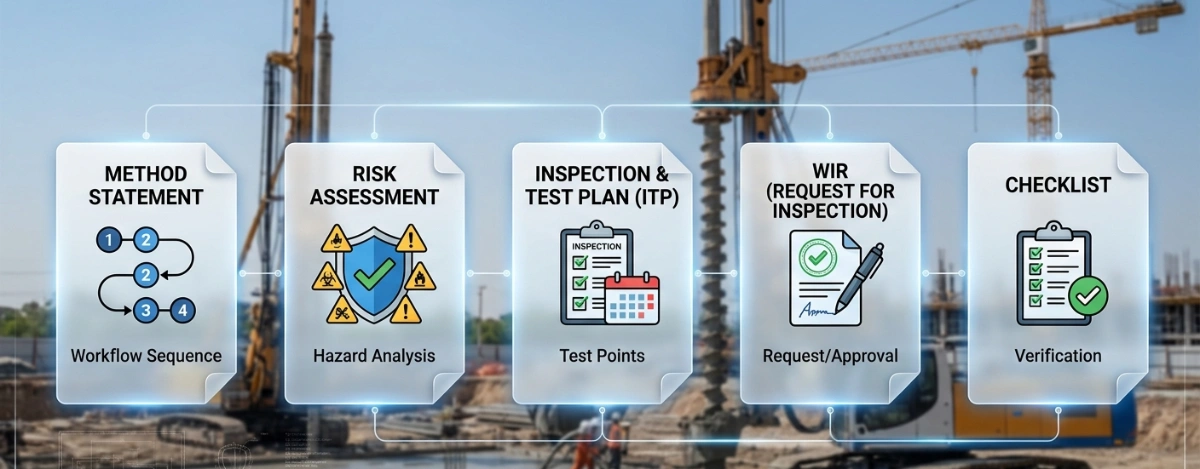
Method Statement: Installation of Internal Timber Doors and Frames – Method Statement
AI-assisted method statement with matching ITP, PDF download, and Excel export.
More than a static template
Unlike a downloadable Word or PDF template, this method statement is an AI-assisted editable starting point connected directly to a matching Inspection and Test Plan. Every section is structured, project-adaptable, and ready to export.
- AI-assisted drafting — Customize every section with AI for your specific project scope.
- Linked ITP — A matching inspection and test plan is generated alongside the method statement.
- Multiple export formats — Download as a formatted PDF or editable Excel spreadsheet.
- Editable starting point, not a final document — Review, verify, and adjust all content against your project requirements before use.
Static template vs. Quollnet workflow
| Feature | Static template | Quollnet |
|---|---|---|
| Project-specific content | Manual fill-in required | AI-assisted customization |
| Linked ITP | Separate document, no link | Matching ITP included |
| Export formats | Usually PDF only | PDF and Excel |
| Structured sections | Free-form layout | 13 standardized sections |
| Saved to your account | Local file only | Cloud-saved, reusable |
| Content accuracy | You verify everything | AI-assisted, you still verify |
| Cost | Often free but time-intensive | Free to customize and download |
What you can customize
When you save this method statement to your account, every section becomes editable. The following 13 sections are included:
- Scope — Defines the activity and its boundaries.
- References — Standards, specifications, and drawings.
- Responsibilities — Roles and accountabilities.
- Resources — Labour, plant, and equipment summary.
- Materials — Materials and compliance requirements.
- Equipment — Tools and equipment details.
- Prerequisites — Hold points and pre-conditions.
- Method sequence — Step-by-step construction sequence.
- Safety controls — HSE risk controls and PPE.
- Environmental controls — Environmental mitigation measures.
- QA/QC — Quality inspection and test requirements.
- ITP — Inspection and Test Plan table (has its own page).
- Attachments — Referenced drawings and documentation.
Why this method statement is used
This method statement is used to define and communicate the approved procedure for carrying out method statement: installation of internal timber doors and frames on site. It ensures the work is planned in advance, the correct resources and controls are in place, and all personnel understand responsibilities, sequence, quality requirements, and safety controls before work begins. It aligns site execution with the documented scope and acceptance expectations.
Who uses this method statement
This method statement is used by contractors, site supervisors, project engineers, QA/QC engineers, HSE officers, consultants, and client representatives. It serves as a shared reference for planning, execution, supervision, inspection, and approval of the activity on site.
When it is prepared and submitted
The method statement is prepared before the work activity starts and submitted as part of the pre-construction documentation package for review and approval.
Who reviews or approves it
The method statement is usually submitted to the client representative, consultant, resident engineer, or project management consultant for review and approval before the work commences.
Important approval note
This method statement is an AI-assisted editable starting point, not a pre-approved document. Before use on any project, all content must be reviewed and approved by the relevant parties (superintendent, principal contractor, or client representative) in accordance with your contract and project quality plan.
For example: if your specification requires a departure from a referenced standard, that departure must be documented and approved separately — this method statement will not capture that automatically. Always verify against your applicable drawings, specifications, and regulatory requirements.
Method statement content
Scope
Work Included
- Supply, inspection, acclimatization, setting out, installation, and alignment of internal timber door frames and leaves (doorsets or component-assembled on site) including architraves, stops, seals, and thresholds as specified.
- Installation of door ironmongery: hinges, locks/latches, cylinders, handles, strike plates, flush bolts, door closers, door stops, signage, and smoke/acoustic/intumescent seals where required.
- Anchoring and packing of frames to substrate (blockwork, concrete, or stud partitions) and compliant sealing of perimeter gaps (acoustic/fire/smoke as specified).
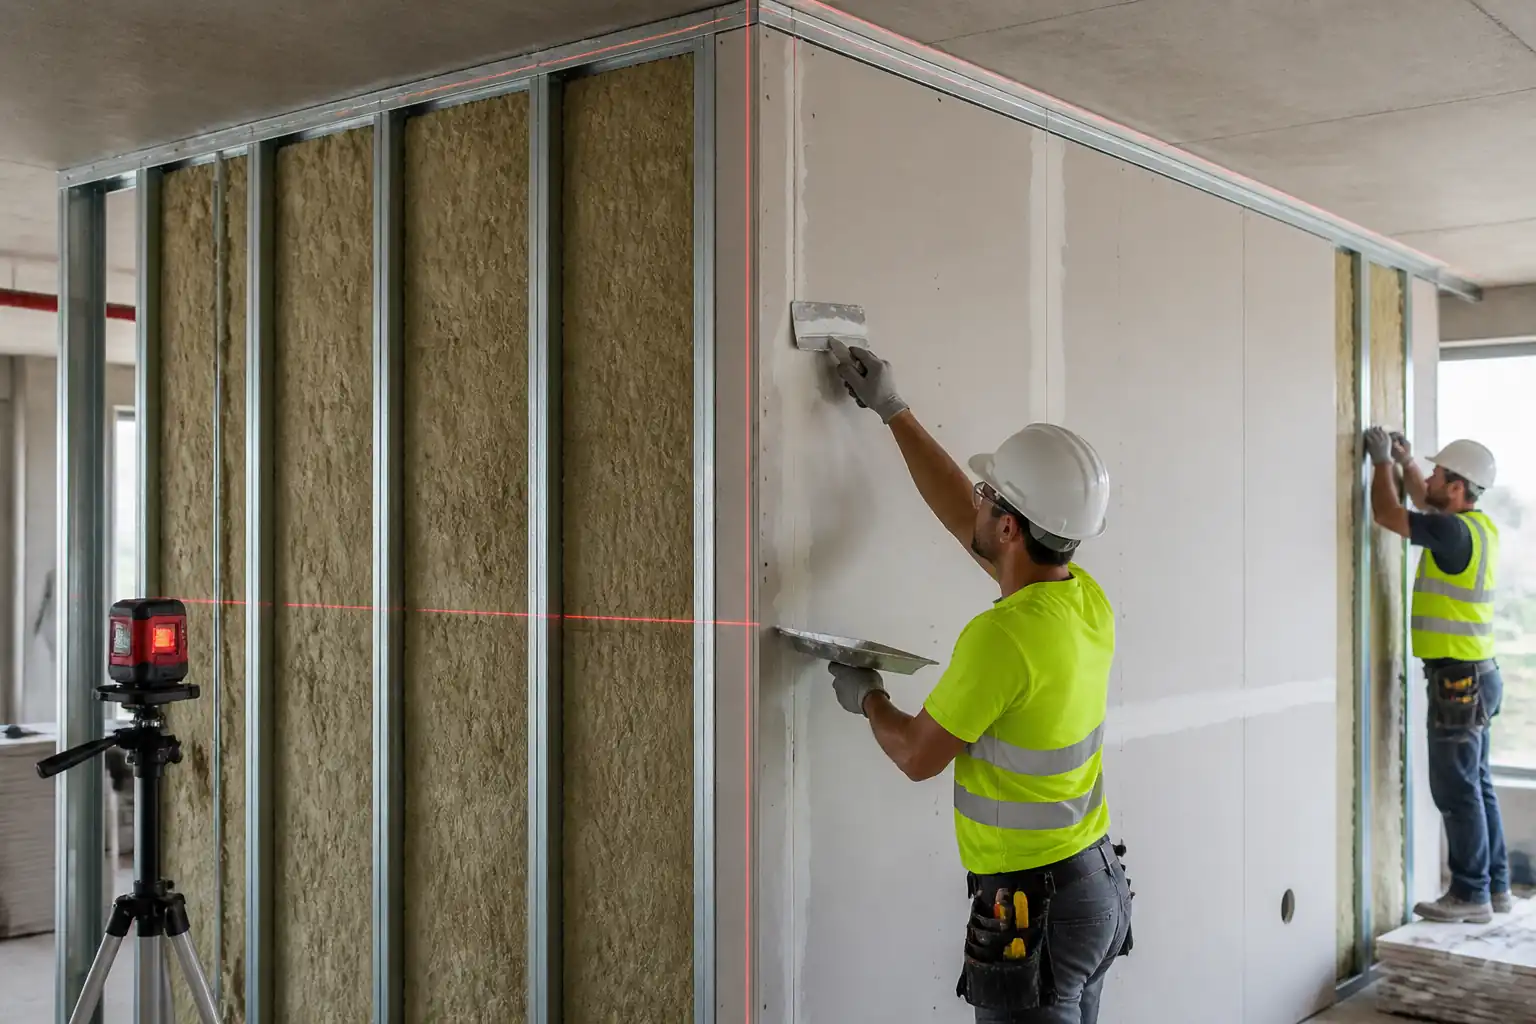
- Integration/interface with wall and floor finishes (plaster/gypsum, tile, skirting, and floor finishes) including temporary protection of finished surfaces.
- QA/QC inspections, specified hold and witness points, operational testing, documentation, and handover.
Exclusions
- Structural alterations to openings, fire stopping beyond the doorset perimeter gap unless specified, electrical access control commissioning, and final decorative painting unless stated in project scope.
References
| Document Type | Reference / Number | Revision | Notes |
|---|---|---|---|
| Standard | EN 14351-2 | ||
| Standard | BS 8000-5 | ||
| Standard | BS 8214 / EN 1634-1/-3 | Apply only to doors specified as fire/smoke control | |
| Standard | BS 8300-2 | ||
| Standard | EN 1935 | ||
| Standard | EN 12209 | ||
| Standard | EN 1906 | ||
| Standard | EN 1154/1155 | ||
| Standard | EN 13183-2 | ||
| Standard | EN 15651 | ||
| Standard | ISO 9001/14001/45001 |
Responsibilities
| Role | Responsibility | Name / Party |
|---|---|---|
| PM | Contractor | Contractor |
| Engineer | Contractor | Contractor |
| Supervisor | Contractor | Contractor |
| Trades | Contractor | Contractor |
| QA/QC | Contractor | Contractor |
| HSE | Contractor | Contractor |
| Consultant | Consultant | Consultant |
Resources
| Resource Type | Description | Quantity | Remarks |
|---|---|---|---|
| Labor | Certified carpenter with doorset/ironmongery experience | 1 per door (typ.) | |
| Labor | Assist lifting, protection, cleaning | 1 per door (typ.) | |
| Staff | Inspections and records | Shared | |
| Staff | HSE controls and permits | Shared |
Materials
| Material | Specification / Grade | Quantity | Remarks |
|---|---|---|---|
| Timber door | As per door schedule [Verify] | ||
| Door frame set | Species/finish per spec [Verify] | ||
| Hinges | SS/BS finish per spec | ||
| Lockset | Backset, function per hardware schedule | ||
| Lever set | Finish and style per schedule | ||
| Closer | Adjustable EN size [Verify] | ||
| Anchors | ETA-approved [Verify] | ||
| Seals | As tested with the door leaf [Verify] | ||
| Sealants/foam | Fire/acoustic grade [Verify] | ||
| Protection | As approved |
Equipment
| Equipment | Capacity / Type | Quantity | Inspection Required |
|---|---|---|---|
| Laser | 1 set | ||
| Drill | As req'd | ||
| Router | As req'd | ||
| Scanner | 1 | ||
| Hand tools | Sets | ||
| Podium/ladder | As req'd | ||
| Vacuum | 1 per team |
Prerequisites
- Approved material submittals for doors, frames, and ironmongery with DoP/CE/UKCA, fire certification (if applicable), and manufacturer installation instructions.
- Issued-for-construction drawings: door schedule, hardware schedule, partition/floor finish drawings, thresholds and levels confirmed.
- Openings completed to required tolerance; substrates cured and dry; partitions braced; floor levels verified.
- Services coordination: verify that access control cabling, door contacts, or hold-open wiring are in place before closing frames.
- Risk assessment and method statement (RAMS) briefed; permits to drill obtained where required; toolbox talk conducted.
- Delivery, storage, and acclimatization: store flat, dry, off-floor; ambient temperature 15–25°C; RH 40–65%; acclimatize timber 48–72 h in the installation area [Verify per manufacturer].
- Check timber moisture content 8–12% (EN 13183-2) before install. Reject swollen/warped/damaged components.
- Confirm compatibility of seals/ironmongery with fire door certification (use only listed components for the specific door leaf) where applicable.
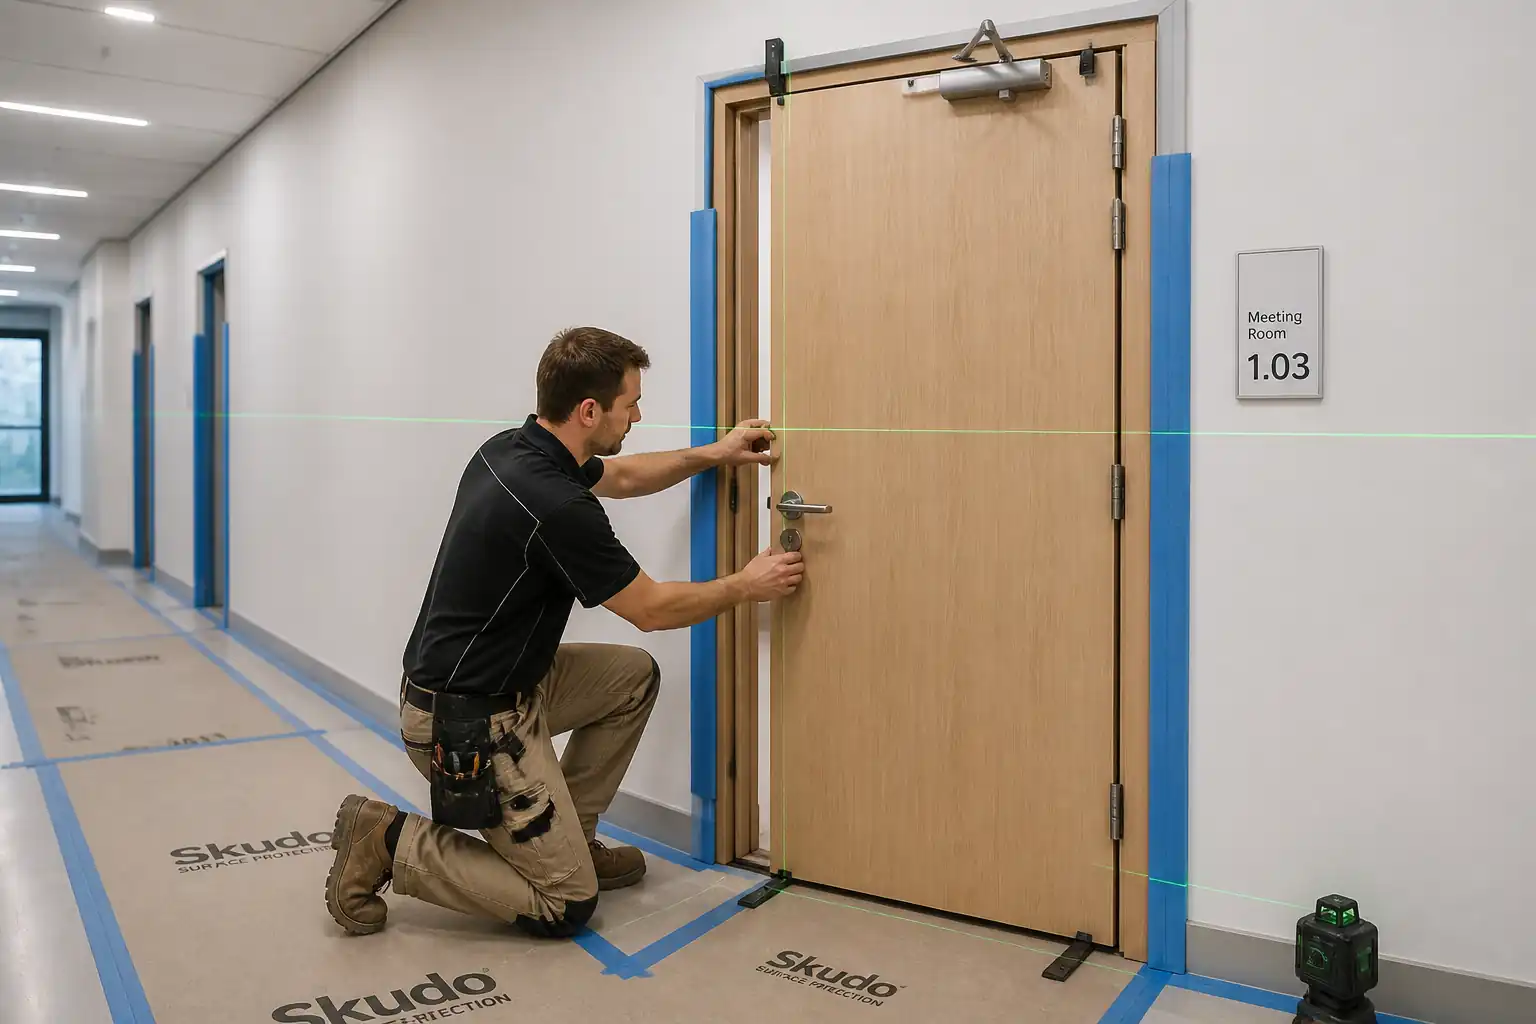
Method Sequence
| Step | Activity | Description | Responsibility | Inspection / Hold Point |
|---|---|---|---|---|
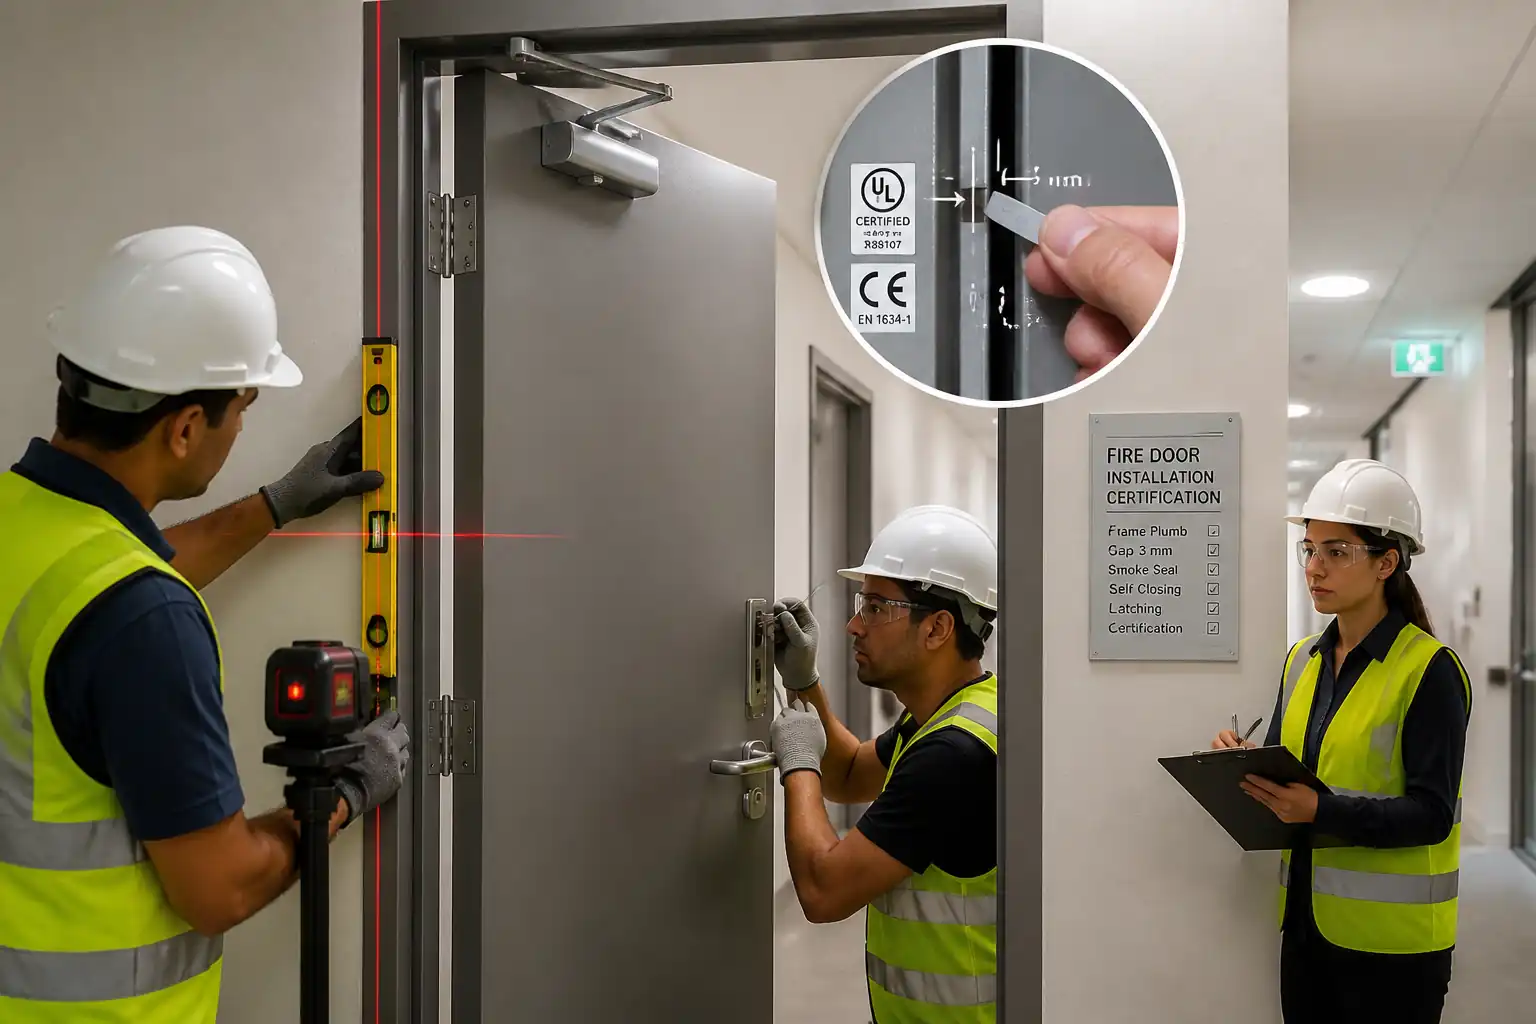
| 1 | Pre-start inspection of opening | Measure structural opening (SO) vs frame outside dimensions (FOD). Confirm squareness, plumb, and level; verify substrate integrity. | Site Engineer / QA-QC | Yes |
| 2 | Set out frame position | Mark frame centerlines, hinge/strike side; verify door swing and ironmongery handing; confirm floor finish buildup and threshold datum. | Site Engineer | Yes |
| 3 | Dry assemble and position frame | Assemble frame (head to jambs) per manufacturer. Offer frame into opening on non-compressible shims; ensure nominal perimeter gap 10–20 mm [Verify]. | Carpenter | Yes |
| 4 | Plumb, level, square, and temporary wedge | Plumb hinge jamb first; level head; square frame using equal diagonals; wedge carefully at fixing points. | Carpenter | Yes |
| 5 | Drill and fix hinge jamb | Scan for services; predrill through frame at marked locations; install ETA frame screws/anchors into substrate with non-compressible packers. | Carpenter | Yes |
| 6 | Fix strike jamb and head | Repeat fixing with shims at each point; continuously verify plumb/level/square as screws are tightened. | Carpenter | Yes |
| 7 | Perimeter gap treatment | Lightly moisten masonry if recommended; apply low-expansion PU foam (not load-bearing) or mineral wool; trim after cure; apply acoustic/fire-rated sealant bead as specified. | Carpenter | Yes |
| 8 | Hinge recessing and installation | Mark out and rout/chisel hinge gains on leaf and jamb; fit hinges with correct screw type/length; intumescent hinge pads for FD doors. | Carpenter | Yes |
| 9 | Hang door leaf | Offer leaf to hinges; insert/remount hinge pins/screws; check swing. | Carpenter | Yes |
| 10 | Latch/lock preparation and fit | Mark and mortice lock/latch; drill spindle and cylinder holes; fit furniture and strike plate; adjust keep. | Carpenter | Yes |
| 11 | Closer installation and adjustment | Install closer/arm per manufacturer; set closing/latching speeds and backcheck; verify opening forces on accessible routes. | Carpenter | Yes |
| 12 | Seals fitting (smoke/intumescent/acoustic) | Install continuous seals to frame or leaf as per certification; fit drop-down seals flush and continuous. | Carpenter | Yes |
| 13 | Interface with finishes | Install architraves; complete make-good to reveals; ensure sealant joints neat; coordinate with skirting/floor cover plates/thresholds. | Carpenter/Finishing team | Yes |
| 14 | Protection | Fit edge guards and correx; label as ‘Do Not Remove’; protect floor thresholds. | Carpenter | Yes |
| 15 | QA/QC inspections and snagging | Execute ITP inspections including hold points; record gaps, operations, closing force; rectify snags. | QA/QC Engineer | Yes |
| 16 | Final functional tests and handover | Demonstrate operation to Consultant/Client; hand over O&M, certificates, and maintenance instructions. | PM / QA-QC | Yes |
Health, Safety and Environment – Task-Specific Safety Controls
Key Hazards and Controls
- Hazard: Manual handling of heavy door leaves (25–45 kg+).
- Likely consequence: Musculoskeletal injury, crush/pinch.
- Engineering/procedural control: Use two-person lift or door trolleys; plan route clear of obstructions; store at chest height where possible.
- PPE: Cut-resistant gloves, safety footwear.
- Collective measure: Team lift briefing; lifting aids available at point of use.
-
Inspection/permit/supervision: Supervisor to approve lift plan for oversized doors; HSE walkdowns.
-
Hazard: Drilling into concealed services in walls.
- Likely consequence: Electric shock, water/gas leak.
- Engineering/procedural control: Review as-built drawings; scan each fixing point with multi-scanner; set drill depth stop to required embed only; isolate local circuits if risk suspected.
- PPE: Safety glasses, insulated gloves if isolations handled by authorized electrician.
- Collective measure: Permit-to-drill where required.
-
Inspection/permit/supervision: Permit sign-off; HSE officer verification. [Verify per project HSE plan and local regulations]
-
Hazard: Power tools (routers/drills/impacts).
- Likely consequence: Lacerations, eye injury, HAVS, noise-induced hearing loss.
- Engineering/procedural control: 110 V CTE or battery tools; guards in place; sharp cutters; use clamps; limit daily trigger time; maintain tools.
- PPE: Safety glasses/face shield, hearing protection, gloves.
- Collective measure: Local extraction on routers/drills with M-class vacuum.
-
Inspection/permit/supervision: PAT tags valid; pre-use checks documented.
-
Hazard: Wood/masonry dust including respirable crystalline silica.
- Likely consequence: Respiratory irritation or disease.
- Engineering/procedural control: On-tool extraction; wet suppression for masonry if practicable; avoid dry sweeping.
- PPE: FFP3 RPE where dust cannot be adequately controlled.
- Collective measure: Segregation/screens; housekeeping with M-class vacuum.
-
Inspection/permit/supervision: Air/dust control checks; RPE fit testing records.
-
Hazard: Work at height (fitting overhead closers/frames).
- Likely consequence: Falls.
- Engineering/procedural control: Use podium steps or platform ladders for duration; maintain 3 points of contact; no overreaching.
- PPE: Non-slip footwear.
- Collective measure: Barriers in circulation areas.
-
Inspection/permit/supervision: Access equipment inspected/tagged weekly; supervisor spot checks.
-
Hazard: PU foams, adhesives, and sealants (isocyanates/VOCs).
- Likely consequence: Skin/eye irritation, sensitization.
- Engineering/procedural control: Review SDS; ensure ventilation; use low-VOC where possible; avoid overspray.
- PPE: Nitrile gloves, safety glasses, long sleeves.
- Collective measure: Spill kit and waste canister for spent foam.
-
Inspection/permit/supervision: COSHH assessment approved; product in-date.
-
Hazard: Pinch points during hanging and adjusting doors.
- Likely consequence: Finger injuries.
- Engineering/procedural control: Use door lifters and wedges; keep hands clear of hinge knuckles; use temporary door retainers.
- PPE: Gloves.
- Collective measure: Controlled area; only crew in work zone.
-
Inspection/permit/supervision: Supervisor present during hanging.
-
Hazard: Fire door non-conformance (if applicable).
- Likely consequence: Loss of compartmentation in a fire.
- Engineering/procedural control: Only use certificated components as listed for the leaf/frame; install by trained personnel; record as-built with photos of labels and seals.
- PPE: Standard task PPE.
- Collective measure: QA hold points.
-
Inspection/permit/supervision: QC and Consultant hold/witness inspections; records retained for O&M.
-
General site requirements: Maintain housekeeping; keep escape routes clear; segregate work area with signage; comply with project HSE plan and local regulations. [Verify per project HSE plan and local regulations]
Environmental Controls
- Timber sourcing: Use FSC/PEFC-certified timber where specified; retain chain-of-custody documents.
- Dust and noise: Use on-tool extraction and M-class vacuums; schedule noisy works during permitted hours; maintain equipment to minimize noise.
- VOC management: Select low-VOC sealants/adhesives where permissible; ensure ventilation; store chemicals in bunded trays.
- Waste segregation: Separate timber offcuts (clean wood), metal hardware packaging, cardboard, plastics, and hazardous wastes (spent foam cans/cleaner). Use labeled skips/containers.
- Spill prevention: Keep foam guns/cleaners on trays; spill kit available; clean spills promptly and dispose per SDS.
- Protection of finishes: Use reusable correx/edge guards; low-tack tapes; remove protection only at handover.
- Energy and resource efficiency: Use battery tools with efficient chargers; turn off equipment when not in use.
- Nuisance control: Keep work area tidy; avoid blocking circulation; damp-wipe rather than dry sweep.
Quality Assurance / Quality Control
QA Preparations
- Approvals: MIRs for doors, frames, and ironmongery with DoP/CE/UKCA; fire door certification (leaf/frame/hardware compatibility) where applicable.
- Mock-up: Install one typical doorset as benchmark; obtain Consultant approval before bulk works.
- Calibration: Levels and measuring tools within calibration.
In-Process QC Checks
- Timber moisture: 8–12% before installation (EN 13183-2). Record readings for 10% of delivered doors [Verify].
- Opening verification: Record SO vs FOD for each opening; confirm allowable perimeter gap 10–20 mm [Verify].
- Frame alignment: Plumb/level ±1 mm/m (max 2 mm overall); diagonal difference ≤3 mm; record on IR.
- Fixings: Anchors at 150–250 mm from corners and 450–600 mm c/c; embed ≥40–60 mm into solid substrate; packers at each fixing.
- Gaps/clearances: Jamb/head gaps 2–3 mm; threshold undercut 6–10 mm (non-smoke) or per drop-seal/FD certificate; meeting stiles 3 mm (pair). Use feeler gauges.
- Seals: Continuous and correct type/size; no paint over intumescent/smoke seals.
- Ironmongery: Positions per schedule; handle height typically 900–1050 mm AFFL [Verify]; latch throw ≥12 mm; closer set for controlled closing and latching; opening forces within BS 8300-2 where applicable.
Documentation and Records
- Inspection Requests (IRs) at hold/witness points.
- As-built photos: fire door labels, hinge stamps, seals continuity, closer model, gap gauges.
- Non-conformances (NCR) and Corrective Actions (CAR) tracked to closure.
- O&M submissions: product data, maintenance instructions, warranties, and cleaning guidance.
Acceptance
- Zero outstanding snags; all criteria met; Client/Consultant IR signed; protection in place until handover.
Attachments
- Approved material submittals (doors, frames, ironmongery) and DoP/CE/UKCA certificates.
- Fire door certificates/label schedule and installation instructions (where applicable).
- Door and hardware schedules with elevations.
- Manufacturer data sheets and SDS for foams, adhesives, and sealants.
- Inspection checklists: opening verification, frame alignment, gap measurement log, ironmongery installation, closer setting.
- Permit-to-drill template and scanner pre-use checklist.
- Toolbox talk record for door installation works.
- Calibration certificates for levels and measuring devices.
- O&M manual template and maintenance instructions.
- As-built photographic record requirements (labels, hinges, seals, gaps, closer).
This content is a read-only public reference. Download or customize to get an editable version.
ITP preview
The first inspection activities from the linked ITP for Method Statement: Installation of Internal Timber Doors and Frames:
| Activity | Inspection / Test | Acceptance Criteria | Responsibility | Record |
|---|---|---|---|---|
| Material delivery inspection (doors, frames, ironmongery) | Verify against approvals; check damage; check fire labels/DoP | Conforms to approved submittals; labels intact; moisture 8–12% where measured | Contractor QC (Perform) / Consultant (Review) | MIR, delivery photos |
| Opening verification and set-out | Measure SO vs FOD, plumb/level/square | SO within tolerance; datum confirmed; swing/handing per schedule | Contractor QC (Perform) / Consultant (Witness) | IR, checklist |
| Frame positioned, plumbed, squared (pre-fix) | Level/plumb; diagonal check | Plumb/level ±1 mm/m; diagonal ≤3 mm | Contractor QC (Hold) / Consultant (Hold) | IR |
Showing 3 of 12 inspection activities. View full ITP →
Related Inspection and Test Plan
An Inspection and Test Plan (ITP) is available for Method Statement: Installation of Internal Timber Doors and Frames. The ITP defines the inspection activities, acceptance criteria, hold and witness points, responsible parties, and records required to verify the work described in this method statement.
View the Method Statement: Installation of Internal Timber Doors and Frames ITP →Frequently asked questions
Continue with related Quollnet resources connected to this method statement.