Method Statement: Torch-Applied Bituminous Membrane Waterproofing for Basement Concrete Retaining Walls – Method Statement
AI-assisted method statement with matching ITP, PDF download, and Excel export.
More than a static template
Unlike a downloadable Word or PDF template, this method statement is an AI-assisted editable starting point connected directly to a matching Inspection and Test Plan. Every section is structured, project-adaptable, and ready to export.
- AI-assisted drafting — Customize every section with AI for your specific project scope.
- Linked ITP — A matching inspection and test plan is generated alongside the method statement.
- Multiple export formats — Download as a formatted PDF or editable Excel spreadsheet.
- Editable starting point, not a final document — Review, verify, and adjust all content against your project requirements before use.
Static template vs. Quollnet workflow
| Feature | Static template | Quollnet |
|---|---|---|
| Project-specific content | Manual fill-in required | AI-assisted customization |
| Linked ITP | Separate document, no link | Matching ITP included |
| Export formats | Usually PDF only | PDF and Excel |
| Structured sections | Free-form layout | 13 standardized sections |
| Saved to your account | Local file only | Cloud-saved, reusable |
| Content accuracy | You verify everything | AI-assisted, you still verify |
| Cost | Often free but time-intensive | Free to customize and download |
What you can customize
When you save this method statement to your account, every section becomes editable. The following 13 sections are included:
- Scope — Defines the activity and its boundaries.
- References — Standards, specifications, and drawings.
- Responsibilities — Roles and accountabilities.
- Resources — Labour, plant, and equipment summary.
- Materials — Materials and compliance requirements.
- Equipment — Tools and equipment details.
- Prerequisites — Hold points and pre-conditions.
- Method sequence — Step-by-step construction sequence.
- Safety controls — HSE risk controls and PPE.
- Environmental controls — Environmental mitigation measures.
- QA/QC — Quality inspection and test requirements.
- ITP — Inspection and Test Plan table (has its own page).
- Attachments — Referenced drawings and documentation.
Why this method statement is used
This method statement is used to define and communicate the approved procedure for carrying out method statement: torch-applied bituminous membrane waterproofing for basement concrete retaining walls on site. It ensures the work is planned in advance, the correct resources and controls are in place, and all personnel understand responsibilities, sequence, quality requirements, and safety controls before work begins. It aligns site execution with the documented scope and acceptance expectations.
Who uses this method statement
This method statement is used by contractors, site supervisors, project engineers, QA/QC engineers, HSE officers, consultants, and client representatives. It serves as a shared reference for planning, execution, supervision, inspection, and approval of the activity on site.
When it is prepared and submitted
The method statement is prepared before the work activity starts and submitted as part of the pre-construction documentation package for review and approval.
Who reviews or approves it
The method statement is usually submitted to the client representative, consultant, resident engineer, or project management consultant for review and approval before the work commences.
Important approval note
This method statement is an AI-assisted editable starting point, not a pre-approved document. Before use on any project, all content must be reviewed and approved by the relevant parties (superintendent, principal contractor, or client representative) in accordance with your contract and project quality plan.
For example: if your specification requires a departure from a referenced standard, that departure must be documented and approved separately — this method statement will not capture that automatically. Always verify against your applicable drawings, specifications, and regulatory requirements.
Method statement content
Scope
Work Summary
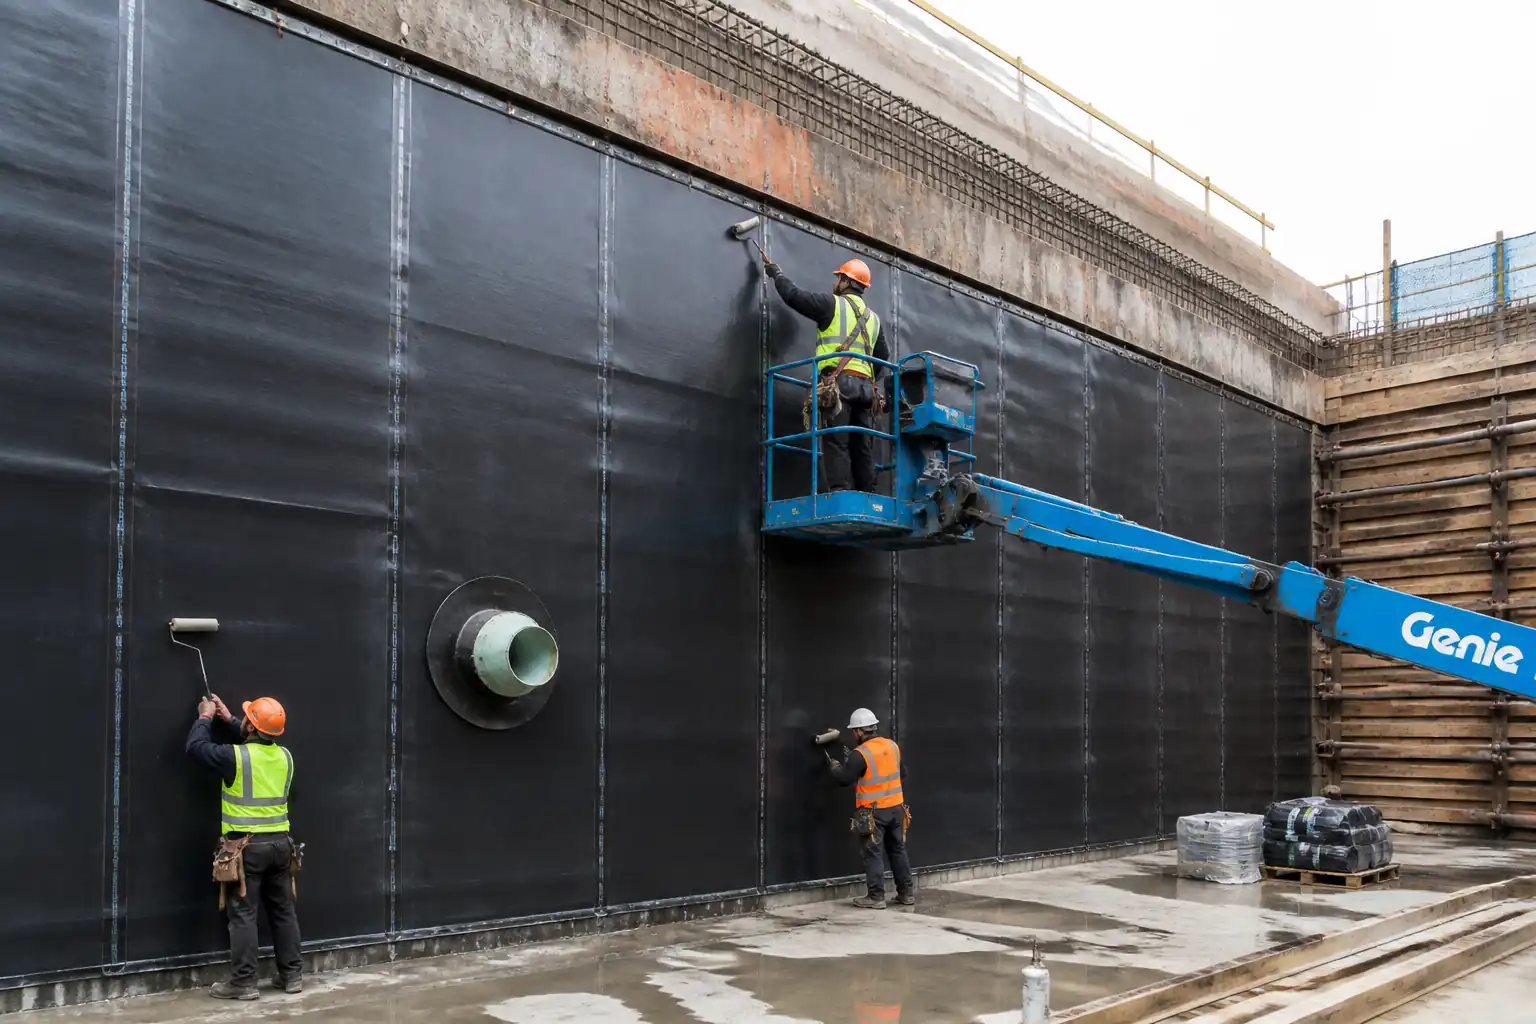
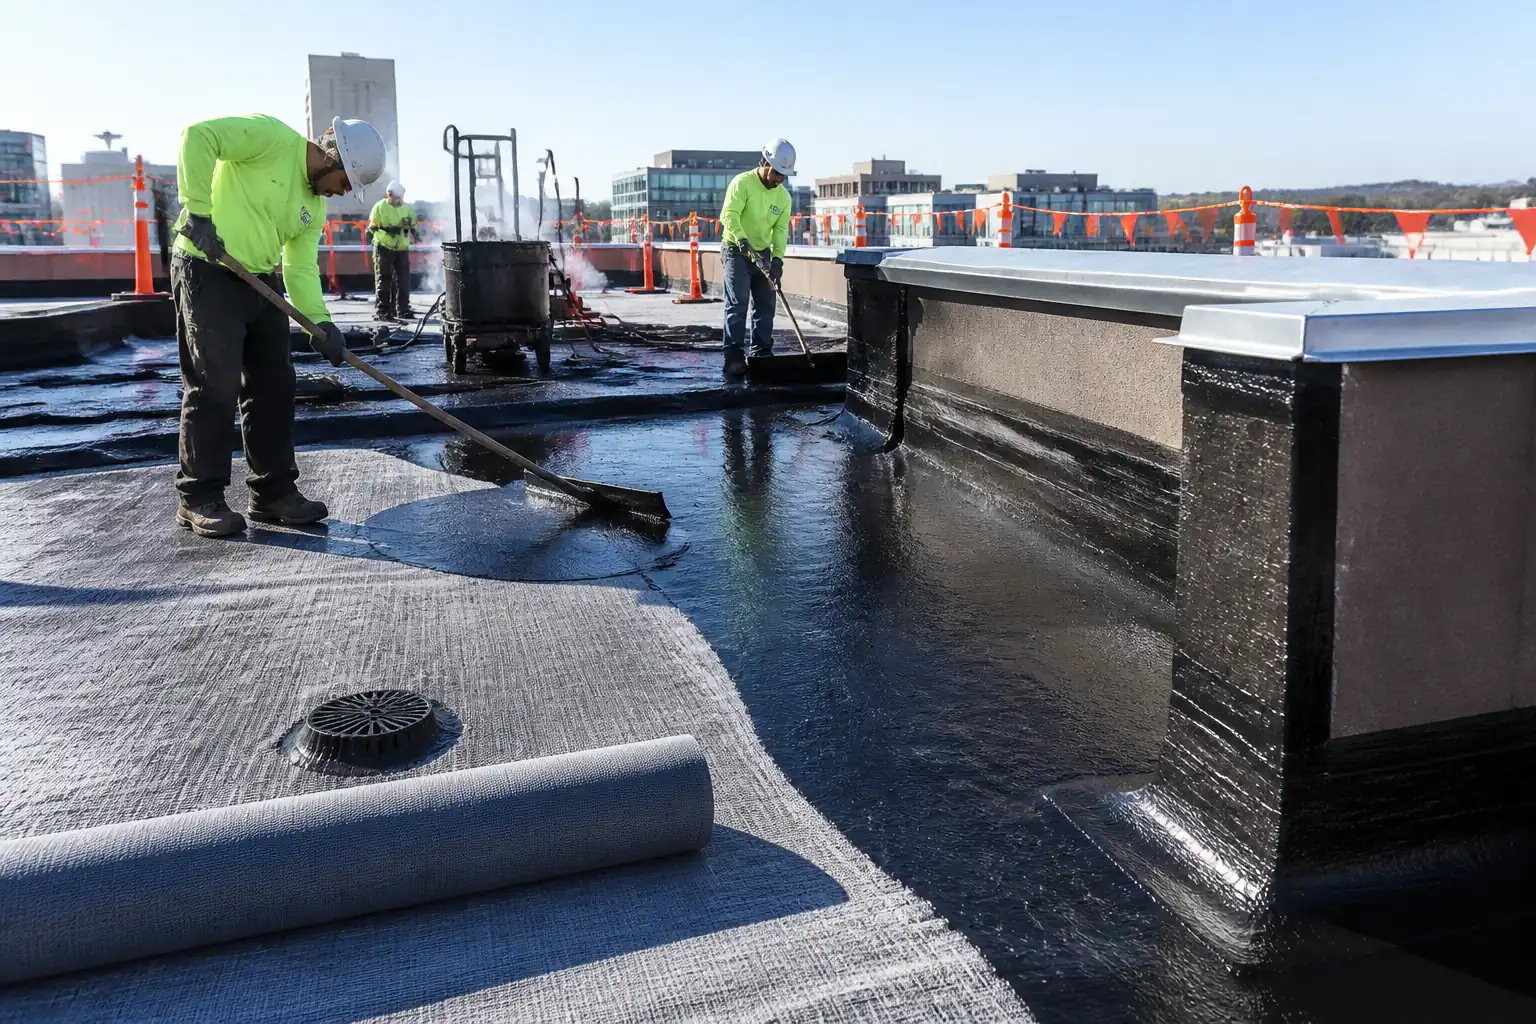
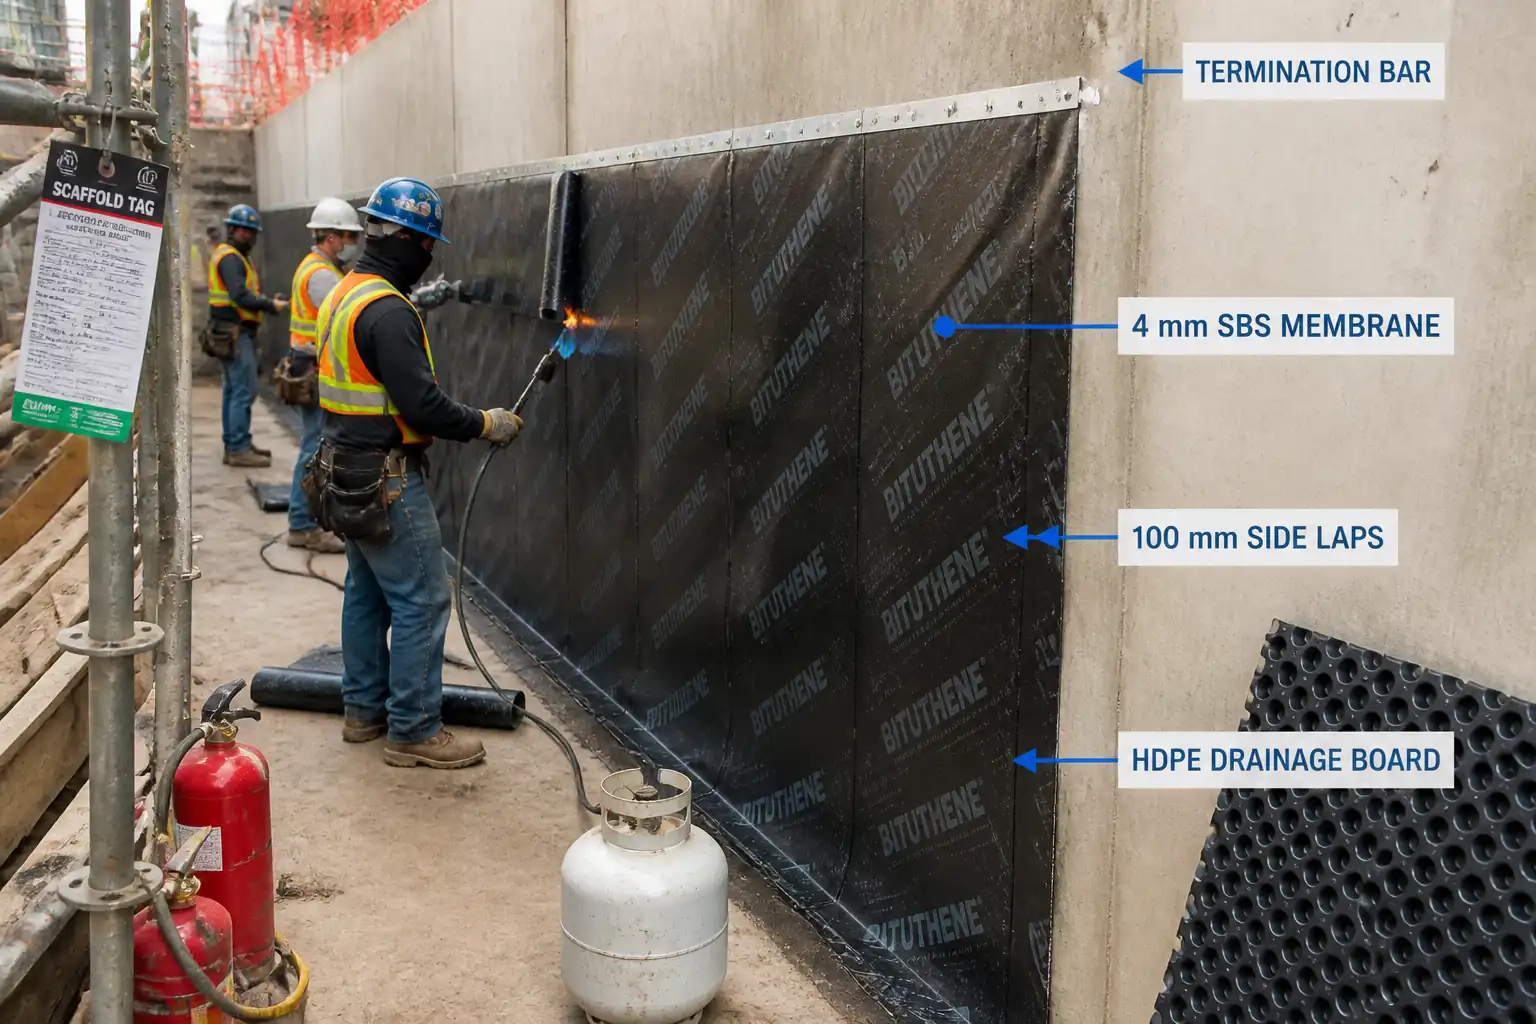
- Supply, prepare, and install a torch-applied SBS-modified bituminous sheet waterproofing system to external faces of basement concrete retaining walls.
- Activities include: substrate cleaning and repair, surface priming, corner fillets, membrane installation with torch application, laps and detailing at joints/penetrations/terminations, protection and installation of dimpled drainage boards, interfaces to slab/kicker, quality control inspections and tests (including high-voltage holiday detection), and coordination with backfilling.
Included Elements
- Concrete substrate acceptance and moisture assessment
- Bituminous primer application
- Torch-applied membrane installation (nominal 4 mm thick SBS-modified, polyester-reinforced) [Verify per project specifications]
- Minimum laps: side laps ≥100 mm; end laps ≥150 mm [Verify per project specifications]
- Detailing: corners, internal/external angles, pipe/steel penetrations, terminations, construction joints, tie-in to slab membrane
- Protective dimpled drainage boards with geotextile, connection to footing drain, and terminations
- Watertightness verification by high-voltage holiday (spark) testing prior to protection
- Hold/witness points and records
Exclusions
- Structural concrete works and curing beyond acceptance criteria checks
- Backfilling operations (by others) except coordination and protection requirements
- Internal tanking or cavity drain systems unless stated in project documents
Constraints/Interfaces
- Coordinate with excavation support/backfilling sequence, drainage installation at footing, and penetrations by MEP.
- No torching during rain, on wet substrates, or in confined unventilated spaces without controls.
- Do not backfill until waterproofing is inspected and accepted.
References
| Document Type | Reference / Number | Revision | Notes |
|---|---|---|---|
| Standard | BS 8102:2022 | Select Grade per design [Verify per project specifications]. | |
| Standard | ASTM D41 | ||
| Standard | ASTM D5147 | For manufacturer compliance certificates. | |
| Standard | ASTM D903 | Used as guidance for site peel checks; acceptance per manufacturer [Verify per project specifications]. | |
| Standard | ASTM D4263 | Site moisture indication prior to priming. | |
| Standard | ASTM D7877 / D8231 | Apply high-voltage holiday test methodology for vertical membranes where feasible. | |
| Standard | ISO 9001/14001/45001 | Apply via project QMS/HSE plans [Verify per project HSE plan and local regulations]. | |
| Project Doc | As submitted/approved | Follow approved submittals; do not mix systems. |
Responsibilities
| Role | Responsibility | Name / Party |
|---|---|---|
| PM | Ensure approved materials/method; coordinate with excavation/backfill. | Main Contractor |
| Engineer | Verify wall readiness, details at slab tie-ins, penetrations. | Main Contractor |
| QA/QC | Implement ITP; verify primer/membrane/drainage board installation; manage holiday testing. | Main Contractor |
| HSE | Hot work permits, fire watch, gas cylinder control, ventilation, scaffold/edge protection compliance. | Main Contractor |
| Supervisor | Execute sequence, manage torching quality, protect finished work. | Subcontractor |
| Inspector | Witness substrate acceptance, membrane trial area, holiday testing. | Third Party |
Resources
| Resource Type | Description | Quantity | Remarks |
|---|---|---|---|
| Personnel | Leads crew, interfaces QC/HSE. | 1/crew of 5–8 [Verify per project] | |
| Personnel | Membrane torching, seam control, detailing. | 3–5/crew [Verify per project] | |
| Personnel | Cleaning, handling, protection, drainage board install. | 2–3/crew [Verify per project] | |
| Personnel | Inspections, tests, documentation. | 1 shared | |
| Personnel | Permit control, monitoring, extinguishers readiness. | 1 HSE + 1 fire watch per active torch team [Verify] |
Materials
| Material | Specification / Grade | Quantity | Remarks |
|---|---|---|---|
| Membrane roll | Width ~1.0 m; side lap marks at 100 mm; end lap marks at 150 mm [Verify]. | ||
| Primer | As per membrane manufacturer. | ||
| Mortar | Fillet size 25–50 mm leg. | ||
| Mastic | Cold-applied. | ||
| Termination kit | Sealant UV-resistant. | ||
| Drainage board | Overlap 100–150 mm; connectors per system. | ||
| Drainage | Typically 100–150 mm dia perforated pipe [Verify]. |
Equipment
| Equipment | Capacity / Type | Quantity | Inspection Required |
|---|---|---|---|
| Torch kit | 1 per torch applicator | ||
| Spark tester | 1 | ||
| Prep tools | As required | ||
| QA kit | 1 set | ||
| Access | As required | ||
| Extinguishers | As required |
Prerequisites
Submittals and Approvals
- Approved product data sheets, MSDS/SDS, application method statements, and samples/mock-up of minimum 2 m x 2 m including one internal and one external corner [Verify per project specifications].
- Approved ITP with defined hold/witness points; calibration certificates for spark tester and measurement devices.
Permits and Coordination
- Hot Work Permit for torching, including fire watch arrangements and gas cylinder handling plan.
- Confirm scaffold/access certifications and tagging current.
- Coordinate with drainage installation, penetrations, and tie-ins to horizontal waterproofing at slab/raft.
Site & Substrate Readiness
- Concrete cured: typically ≥14 days for normal concrete prior to membrane application [Verify per project specifications].
- Substrate temperature: typically >5°C and rising; ambient wind <25 km/h for safe torch control [Verify].
- Moisture: No free water; surface moisture acceptable only per manufacturer limits (e.g., <5% mass or ASTM D4263 no condensation after 24 h) [Verify].
- Surface flatness: deviations ≤5 mm under 2 m straightedge; honeycombs/voids repaired; edges chamfered/arrises rounded.
- Internal corners built with 25–50 mm cementitious fillet; external corners eased.
- Confirm location of services; protect combustible or heat-sensitive adjacent materials.
Method Sequence
| Step | Activity | Description | Responsibility | Inspection / Hold Point |
|---|---|---|---|---|
| 1 | Pre-Start Briefing and Area Handover | Conduct toolbox talk focused on hot works and confined/excavation interfaces; verify permits; inspect access and exclusion zones; confirm area handover from civil team. | Supervisor / HSE / QA | Permit check, scaffold tag |
| 2 | Substrate Cleaning and Repairs | Remove laitance, loose particles, form-release agents; grind high spots; fill blowholes/honeycombs with polymer-modified mortar; vacuum clean to dust-free finish; form 25–50 mm fillets at internal corners; ease external corners. | Subcontractor | Visual; straightedge; repair records |
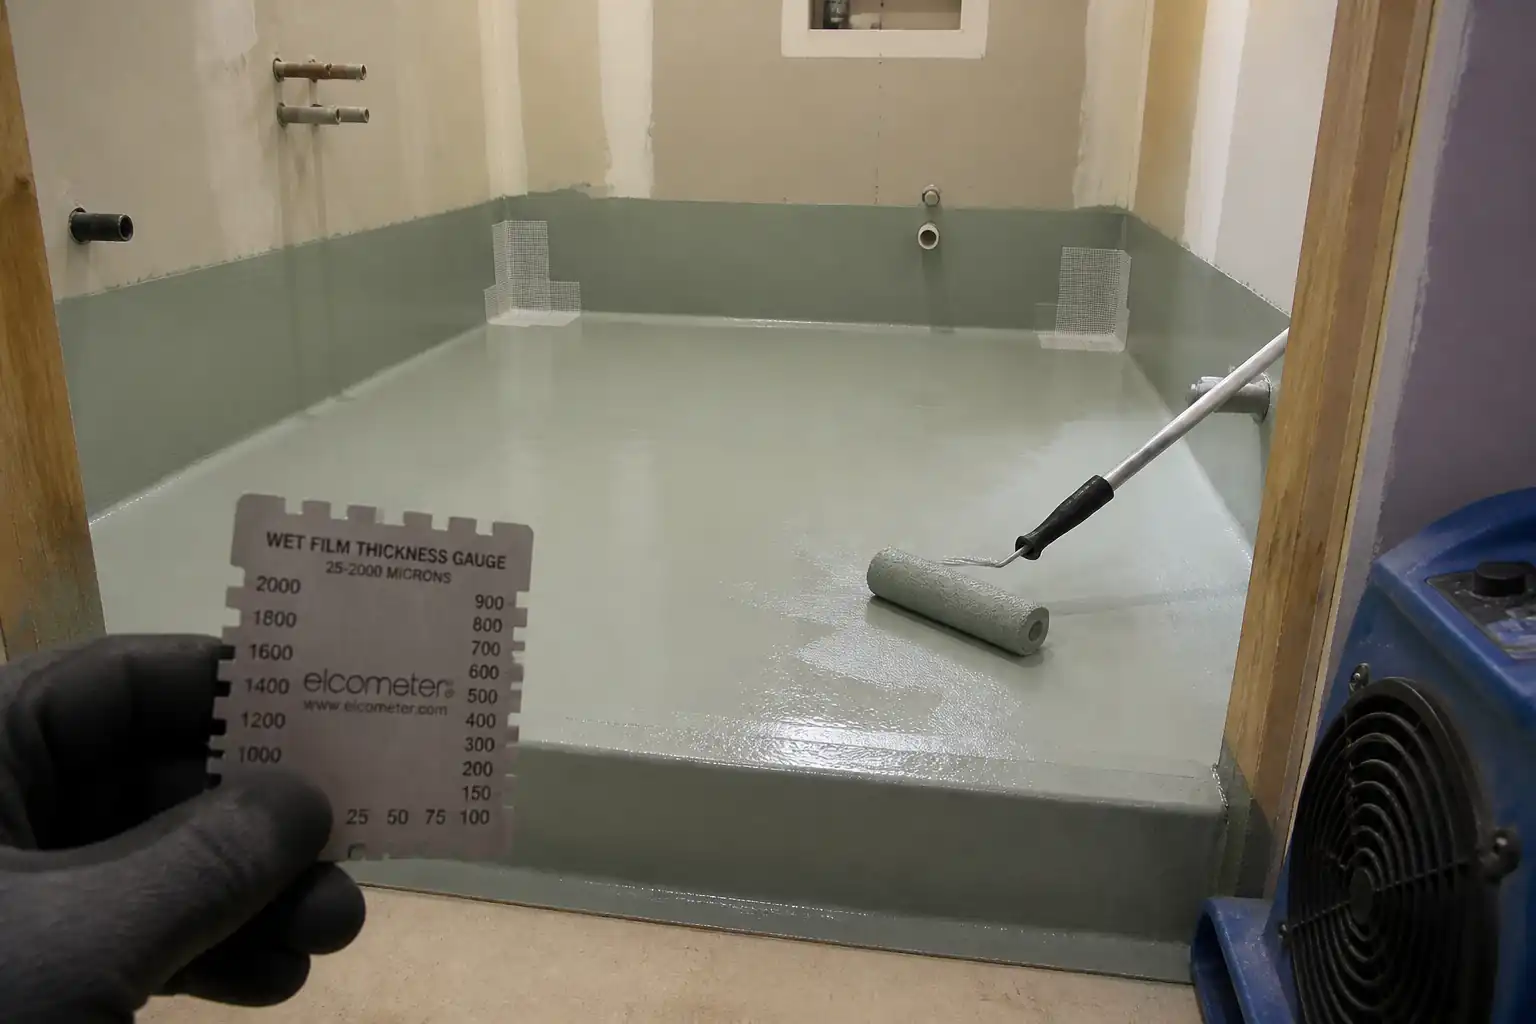
| 3 | Surface Priming | Apply bituminous primer by roller/spray at 0.25–0.40 L/m²; ensure even, pinhole-free film; allow to dry to tack-free (typically 30–90 min depending on product and weather). | Subcontractor | Wet film coverage check |
| 4 | Starter/Detail Strips | Install 300 mm wide reinforcement/detail strips at corners, terminations, and along base kicker; torch lightly to bond; ensure full adhesion without scorching. | Subcontractor | Visual |
| 5 | Main Membrane Torching – First Rise | Start at base; align roll vertically; torch underside sweeping to achieve uniform melt; press with roller to ensure total bond. Provide side laps ≥100 mm and end laps ≥150 mm; stagger end laps ≥300 mm. Achieve 3–5 mm bitumen bleed along seams. | Subcontractor | Continuous |
| 6 | Detailing at Penetrations and Joints | Install prefabricated collars or field-fabricate reinforcement; round edges; seal with compatible mastic; ensure 100% bond. Treat construction joints and tie-in to horizontal membranes per approved detail. | Subcontractor | Visual |
| 7 | Termination at Top of Wall | Terminate membrane minimum 150 mm above finished ground level or per detail; fix termination bar with corrosion-resistant fasteners at ≤200 mm c/c; seal upper edge with sealant; protect transition. | Subcontractor | Visual; pull check on fixings |
| 8 | Holiday (Spark) Testing | Perform high-voltage holiday detection across 100% of membrane surface prior to protection. Set voltage per manufacturer/thickness (typ. 6–10 kV for 4–5 mm) [Verify]; earth to substrate; sweep at controlled pace ≤0.3 m/s; mark defects for repair and retest. | QA/QC with Subcontractor | Witness |
| 9 | Repairs (If Required) | Cut out blister/defect to sound area; re-prime if needed; insert patch with ≥150 mm overlap in all directions; torch to full bond; re-test repaired area. | Subcontractor | Visual + holiday re-test |
| 10 | Install Protective Dimpled Drainage Boards | Place HDPE dimple board with geotextile facing soil side; overlap adjacent sheets by 100–150 mm; fix using compatible spots/term bars without puncturing membrane; ensure continuity to footing drains and outlets; cap top edge with termination strip or flashing as per system. | Subcontractor | Visual |
| 11 | Final QA/QC and Area Protection | Finalize documentation; protect exposed terminations; install temporary protection from site traffic; issue Request for Inspection (RFI) for acceptance prior to backfill. | QA/QC / Supervisor | Documentation review |
| 12 | Backfilling Coordination | Authorize backfilling only after acceptance; ensure suitable backfill (rounded, free of debris); place in layers to avoid impact on boards; maintain drainage outlets free. | Main Contractor (Earthworks) | Visual |
Health, Safety, and Environment - Safety Controls
Principal Hazards and Controls
- Hazard: Torching/open flame near combustible materials and bituminous primer vapors
- Likely consequence: Fire, explosion, burns, smoke inhalation
- Engineering/procedural control: Hot Work Permit; segregate flammables; remove/cover combustibles with fire blankets; maintain minimum 3 m separation between LPG cylinders and ignition sources; use flashback arrestors; leak-test hoses; control flame direction; prohibit torching on wet primer; designate exclusion zone.
- Required PPE: Flame-resistant clothing, heat-resistant gloves, eye protection, safety boots; half-mask respirator with organic vapor filters if ventilation is limited [Verify per project HSE plan].
- Collective preventive measure: Fire watch during and 60 minutes after works; minimum two serviceable 6 kg dry powder/CO₂ extinguishers within 15 m; spill kits for primer.
-
Inspection/permit/supervision: Hot Work Permit each shift; pre-use torch/LPG check; HSE supervision and documented fire watch log.
-
Hazard: Work at height on vertical walls/scaffolds
- Likely consequence: Falls, dropped objects, severe injury
- Engineering/procedural control: Certified scaffolds/towers with guardrails, toe boards, and access ladders; tether tools; exclusion zone below; material hoists rather than manual passing.
- Required PPE: Full-body harness with double lanyard when guardrails absent; hard hat with chin strap; safety shoes; gloves.
- Collective preventive measure: Scaffold inspections and tagging; debris netting; edge protection.
-
Inspection/permit/supervision: Formal scaffold inspection per schedule and after alterations; work-at-height permit where applicable.
-
Hazard: Working adjacent to open excavations/basement perimeters
- Likely consequence: Falls to depth, entrapment, plant strike
- Engineering/procedural control: Barriers 2 m from edge; safe access/egress; coordinate plant movements; spotter for reversing plant.
- Required PPE: Hard hat, high-visibility vest, safety boots.
- Collective preventive measure: Edge barricades and signage; lighting.
-
Inspection/permit/supervision: Daily inspection of excavation support by competent person [Verify per local regulations].
-
Hazard: Inhalation of VOCs from primers/bitumen fumes
- Likely consequence: Respiratory irritation, dizziness
- Engineering/procedural control: Use low-VOC products where feasible; ensure cross-ventilation; restrict torching in confined areas; follow SDS exposure limits.
- Required PPE: Respirator with organic vapor cartridges where ventilation inadequate; gloves resistant to solvents.
- Collective preventive measure: Forced ventilation if required; atmospheric monitoring in poorly ventilated spaces.
-
Inspection/permit/supervision: SDS available; HSE monitoring; confined space permit if applicable.
-
Hazard: Manual handling of rolls and boards (≈35–45 kg)
- Likely consequence: Musculoskeletal injury
- Engineering/procedural control: Team lifts; lifting aids/hoists; store rolls upright on level pallets near point of use.
- Required PPE: Gloves, safety footwear.
- Collective preventive measure: Manual handling training; job rotation.
-
Inspection/permit/supervision: Supervisor to plan lifting; spot checks.
-
Hazard: Heat exposure and burns from torches and hot bitumen
- Likely consequence: Burns, heat stress
- Engineering/procedural control: Torch stands; cool-down areas; keep flame away from body; schedule breaks; hydration plan.
- Required PPE: Heat-resistant gloves, FR clothing, eye/face shield when needed.
- Collective preventive measure: Shade, water stations.
-
Inspection/permit/supervision: HSE to monitor heat index; first-aid kit accessible.
-
Hazard: Puncture/tear of membrane by fixings or sharp substrate
- Likely consequence: Water ingress post backfill
- Engineering/procedural control: Remove protrusions; use compatible fixing methods for drainage boards; no direct nailing through membrane unless per approved detail; immediate repair of any puncture.
- Required PPE: Gloves, eye protection.
- Collective preventive measure: Protected laydown zones; supervision during protection board install.
- Inspection/permit/supervision: QA inspections; holiday re-testing on repaired areas.
Health, Safety, and Environment - Environmental Controls
Environmental Aspects and Controls
- VOC emissions from primer and fumes from torching
-
Control: Select low-VOC primer where possible; avoid enclosed spaces or provide mechanical ventilation; schedule works during favorable wind conditions; maintain SDS limits.
-
Spill risk of primer/solvents
-
Control: Store in bunded area; use drip trays; have spill kits; train crew in spill response; prevent discharge to soil/drains; collect contaminated rags in sealed containers for proper disposal.
-
Waste generation (membrane offcuts, release film, containers)
-
Control: Segregate recyclable packaging; collect offcuts for proper disposal; return unused sealed materials per supplier take-back where available; maintain waste transfer notes.
-
Noise
-
Control: Limit work hours per permits; maintain equipment; provide hearing protection where necessary; position noisy operations away from receptors.
-
Dust from surface preparation
-
Control: Vacuum extraction on grinders; damp wiping where acceptable (not during torching); maintain housekeeping.
-
Fire water/runoff in case of incident
-
Control: Protect drains with booms/socks; have emergency response plan; coordinate with site emergency services.
-
Material storage
- Control: Store rolls upright on pallets under cover; protect from UV and heat; segregate LPG cylinders in ventilated cages with signage; maintain MSDS on site.
Quality Assurance & Quality Control
General
- Works to comply with BS 8102 and approved manufacturer system. Do not mix materials from different systems.
- Use only approved batches; record roll numbers and areas installed per day for traceability.
- Calibration: Holiday detector and measuring devices to have valid calibration certificates.
Mock-Up/Trial Area
- Execute a minimum 10–15 m² trial area including one internal and one external corner to demonstrate workmanship and torching parameters. Approval is a hold point prior to full production [Verify per project specifications].
Inspection & Test Frequency (typical)
- Substrate acceptance: 100% of surfaces; HOLD.
- Primer coverage: 1 check per 50 m² minimum (area vs consumption) and visual 100%.
- Seam dimensions and bleed-out: Continuous visual; record checks at least every 10 m of seam.
- Peel adhesion check: 1 per 200 m² or per shift, whichever is greater [Verify per project specifications].
- Holiday test: 100% of membrane area prior to protection; HOLD.
- Drainage board installation: 100% visual; HOLD prior to backfill.
Acceptance Criteria (summary)
- Surface: Clean, sound, dry within manufacturer limits; flatness ≤5 mm over 2 m [Verify].
- Primer: Uniform film; tack-free; consumption within ±10% of target [Verify].
- Membrane: Side laps ≥100 mm, end laps ≥150 mm; continuous 3–5 mm bleed; no fishmouths/blisters; peel ≥0.5 N/mm or TDS value [Verify].
- Holiday test: 0 defects after repair/retest.
- Protection/drainage boards: Continuous coverage; correct overlaps; secure without puncturing membrane.
Documentation
- ITP and checklists; daily logs; photographic records; material COC/TDS; PTW; calibration certificates; NCRs and corrective actions; as-built redlines with termination levels and interfaces.
Nonconformance and Repairs
- Stop work and raise NCR for systemic defects; repair localized issues per Step 9; repeat testing; document closure prior to backfill.
Attachments
- Approved product datasheets (membrane, primer, mastic, drainage boards)
- Manufacturer installation guidelines and safety data sheets
- Typical details: corners, lap joints, penetrations, terminations, tie-in to slab
- Hot Work Permit template; Fire watch log; LPG handling procedure
- Substrate acceptance checklist; Primer log; Daily installation log; Peel test form; Holiday test report template
- Calibration certificates for holiday detector and measuring equipment
- As-built redline drawing template with termination elevations and drainage connections
This content is a read-only public reference. Download or customize to get an editable version.
ITP preview
The first inspection activities from the linked ITP for Method Statement: Torch-Applied Bituminous Membrane Waterproofing for Basement Concrete Retaining Walls:
| Activity | Inspection / Test | Acceptance Criteria | Responsibility | Record |
|---|---|---|---|---|
| Pre-start approvals [HOLD] | Verify approved materials, MS/TDS, PTW, calibrations | All approvals current; equipment calibrated; permits in place. | QA/QC Engineer | ITP checklist, approvals register |
| Substrate acceptance [HOLD] | Flatness (2 m straightedge), moisture (ASTM D4263 or meter), surface soundness | Clean, sound, dry within limits; flatness ≤5 mm/2 m; repairs completed. | QA/QC Engineer | Substrate acceptance form, photos |
| Primer application [WITNESS] | Coverage vs consumption; tack-free status | Uniform film; consumption within target; tack-free before membrane. | QA/QC Engineer | Primer log, photos |
Showing 3 of 8 inspection activities. View full ITP →
Related Inspection and Test Plan
An Inspection and Test Plan (ITP) is available for Method Statement: Torch-Applied Bituminous Membrane Waterproofing for Basement Concrete Retaining Walls. The ITP defines the inspection activities, acceptance criteria, hold and witness points, responsible parties, and records required to verify the work described in this method statement.
View the Method Statement: Torch-Applied Bituminous Membrane Waterproofing for Basement Concrete Retaining Walls ITP →Frequently asked questions
Continue with related Quollnet resources connected to this method statement.