Method Statement: Installation of Tactile Ground Surface Indicators (TGSIs) at Pedestrian Crossings – Method Statement
AI-assisted method statement with matching ITP, PDF download, and Excel export.
More than a static template
Unlike a downloadable Word or PDF template, this method statement is an AI-assisted editable starting point connected directly to a matching Inspection and Test Plan. Every section is structured, project-adaptable, and ready to export.
- AI-assisted drafting — Customize every section with AI for your specific project scope.
- Linked ITP — A matching inspection and test plan is generated alongside the method statement.
- Multiple export formats — Download as a formatted PDF or editable Excel spreadsheet.
- Editable starting point, not a final document — Review, verify, and adjust all content against your project requirements before use.
Static template vs. Quollnet workflow
| Feature | Static template | Quollnet |
|---|---|---|
| Project-specific content | Manual fill-in required | AI-assisted customization |
| Linked ITP | Separate document, no link | Matching ITP included |
| Export formats | Usually PDF only | PDF and Excel |
| Structured sections | Free-form layout | 13 standardized sections |
| Saved to your account | Local file only | Cloud-saved, reusable |
| Content accuracy | You verify everything | AI-assisted, you still verify |
| Cost | Often free but time-intensive | Free to customize and download |
What you can customize
When you save this method statement to your account, every section becomes editable. The following 13 sections are included:
- Scope — Defines the activity and its boundaries.
- References — Standards, specifications, and drawings.
- Responsibilities — Roles and accountabilities.
- Resources — Labour, plant, and equipment summary.
- Materials — Materials and compliance requirements.
- Equipment — Tools and equipment details.
- Prerequisites — Hold points and pre-conditions.
- Method sequence — Step-by-step construction sequence.
- Safety controls — HSE risk controls and PPE.
- Environmental controls — Environmental mitigation measures.
- QA/QC — Quality inspection and test requirements.
- ITP — Inspection and Test Plan table (has its own page).
- Attachments — Referenced drawings and documentation.
Why this method statement is used
This method statement is used to define and communicate the approved procedure for carrying out method statement: installation of tactile ground surface indicators (tgsis) at pedestrian crossings on site. It ensures the work is planned in advance, the correct resources and controls are in place, and all personnel understand responsibilities, sequence, quality requirements, and safety controls before work begins. It aligns site execution with the documented scope and acceptance expectations.
Who uses this method statement
This method statement is used by contractors, site supervisors, project engineers, QA/QC engineers, HSE officers, consultants, and client representatives. It serves as a shared reference for planning, execution, supervision, inspection, and approval of the activity on site.
When it is prepared and submitted
The method statement is prepared before the work activity starts and submitted as part of the pre-construction documentation package for review and approval.
Who reviews or approves it
The method statement is usually submitted to the client representative, consultant, resident engineer, or project management consultant for review and approval before the work commences.
Important approval note
This method statement is an AI-assisted editable starting point, not a pre-approved document. Before use on any project, all content must be reviewed and approved by the relevant parties (superintendent, principal contractor, or client representative) in accordance with your contract and project quality plan.
For example: if your specification requires a departure from a referenced standard, that departure must be documented and approved separately — this method statement will not capture that automatically. Always verify against your applicable drawings, specifications, and regulatory requirements.
Method statement content
Scope
Summary
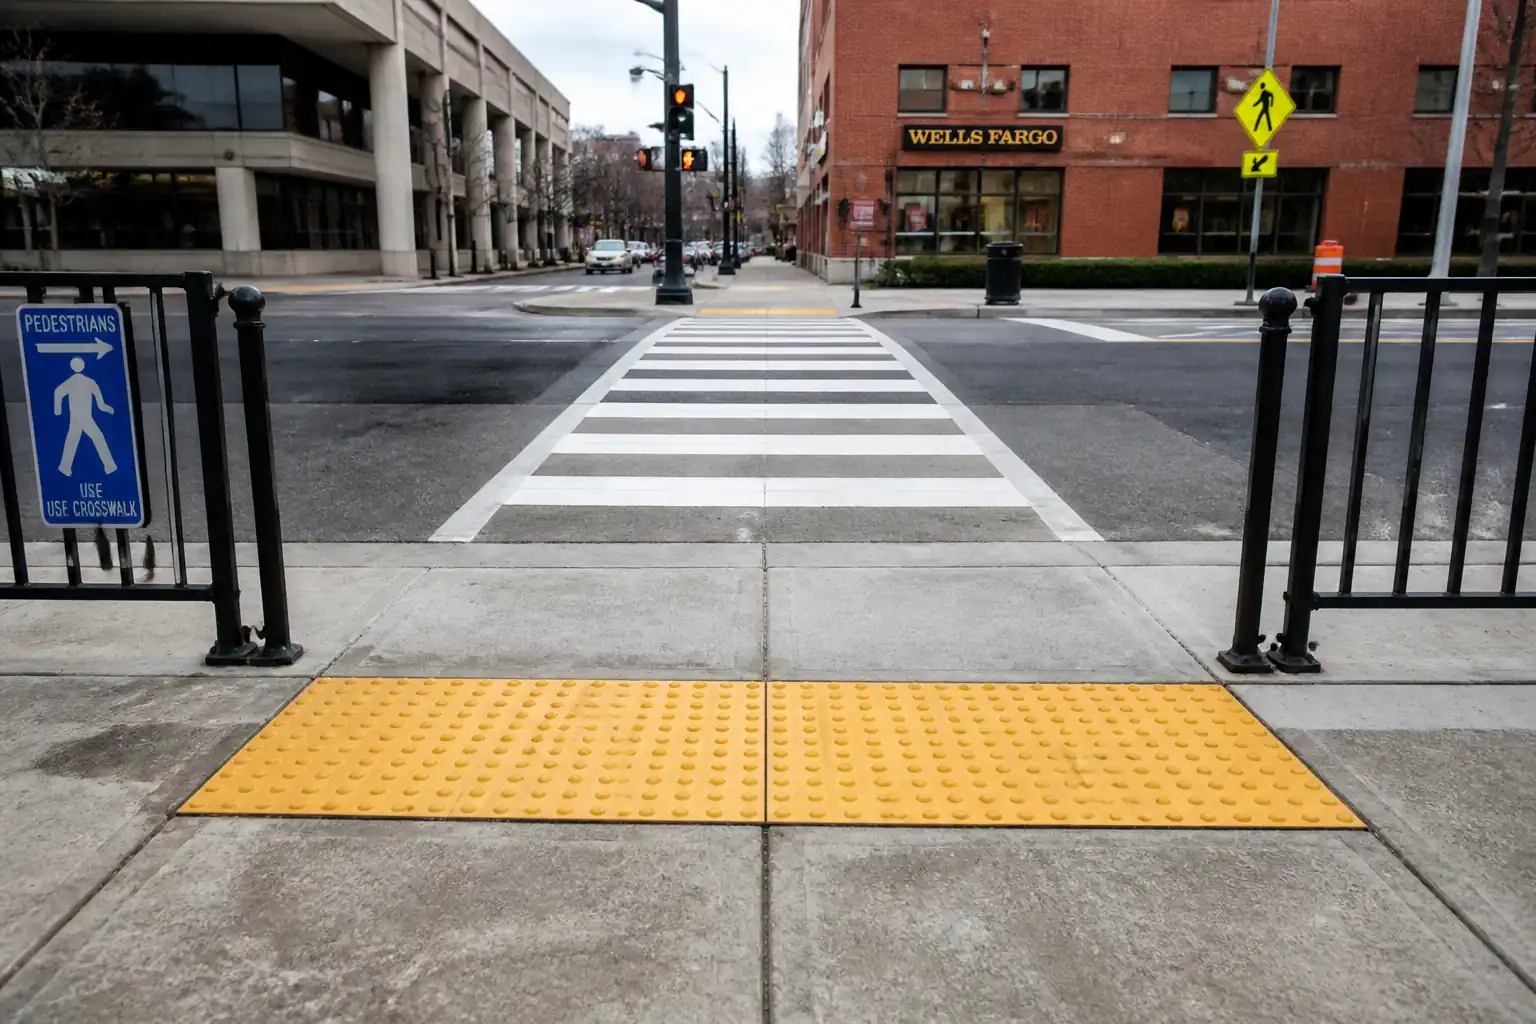
This method covers supply, setting-out, installation, and quality control of Tactile Ground Surface Indicators (TGSIs) at pedestrian crossings on hardscape pavements (concrete or asphalt with concrete overlay). It includes layout geometry per accessibility standards, substrate preparation, adhesive or mortar bedding, alignment, visual contrast requirements, level and tolerance checks relative to adjacent walkways, curing, protection, and handover documentation.
Inclusions
- Procurement of TGSI tiles/plates and associated materials.
- Shop drawings and layout setting-out at pedestrian crossings.
- Substrate preparation (cleaning, grinding, recess cutting where required).
- Installation using polymer-modified thinset/adhesive or mortar bed per manufacturer.
- Jointing/grouting/sealant.
- Level, alignment, geometry, and visual contrast verification.
- Protection, curing, opening to traffic/pedestrians, and as-built documentation.
Exclusions
- Civil works outside TGSI footprint (e.g., new ramps, kerb construction), unless noted.
- Electrical/traffic signal works.
- Permanent road markings and signage (by others unless specified).
Typical geometry notes [Verify per project specifications]
- Warning/dome (blister/truncated dome) fields across the full effective width of crossing; depth typically 600–900 mm from carriageway edge.
- Setback from kerb/dropped-kerb: typically 0–200 mm depending on local guidance.
- Orientation: dome grid square to pedestrian line of travel; leading edge parallel to kerb.
- Visual contrast LRV difference: typically ≥30 points (BS 8300) up to ≥60 points (DfT guidance) depending on authority.
- Lippage vs adjacent walkway: target flush, ≤2 mm preferred, ≤3 mm maximum before beveling; bevel 1:2 if 3–6 mm.
- Crossfall: typically 1.5–2.5% to match adjacent pavement without creating ponding [Verify].
- Surface regularity: ≤3 mm under a 3 m straightedge in any direction [Verify].
- Joint width between tiles: typically 3–5 mm.
References
| Document Type | Reference / Number | Revision | Notes |
|---|---|---|---|
| ISO Standard | ISO 23599:2019 | General requirements for layout, geometry, and performance. [Verify local adoption] | |
| BS Standard | BS 8300-1/-2 | Visual contrast guidance (LRV), inclusive design principles. | |
| Code/Standard | ADA 2010, Sec. 705 | Truncated dome size, spacing, and arrangement. [Verify jurisdiction] | |
| Government Guidance | DfT (UK) Guidance | Layout at controlled vs uncontrolled crossings; color/contrast. | |
| ASTM | ASTM C1583/C1583M | For verification of adhesive bond to concrete substrate [if specified]. | |
| BS/EN | BS 7976 / EN 13036-4 | If specified for wet slip resistance of paving including tactile tiles. [Verify] | |
| Guideline | ISO 45001 & local OHS regs | For cutting/grinding controls. [Verify local regulations] |
Responsibilities
| Role | Responsibility | Name / Party |
|---|---|---|
| Project Manager | Approve method statement/ITP; ensure permits and traffic management in place. | Contractor |
| Site Engineer | Check geometry, levels, alignment; maintain red-lines; request inspections. | Contractor |
| QA/QC Engineer | Implement ITP; verify materials; conduct LRV and level checks; manage NCRs. | Contractor |
| HSE Officer | Approve RAMS; monitor controls (dust, noise); conduct toolbox talks; ensure barriers. | Contractor |
| Foreman | Ensure correct adhesive/mortar use, curing and protection. | Contractor |
| Surveyor | Provide control lines and benchmarks; verify offsets from kerb. | Contractor |
| Engineer | Witness/hold points per ITP; approve mock-up and materials. | Client/Engineer |
Resources
| Resource Type | Description | Quantity | Remarks |
|---|---|---|---|
| Labor | Foreman + 3–6 installers + 1 laborer + 1 QA/QC tech + 1 traffic marshal. | 6–10 | |
| Labor | Traffic controllers/marshals for pedestrian and vehicle control. | 1–2 |
Materials
| Material | Specification / Grade | Quantity | Remarks |
|---|---|---|---|
| Precast concrete/polymer-concrete/ceramic/resin plate | Compressive strength ≥40 MPa (concrete units) [Verify]; slip resistance per project; dome geometry per code. | ||
| Polymer-modified cementitious or epoxy/PU | Bond strength ≥0.8 MPa pull-off to concrete [Verify]; frost/UV resistant. | ||
| Cement-sand mortar | Thickness 20–40 mm; compressive strength ≥25 MPa @ 28 days [Verify]. | ||
| Polymer grout/PU sealant | Joint width 3–5 mm; movement capability as specified [Verify]. | ||
| Epoxy/acrylic primer | Applied coverage per TDS; substrate moisture within limits. |
Equipment
| Equipment | Capacity / Type | Quantity | Inspection Required |
|---|---|---|---|
| Grinder, cut-off saw | 230 mm blade; HEPA H-class extractor | 1 set | |
| Hand tools | Full kit | ||
| QA instrumentation | 1 set | ||
| Barriers & signage | As required |
Prerequisites
- Approved method statement, ITP, shop drawings, and manufacturer technical data sheets (TDS/SDS).
- Traffic/Pedestrian Management Plan approved by the Authority [Verify per project HSE plan and local regulations].
- Utilities clearance for any sawcutting or anchors; review as-builts and conduct CAT/Genny scan where applicable.
- Substrate readiness: concrete age and strength achieved (≥25 MPa typical) and moisture content within adhesive limits; surface sound, clean, and free of laitance and contaminants.
- Weather: ambient and substrate temperature within adhesive/mortar TDS limits (typically 5–35°C) and no rain forecast during open time and curing; provide shelter if needed.
- Materials inspected and approved (color, type, batch records) and stored off-ground under cover.
- Mock-up area (minimum 1 m²) built and approved for pattern, contrast, level, and workmanship.
- Calibrated QA equipment available (LRV meter, levels, straightedge, pull-off tester if specified).
Method Sequence
| Step | Activity | Description | Responsibility | Inspection / Hold Point |
|---|---|---|---|---|
| 1 | Site establishment and safety setup | Set up pedestrian/traffic control, barriers, detours, and signage. Toolbox talk covering task-specific risks. | Foreman/HSE Officer | Pre-start HSE inspection; TMP approval on file |
| 2 | Setting-out | Survey and mark TGSI footprint. Establish offsets from kerb and crossing width per drawings. Snap chalk lines for leading and trailing edges and tile grid. | Surveyor/Site Engineer | Hold point: layout verification by QA/QC and Engineer |
| 3 | Substrate preparation | Mechanically abrade/grind to expose sound concrete; remove contaminants. Vacuum clean. Repair voids/cracks >5 mm with approved repair mortar. Moisture test if required. | Foreman/QA/QC | Visual and soundness check (hammer tap) |
| 4 | Recess cutting (if recessed installation) | Sawcut to target recess depth equal to TGSI thickness minus desired flushness (typically net flush to adjacent pavement). Break-out and trim. Clean with vacuum. | Foreman | Dimension check |
| 5 | Dry lay and mock alignment | Dry place first row to verify bond lines, dome grid orientation, joint width (3–5 mm), and full-width coverage of crossing. | Foreman/QA/QC | Witness point |
| 6 | Primer (if required) | Apply primer uniformly to substrate as per TDS; allow tack time. | Installer | Visual |
| 7 | Adhesive/thinset mixing | Mix per TDS with mechanical mixer; respect pot life and open time. Prepare only what can be laid within open time. | Installer | Check batch/expiry; temperature |
| 8 | Adhesive application | Comb adhesive with appropriate notch to achieve 3–6 mm final bed. Back-butter tiles if needed for coverage. | Installer | Coverage checks by lift-and-look |
| 9 | Placement and alignment | Place tiles to lines; tap with rubber mallet to level; maintain joints 3–5 mm; ensure dome grid in square pattern. Use spacers as required. | Installer/Foreman | Continuous supervision; straightedge checks |
| 10 | Mortar bed method (alternative) | Place 20–40 mm polymer-modified mortar; screed to level; wet-set TGSI units; compact to line/level. Clean squeeze-out. | Installer | Bed thickness and level checks |
| 11 | Jointing/grouting | After initial set, fill joints with polymer grout or sealant; tool neatly; avoid smearing domes. | Installer | Visual |
| 12 | Curing and protection | Protect area with barriers; no pedestrian load until adhesive/mortar reaches walk-on strength (typically 12–24 h) and full cure (24–72 h) [Verify]. Provide temporary ramps if needed. | Foreman/HSE | Daily |
| 13 | Contrast verification | Measure LRV or confirm manufacturer-certified LRV; verify contrast to adjacent surface. | QA/QC | Instrument check or certificate review |
| 14 | Adhesion test (if specified) | Conduct pull-off test per ASTM C1583 on sacrificial or non-critical location after cure. | QA/QC / Independent lab | Hold point (if required) |
| 15 | Final QA/QC and handover | Check geometry, levels, joints, cleanliness; compile as-builts and warranties; open area after acceptance. | QA/QC, Engineer | Final inspection and sign-off |
Health & Safety Controls
For each significant hazard, the following are defined: hazard, consequence, control, PPE, collective measure, inspection/permit.
- Cutting/grinding silica dust
- Consequence: Respiratory disease (silicosis), eye injury.
- Control: Wet-cutting or on-tool H-class HEPA extraction; minimize dry cutting; designate cutting area; implement exposure time limits.
- PPE: Fit-tested P2/P3 respirator, safety goggles/face shield, gloves.
- Collective measure: Dust screens where near public; exclusion zone 5 m.
-
Inspection/permit: HSE inspection of equipment; verify filter status; [Verify per project HSE plan and local regulations].
-
Live pedestrian/vehicle interface at crossings
- Consequence: Struck-by incidents.
- Control: Approved Traffic/Pedestrian Management Plan; detours with continuous accessible path; temporary ramps with max 1:12 gradient; trained marshals.
- PPE: High-visibility vest, safety boots, hard hat (as required).
- Collective measure: Barriers, water-filled barriers near road, signage at approach distances per authority.
-
Inspection/permit: Right-of-way/road occupancy permit; daily TMP audit.
-
Manual handling of tiles/pavers
- Consequence: Musculoskeletal strain, crush injuries to fingers/toes.
- Control: Team lifts, lifting aids/trolleys, limit unit weight per manual handling guidelines.
- PPE: Cut-resistant gloves, safety boots with toe protection.
- Collective measure: Staging pallets close to work face to reduce carry distance.
-
Inspection/permit: Manual handling training and lift plan briefing.
-
Chemical exposure (epoxy/PU/primers)
- Consequence: Dermatitis, sensitization, inhalation hazards.
- Control: Follow SDS; mix in ventilated area; keep lids closed; prohibit ignition sources.
- PPE: Chemical-resistant nitrile gloves, goggles, long sleeves; respirator if required by SDS.
- Collective measure: Spill kits within 10 m; eyewash station available.
-
Inspection/permit: SDS on site; chemical handling permit if required.
-
Trip/Slip hazards during curing
- Consequence: Falls and injuries to public/crew.
- Control: Hard barriers with toe boards; clear signage; night lighting 50–100 lux on walkway.
- PPE: Safety boots, headlamp (night).
- Collective measure: Alternate accessible route with tactile information and ramps.
-
Inspection/permit: Daily barrier inspection log.
-
Noise and vibration from tools
- Consequence: Hearing loss, hand–arm vibration syndrome (HAVS).
- Control: Select low-vibration tools; limit exposure time; maintain tools.
- PPE: Class 4/5 hearing protection; anti-vibration gloves.
- Collective measure: Noise screens if near residences; schedule within permitted hours.
-
Inspection/permit: Noise monitoring if required by permit.
-
Weather extremes (hot/cold, rain)
- Consequence: Adhesive failure, poor cure, heat stress.
- Control: Check TDS limits; erect shelters; adjust working hours; mix smaller batches.
- PPE: Weather-appropriate gear; sunscreen; hydration.
- Collective measure: Shade tents; heated/insulated storage for materials.
-
Inspection/permit: Supervisor go/no-go decision log.
-
Underground services (if recessing/anchoring)
- Consequence: Service strike, shock, flooding.
- Control: Review as-builts, utility scan; set maximum recess depth; hand expose if uncertain.
- PPE: Insulated tools (if near electrical), gloves.
- Collective measure: Permit to dig; exclusion zone.
- Inspection/permit: Utility clearance certificate; permit-to-dig.
Environmental Controls
- Dust and slurry management
- Control: Wet cutting with slurry collection; H-class vacuums; prevent discharge to drains; use silt socks; dispose of slurry as per local waste regs.
-
Monitoring: Visual checks hourly; no visible dust beyond site boundary.
-
Noise and working hours
- Control: Comply with permitted hours; use silencers and acoustic screens where needed.
-
Monitoring: Spot measurements if complaints; maintain log.
-
Chemical/adhesive handling
- Control: Store in bunded trays; keep away from drains; maintain spill kits and SDS.
-
Response: Stop source, contain with absorbents, dispose as hazardous waste.
-
Waste management
-
Control: Segregate pallets, plastic, tile offcuts, empty containers; label hazardous waste; track with waste transfer notes.
-
Material sourcing and transport
-
Control: Use certified products with durability; optimize deliveries to reduce emissions.
-
Water quality protection
-
Control: Cover storm inlets; no washout to ground; designate wash station with collection.
-
Light pollution (night works)
- Control: Directional, shielded task lighting; avoid spill into residences.
[Verify per project environmental management plan and local regulations].
Quality Assurance / Quality Control
Acceptance Criteria (typical – verify per project specifications)
- Geometry: TGSI depth 600–900 mm across the full effective crossing width; setback from kerb 0–200 mm depending on crossing type.
- Dome geometry (if checked): per ADA Sec. 705 or local: base Ø 23–36 mm; top Ø 11–23 mm; height 5 mm; center spacing 41–61 mm; square grid.
- Visual contrast: LRV difference ≥30 to ≥60 points depending on authority; uniform color, no patchiness.
- Levels and lippage: flush with adjacent pavement (0 to +2 mm); max step/lippage ≤3 mm; bevel 1:2 if 3–6 mm; crossfall consistent with adjacent pavement (typically 1.5–2.5%) without ponding.
- Surface regularity: ≤3 mm under a 3 m straightedge in any direction.
- Adhesive coverage: ≥95% underside contact; edges/corners 100%.
- Jointing: 3–5 mm width; fully filled; neat arrises; no grout haze.
- Curing/protection: No pedestrian load until walk-on strength is achieved; no damage at handover.
- Slip resistance (if specified): Wet PTV ≥36 (pendulum) or as per specification.
Testing and Inspection Frequencies
- Layout and geometry: 100% of crossings (hold point before installation).
- Level and lippage: 100% of crossings using 3 m straightedge and feeler gauges.
- LRV contrast: 1 per material color batch + minimum 1 per crossing, or manufacturer certificate cross-checked on-site.
- Adhesion (if specified): Pull-off ASTM C1583 – 1 per 50 m² or minimum 1 per project area; acceptance ≥0.8 MPa (epoxy/PU) or per spec.
- Material certification: Each delivery – review CoC and SDS.
Documentation
- ITP checklists, inspection requests (IR), material inspection reports (MIR), test reports, batch logs, photos, red-line as-builts, warranties.
Nonconformance
- Record NCR for deviations; propose corrective action (lift/relay, re-grout, surface correction); re-test affected areas before acceptance.
Attachments
- Approved shop drawings with setting-out dimensions, offsets from kerb, and crossfall indications.
- Manufacturer technical data sheets (TDS) and safety data sheets (SDS) for adhesives, primers, grout, and TGSI units.
- Mock-up approval record and photographs.
- Traffic/Pedestrian Management Plan and permits.
- Calibration certificates for LRV meter, levels, pull-off tester (if used).
- Inspection checklists, IR/MIR forms, and test report templates.
- As-built drawings and warranty documents.
This content is a read-only public reference. Download or customize to get an editable version.
ITP preview
The first inspection activities from the linked ITP for Method Statement: Installation of Tactile Ground Surface Indicators (TGSIs) at Pedestrian Crossings:
| Activity | Inspection / Test | Acceptance Criteria | Responsibility | Record |
|---|---|---|---|---|
| Materials approval | Verify product data, certificates, SDS | Conformance to ISO 23599/ADA/BS 8300 and project specs; color/finish per submittal | Contractor QA/QC; Engineer (Review) | MIR, approvals |
| Mock-up | Geometry, alignment, contrast, levels | Meets acceptance criteria; workmanship approved | Contractor QA/QC; Engineer (Witness) | Mock-up IR, photos |
| Setting-out verification | Dimensions and offsets | Depth 600–900 mm; setback 0–200 mm; lines square (≤3 mm over 2 m) [Verify] | Site Engineer; Engineer (Hold) | Layout IR |
Showing 3 of 11 inspection activities. View full ITP →
Related Inspection and Test Plan
An Inspection and Test Plan (ITP) is available for Method Statement: Installation of Tactile Ground Surface Indicators (TGSIs) at Pedestrian Crossings. The ITP defines the inspection activities, acceptance criteria, hold and witness points, responsible parties, and records required to verify the work described in this method statement.
View the Method Statement: Installation of Tactile Ground Surface Indicators (TGSIs) at Pedestrian Crossings ITP →Frequently asked questions
Continue with related Quollnet resources connected to this method statement.