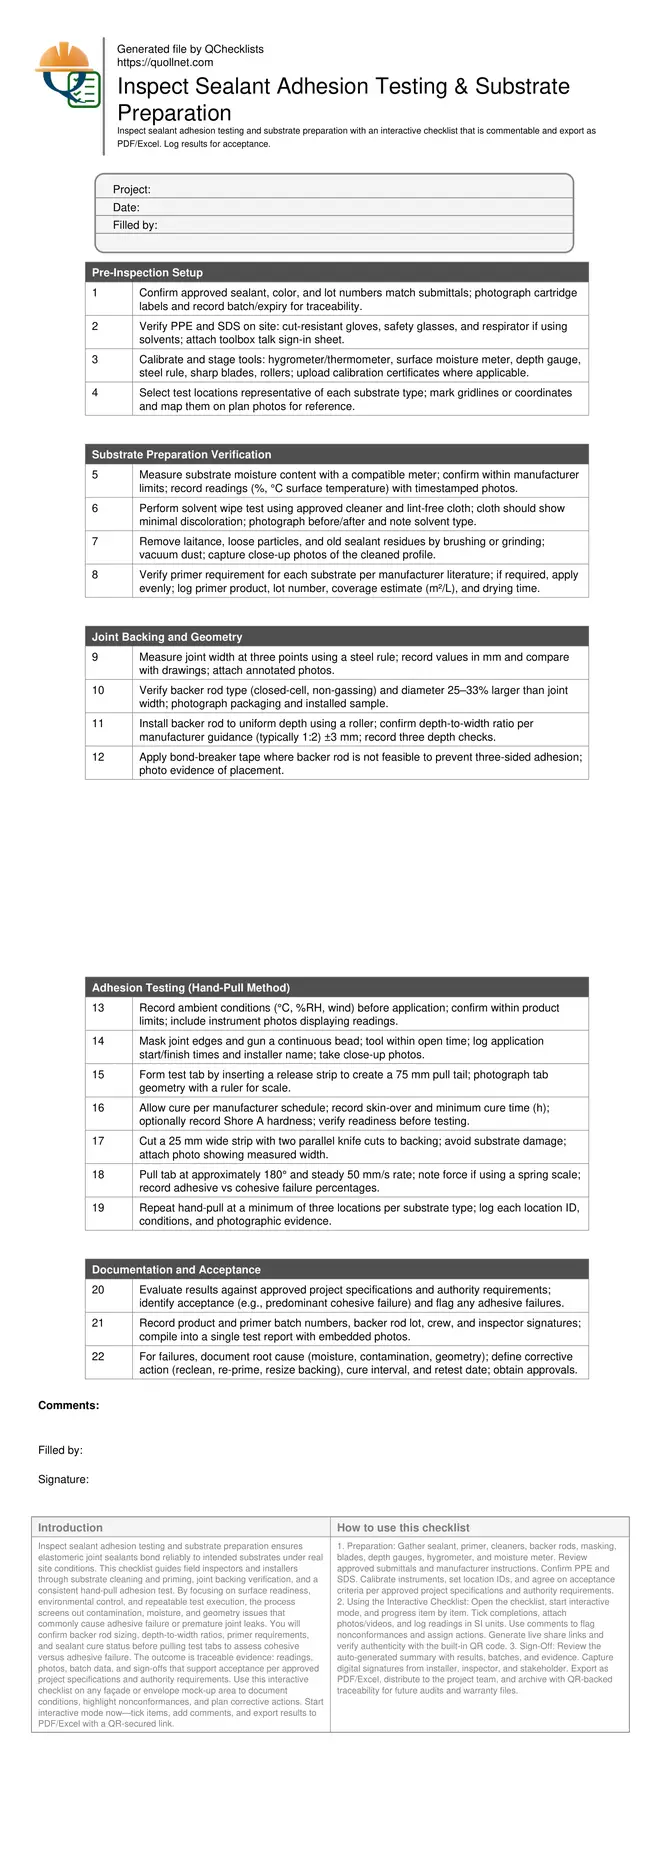
Inspect Sealant Adhesion Testing & Substrate Preparation
Definition: Inspect sealant adhesion testing and substrate preparation defines a field-ready checklist for QA inspectors and installers to verify clean substrates, correct primers, and reliable hand-pull adhesion results before acceptance.
- Verify clean, dry substrates and correct primer selection for adhesion.
- Control joint geometry, backer rod sizing, and application timing.
- Conduct standardized hand-pull field tests and record failure modes.
- Interactive, commentable checklist with export and QR code verification.
Inspect sealant adhesion testing and substrate preparation ensures elastomeric joint sealants bond reliably to intended substrates under real site conditions. This checklist guides field inspectors and installers through substrate cleaning and priming, joint backing verification, and a consistent hand-pull adhesion test. By focusing on surface readiness, environmental control, and repeatable test execution, the process screens out contamination, moisture, and geometry issues that commonly cause adhesive failure or premature joint leaks. You will confirm backer rod sizing, depth-to-width ratios, primer requirements, and sealant cure status before pulling test tabs to assess cohesive versus adhesive failure. The outcome is traceable evidence: readings, photos, batch data, and sign-offs that support acceptance per approved project specifications and authority requirements. Use this interactive checklist on any façade or envelope mock-up area to document conditions, highlight nonconformances, and plan corrective actions. Start interactive mode now—tick items, add comments, and export results to PDF/Excel with a QR-secured link.
- Validate substrate condition, primer selection, and joint geometry before testing to prevent adhesion loss, staining, or cohesive tearing. Record environmental conditions in °C and %RH, confirm moisture limits, and capture photos of cleaning, priming, and backing installations for traceable acceptance.
- Standardize the hand‑pull test by forming repeatable tabs, cutting to a consistent width, and pulling at a steady rate. Log failure mode percentages, force indications when available, and replicate across locations and substrates to build statistically confident results.
- Integrate documentation rigor: batch numbers, cure intervals, wet/dry times, and responsible personnel. When failures occur, link root causes to corrective actions—reclean, re-prime, resize backing—and schedule retests after appropriate cure durations, ensuring durable, leak‑resistant joints.
- Interactive online checklist with tick, comment, and export features secured by QR code.
Pre-Inspection Setup
Substrate Preparation Verification
Joint Backing and Geometry
Adhesion Testing (Hand-Pull Method)
Documentation and Acceptance
Why Field Adhesion Testing Matters
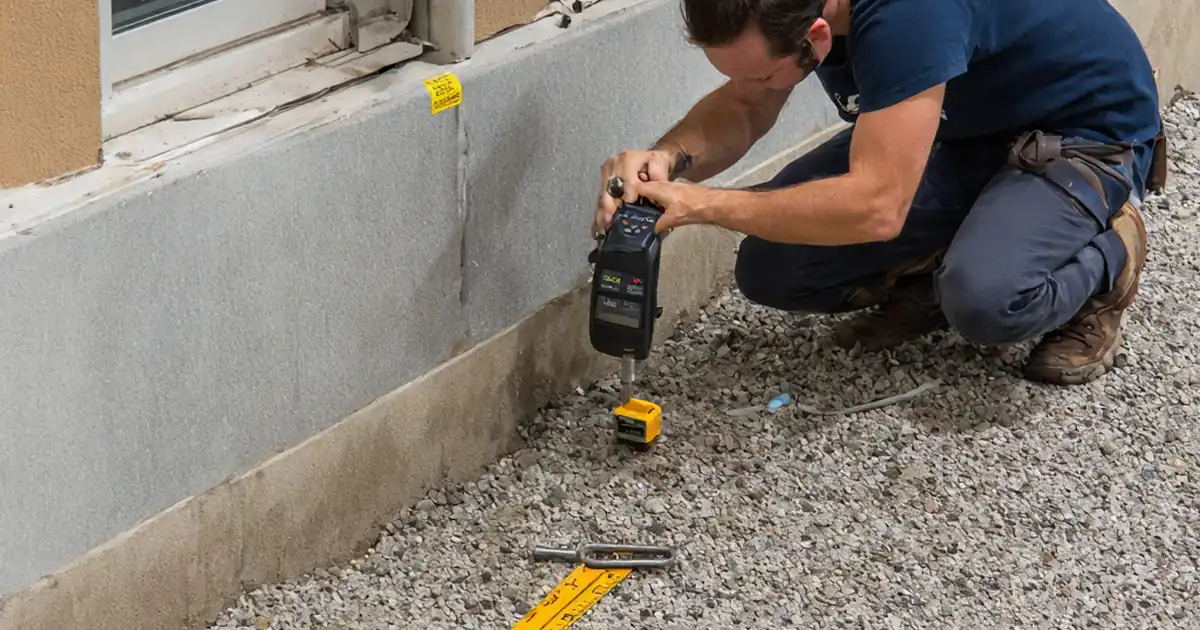
Field adhesion testing verifies that sealant bonds to actual project substrates under current site conditions, not just in laboratory scenarios. It reveals real-world issues like residual oils, dust, excessive substrate moisture, or incorrect primers that compromise adhesion and lead to early joint leakage or staining. Executed with consistent geometry and timing, the hand-pull method provides a practical read on bond quality by distinguishing cohesive tearing of the sealant from adhesive separation at the interface. The process also confirms that surface preparation methods, such as solvent cleaning and priming, are compatible with the sealant and the substrate. When combined with reliable documentation—environmental readings, photos, and batch data—results become defensible evidence for acceptance per approved project specifications and authority requirements. This paragraph sets expectations for test frequency, repeatability, and pass/fail cues so teams can plan mock-ups, avoid rework, and achieve durable building envelope performance.
- Use representative locations for every substrate type and finish.
- Record ambient and surface conditions before application and testing.
- Differentiate cohesive tear from adhesive failure with photos.
- Link acceptance to project specifications and authority requirements.
Getting Substrates Ready for Reliable Bonding
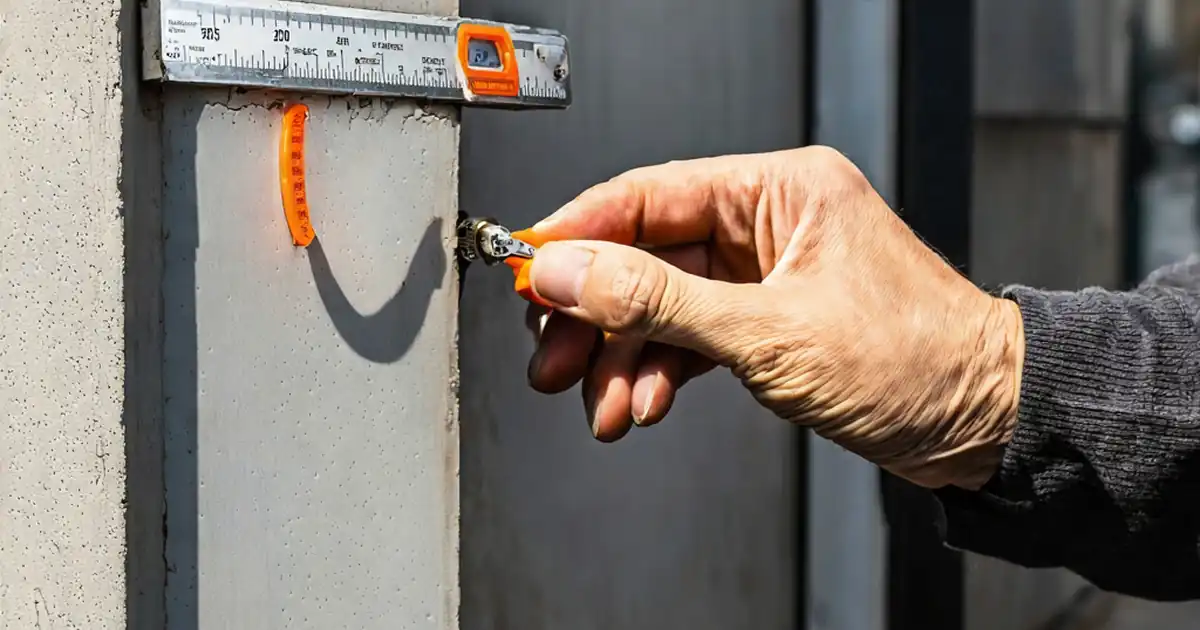
Successful adhesion begins with clean, sound, and dry substrates. A solvent wipe test on a white, lint-free cloth should show minimal discoloration, indicating oils or fines have been removed. When laitance or old residues persist, mechanical abrasion followed by vacuuming improves surface profile and cleanliness. Moisture is a common cause of failure, so confirm substrate moisture content and surface temperature are within the manufacturer’s application range before priming or gunning sealant. Not all substrates need primer, but when specified, apply uniformly and respect coverage and drying times. Joint backing must prevent three-sided adhesion, set correct depth, and control geometry; choose closed-cell backer rod sized 25–33% larger than joint width, or use bond-breaker tape where rods cannot be used. Accurate measurements, photos, and batch logs prove compliance and reduce disputes during acceptance reviews.
- Verify moisture levels and surface temperature meet product limits.
- Use correct cleaner, lint-free cloth, and approved primer only.
- Backer rod size 25–33% larger than joint width.
- Prevent three-sided adhesion with rod or bond-breaker tape.
Executing and Interpreting the Hand-Pull Test
A consistent hand-pull test starts with proper bead application and a formed pull tab that cures sufficiently before testing. Cut a 25 mm wide strip back to the backing without scoring the substrate, then pull the tab at approximately 180° and steady speed to observe failure mode. Cohesive tearing within the sealant or substrate tear generally indicates strong adhesion; adhesive separation at the interface signals problems such as contamination, moisture, incompatible primer, or poor geometry. Record ambient conditions, batch numbers, cure times, and failure percentages for each test. Repeat across multiple locations for each substrate to validate repeatability. Where failures appear, tie them to a clear corrective action—recleaning, re-priming, backing adjustment—and schedule a documented retest after the specified cure interval. This disciplined approach drives predictable results and supports transparent acceptance decisions.
- Standardize tab width, angle, and pull rate.
- Capture close-ups showing failure mode clearly.
- Repeat tests across substrates for confidence.
- Define corrective actions and retest windows.
How to Use This Interactive Checklist
- Preparation: Gather sealant, primer, cleaners, backer rods, masking, blades, depth gauges, hygrometer, and moisture meter. Review approved submittals and manufacturer instructions. Confirm PPE and SDS. Calibrate instruments, set location IDs, and agree on acceptance criteria per approved project specifications and authority requirements.
- Using the Interactive Checklist: Open the checklist, start interactive mode, and progress item by item. Tick completions, attach photos/videos, and log readings in SI units. Use comments to flag nonconformances and assign actions. Generate live share links and verify authenticity with the built-in QR code.
- Sign-Off: Review the auto-generated summary with results, batches, and evidence. Capture digital signatures from installer, inspector, and stakeholder. Export as PDF/Excel, distribute to the project team, and archive with QR-backed traceability for future audits and warranty files.
Call to Action
- Start Checklist Tick off tasks, leave comments on items or the whole form, and export your completed report to PDF or Excel—with a built-in QR code for authenticity.
- Download Excel - Sealant Adhesion Testing & Substrate Prep Inspection
- Download PDF - Sealant Adhesion Testing & Substrate Prep Inspection
- View Image - Sealant Adhesion Testing & Substrate Prep Inspection
Cite & Embed
“Sealant Adhesion Testing & Substrate Prep Inspection by Quollnet”
with a link to
this source page.

FAQ
Question: How many hand-pull adhesion tests should be performed per substrate?
Question: When is primer required before applying joint sealant?
Question: What if the test shows adhesive failure instead of cohesive tear?
Question: How long should I wait before conducting the hand-pull test?
Question: Can adhesion testing be performed in cold or damp conditions?
Related Articles
Broader reading and guidance connected to this checklist topic.


Concrete Cube Test Register Excel Format – Pdf & Excel Sample


Related Checklists
Keep the workflow moving with nearby templates chosen from similar checklist content.