Prepare Construction Joints (Interface) — Horizontal
Definition: Prepare construction joints (interface) for horizontal cast-in-place concrete helps site engineers, supervisors, and QC teams ensure roughening, cleaning, bonding, and waterstop placement are correct before the next placement.
- Mechanical roughening to a defined profile for durable shear transfer.
- Thorough cleaning and controlled moisture for reliable bond activation.
- Correct bonding agent selection and application within open time.
- Interactive, commentable checklist with export and QR code verification.
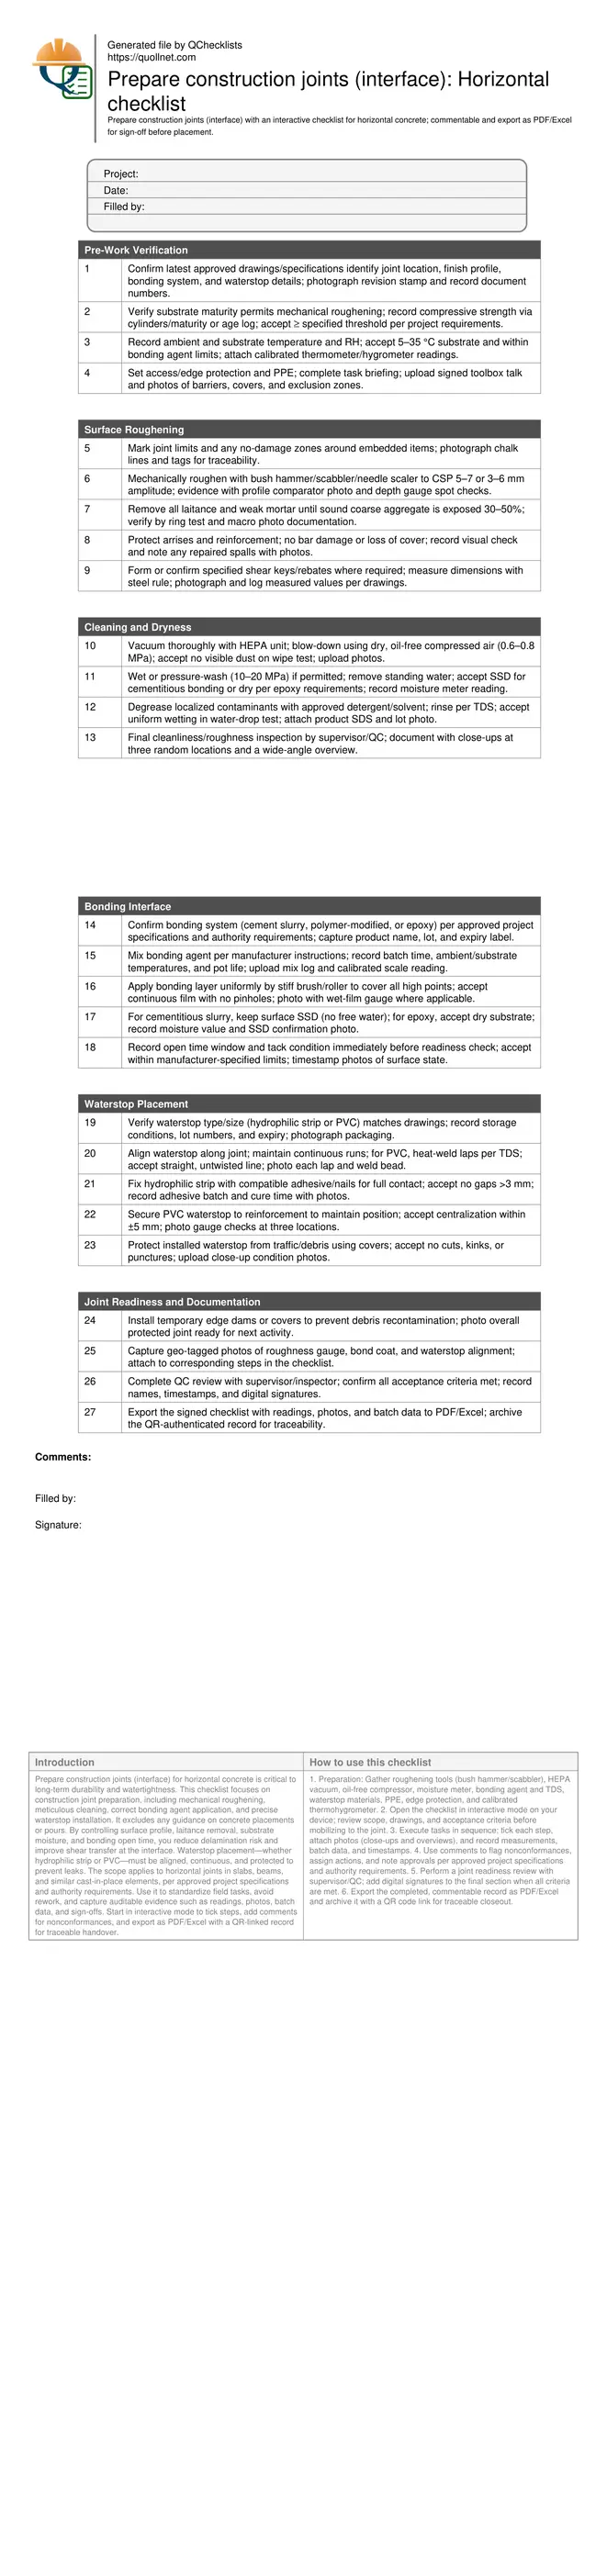
Prepare construction joints (interface) for horizontal concrete is critical to long-term durability and watertightness. This checklist focuses on construction joint preparation, including mechanical roughening, meticulous cleaning, correct bonding agent application, and precise waterstop installation. It excludes any guidance on concrete placements or pours. By controlling surface profile, laitance removal, substrate moisture, and bonding open time, you reduce delamination risk and improve shear transfer at the interface. Waterstop placement—whether hydrophilic strip or PVC—must be aligned, continuous, and protected to prevent leaks. The scope applies to horizontal joints in slabs, beams, and similar cast-in-place elements, per approved project specifications and authority requirements. Use it to standardize field tasks, avoid rework, and capture auditable evidence such as readings, photos, batch data, and sign-offs. Start in interactive mode to tick steps, add comments for nonconformances, and export as PDF/Excel with a QR-linked record for traceable handover.
- This checklist standardizes horizontal construction joint preparation before the next placement: targeted mechanical roughening, comprehensive cleaning, controlled substrate moisture, correct bonding system selection and application, and safeguarded waterstop alignment. Each step includes measurable acceptance criteria, tools, and evidence to reduce leakage, delamination, and rework on busy job sites.
- Interactive online checklist with tick, comment, and export features secured by QR code.
- Field-proven cues speed inspections: profile comparators (CSP 5–7 or 3–6 mm amplitude), dust tests, moisture readings, batch and expiry capture for bonding agents, and geo-tagged photos of waterstop laps. Digital sign-offs enable transparent QA closeout per approved project specifications and authority requirements, without covering placement activities.
Pre-Work Verification
Surface Roughening
Cleaning and Dryness
Bonding Interface
Waterstop Placement
Joint Readiness and Documentation
Roughening that Achieves Bond Without Damaging the Substrate
Effective construction joint preparation starts with mechanical roughening that exposes sound coarse aggregate and removes all laitance. For horizontal joints, tools like bush hammers, scabblers, and needle scalers give controlled profiles without saturating the structure. Target a profile equivalent to CSP 5–7 or about 3–6 mm amplitude to promote shear transfer and mechanical interlock. Protect reinforcement and arrises: undercutting bars or breaking corners introduces future spalls and leak paths. Where drawings require a shear key or rebate, dimensional compliance matters as much as finish. Clean as you go—dust left behind behaves like a bond breaker under the next layer. Validate results with a profile comparator and macro photos in three to five locations, then have a supervisor confirm uniformity. Done correctly, roughening creates a durable, clean “tooth” that allows the bonding system to perform as designed.
- Aim for CSP 5–7 or 3–6 mm amplitude.
- Expose sound aggregate; remove all laitance.
- Avoid rebar damage and loss of cover.
- Measure any shear key dimensions precisely.
- Capture comparator photos for evidence.
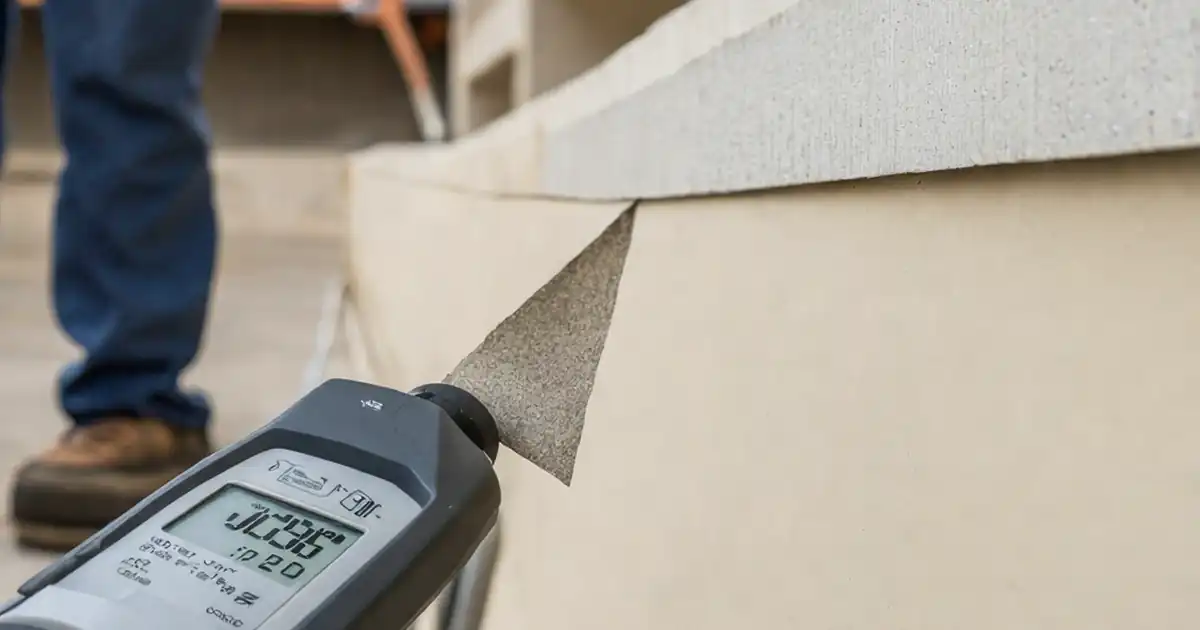
Cleaning, Moisture Control, and Bonding System Application
Cleanliness and moisture state decide whether a bonding system works. After roughening, vacuum dust with a HEPA unit and blow down using dry, oil-free air. If pressure washing is permitted, remove all standing water and leave the surface saturated surface-dry (SSD) for cementitious slurries, or dry according to epoxy requirements. Select the bonding agent per approved project specifications and authority requirements, then verify product lot, expiry, and storage. Mix under the manufacturer’s instructions, controlling ambient and substrate temperatures within specified limits. Apply a continuous film that wets high points; check for pinholes and monitor open time. Record moisture meter values, temperatures, batch times, and application photos. This data proves the interface is clean, correctly conditioned, and within the bonding window—preventing debonding, blistering, and early-age delamination.
- Use HEPA vacuum and oil-free air.
- SSD for cement slurries; dry for epoxies.
- Log lot numbers and expiry dates.
- Apply continuous, pinhole-free bonding film.
- Track open time and temperatures.
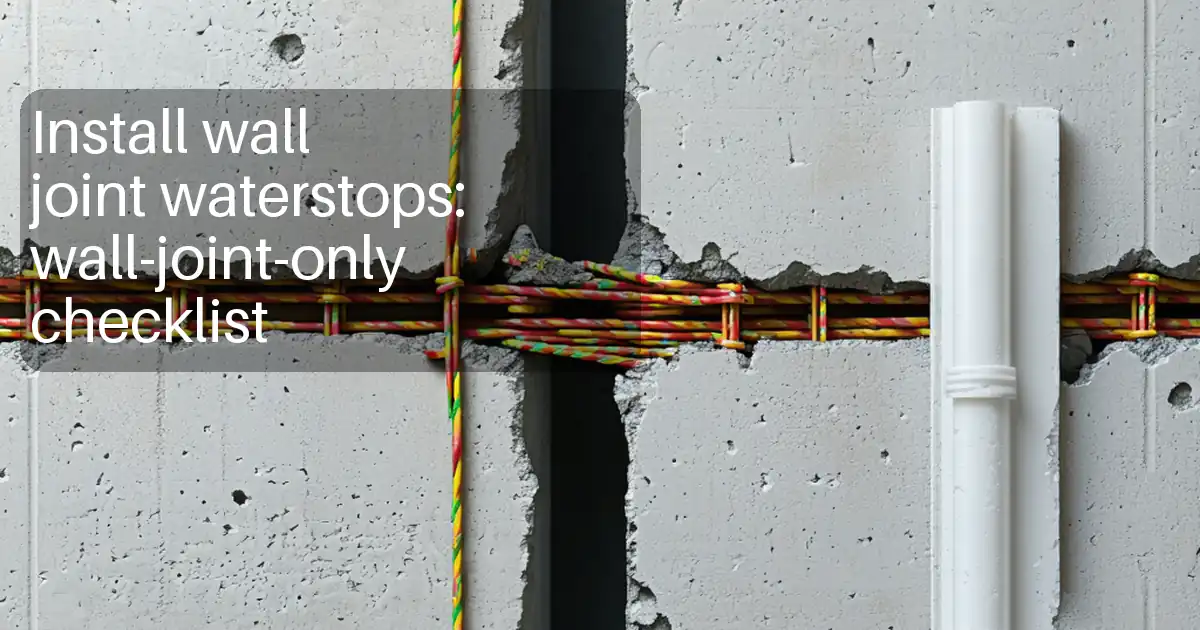
Waterstop Placement and Joint Readiness Without Covering Work
Waterstop integrity determines watertightness across the joint. Confirm the specified system—hydrophilic strip or PVC—matches drawings, then inspect lot numbers and storage. Hydrophilic strips must be fixed with compatible adhesive or mechanical fasteners to achieve full contact, with no discontinuities at corners or laps. PVC waterstops require straight alignment, correct laps welded per the manufacturer’s method, and centralization to avoid folding during subsequent work. Protect installed waterstops from traffic and debris until the next activity. Finish with a readiness review: photos of alignment and welds, moisture readings, bond coat condition, and digital sign-offs. Export a QR-authenticated record to lock in accountability and speed approvals—without mixing in any placement tasks.
- Verify type, size, and lot numbers.
- Ensure continuous contact and straight alignment.
- Weld PVC laps per manufacturer instructions.
- Protect waterstops from damage and debris.
- Document with geo-tagged photos and sign-offs.
How to Use This Interactive Construction Joint Prep Checklist
- Preparation: Gather roughening tools (bush hammer/scabbler), HEPA vacuum, oil-free compressor, moisture meter, bonding agent and TDS, waterstop materials, PPE, edge protection, and calibrated thermohygrometer.
- Open the checklist in interactive mode on your device; review scope, drawings, and acceptance criteria before mobilizing to the joint.
- Execute tasks in sequence; tick each step, attach photos (close-ups and overviews), and record measurements, batch data, and timestamps.
- Use comments to flag nonconformances, assign actions, and note approvals per approved project specifications and authority requirements.
- Perform a joint readiness review with supervisor/QC; add digital signatures to the final section when all criteria are met.
- Export the completed, commentable record as PDF/Excel and archive it with a QR code link for traceable closeout.
Call to Action
- Start Checklist Tick off tasks, leave comments on items or the whole form, and export your completed report to PDF or Excel—with a built-in QR code for authenticity.
- Download Excel - Construction Joint Interface Preparation (Horizontal)
- Download PDF - Construction Joint Interface Preparation (Horizontal)
- View Image - Construction Joint Interface Preparation (Horizontal)
Cite & Embed
“Construction Joint Interface Preparation (Horizontal) by Quollnet”
with a link to
this source page.
FAQ
Question: What roughness profile should I target for a horizontal construction joint?
Question: Should the interface be wet or dry before applying the bonding agent?
Question: How do I ensure waterstop continuity across the joint?
Question: What evidence should I capture to prove joint readiness?
Related Articles
Broader reading and guidance connected to this checklist topic.

Construction Tender Preparation Guide | Step-by-step Bidding Process


Master Construction Project Cashflow With Cashflowpot

Open Ncrs At Taking-over / Dlp: What Happens At Handover And How To Escalate

Related Checklists
Keep the workflow moving with nearby templates chosen from similar checklist content.