Introduction
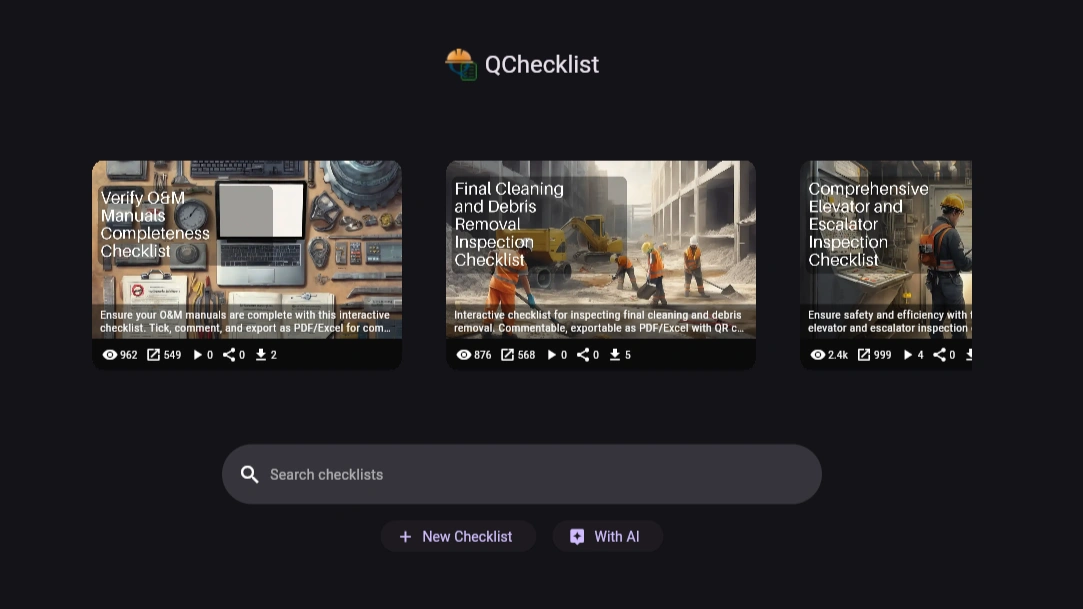
QChecklists is a web app for building reusable checklist templates and completing them as live checklist runs for inspections, audits, QA/QC reviews, facilities checks, and other field workflows. Teams can create structured templates, launch runs with project-specific context, check items on site, add comments and evidence, collaborate with others, and export professional reports.
In QChecklists, a reusable checklist is called a template. A live working copy created from that template is called a checklist run. Internally, the system may sometimes call a checklist run an instance, but for users it is easier to think of it as the run of a checklist for a real project, location, date, or inspection activity.
This guide explains the real frontend workflow of QChecklists, from signing in and creating a template to completing a run, organizing it into groups, collaborating with others, and exporting reports with QR-based authenticity verification.
How to Use QChecklists
What QChecklists helps you do
QChecklists is built for teams that need structured, repeatable, evidence-backed checklists. It is especially useful for construction teams, QA/QC teams, inspectors, consultants, auditors, and facilities teams.
With QChecklists, you can:
-
create reusable checklist templates
-
generate checklist items with AI
-
organize checklist items into grouped sections
-
launch a live checklist run from a template
-
add run-specific context such as project, inspector, contractor, client, and date
-
mark checklist items as checked or unchecked
-
add comments to the whole run or to individual items
-
upload evidence files to the whole run or to individual items
-
share runs with collaborators
-
control collaborator access
-
organize runs into groups
-
export runs to PDF or Excel
-
verify exported reports using a QR code
Signing in and accessing the app
To use protected parts of QChecklists, sign in through the authentication dialog. The app supports standard sign-in and account flows, including account creation, password recovery, and Google sign-in.
Some checklist template pages may be viewable publicly, but working with your own templates and checklist runs requires login.
After signing in, the main navigation gives access to your templates, your checklist runs, shared runs, and your profile.
Understanding the difference between templates and checklist runs
This is the most important concept in the app.
A template is the reusable master checklist. You create it once and reuse it many times.
A checklist run is the live working copy of that template. It is the version you use for a real inspection, audit, or site review.
A simple rule:
-
template = the reusable checklist design
-
checklist run = the real execution of that checklist
If you want to change the checklist structure, edit the template.
If you want to perform or update a real inspection, work inside the checklist run.
Creating a checklist template

Start by creating a new checklist template from the main app areas where checklist creation is offered.
When creating a template, begin with the core details:
-
checklist name
-
introduction
-
optional slug
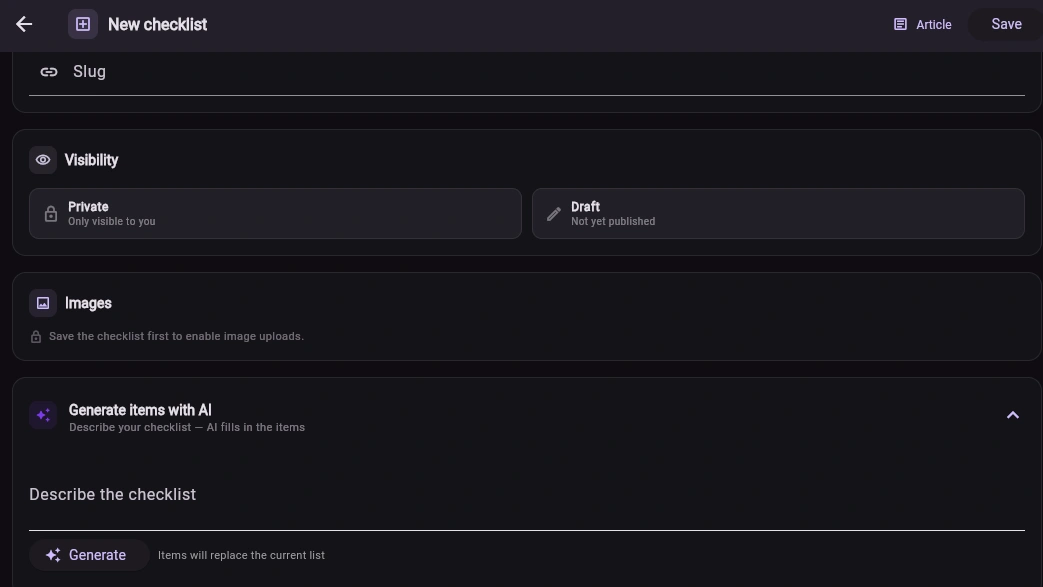
The template also supports visibility settings, including public or private and published or draft, depending on how you want to manage the checklist.
Adding checklist items manually
Once the template basics are filled in, build the checklist items.
Each item is a single checkpoint or action line. You can add, edit, delete, and reorder items. Items can also include an optional group or section label. This is useful when you want related items to appear together under one heading in the checklist.
Examples of useful groups include:
-
General
-
Documentation
-
Safety
-
Concrete Works
-
MEP
-
Final Review
Using groups makes longer checklists easier to read and easier to complete in the field.
Generating checklist items with AI
QChecklists includes AI-assisted checklist item generation.
This is helpful when you want to create a first draft quickly. You describe the checklist you want, and the app generates a list of items for you.
A good workflow is:
-
enter the checklist title
-
write a short description of the checklist purpose
-
generate items with AI
-
review the generated results carefully
-
edit, reorder, or remove items as needed
Important note: AI-generated items replace the current item list. If you already wrote items manually, make sure you are ready to overwrite them before generating again.
Saving the template
Save the template once the basic structure is ready.
This first save is important because some features, especially image assignment, only become available after the template already exists.
Adding template images
QChecklists supports two important template image types:
-
hero image
-
logo
The hero image is the main visual banner for the checklist page. The logo is a smaller branding image associated with the checklist.
Important rule: save the checklist first
The checklist must exist before these images can be assigned. In practice, the workflow is:
-
create the template
-
save it
-
upload the image
-
assign it as hero image or logo
The upload happens first, and then the uploaded image is linked to the template as the hero or logo image.
This means image assignment is not just a local preview. It is saved into the checklist template.
Hero image alt text
The hero image also supports alt text editing, which is useful for accessibility and clearer public presentation.
Launching a checklist run
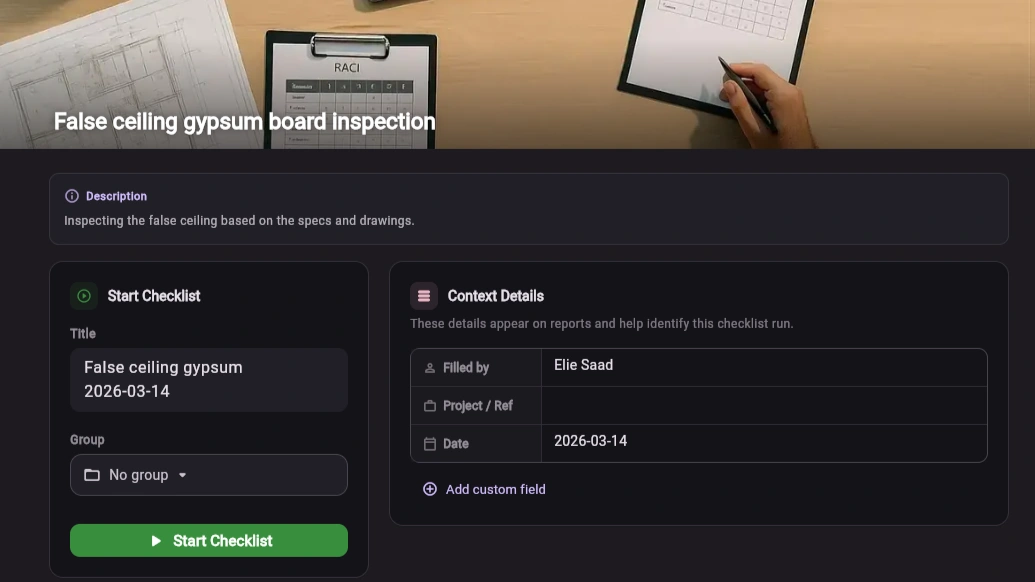
When your template is ready, open it and start a checklist run using the action provided on the checklist page.
A checklist run is the live version you will actually complete in the field or during the audit.
Before starting, the app lets you set the run details.
Run title
The app proposes a default title based on the checklist and date, but you can edit it.
Group selection
At creation time, you can choose a group for the checklist run.
If no group is selected, the run is placed in the Ungrouped section.
Groups are useful for organizing runs by project, building, area, client, or work package.
Context details
The run supports context details that help identify the inspection and improve reporting.
Standard fields include items like:
-
filled by
-
project / reference
-
date
You can also add extra custom key-value fields. These can be used for practical reporting information such as:
-
contractor
-
client
-
inspector
-
building
-
floor
-
zone
-
permit number
-
asset number
-
department
These context fields are included in the exported run report.
Completing a checklist run
Once the run starts, you move into the live working screen.
This is where the real checklist activity happens.
Item completion model
The current implementation uses a simple checked / unchecked model.
There are no separate pass, fail, or N/A item states in the current live frontend workflow.
Working through the checklist
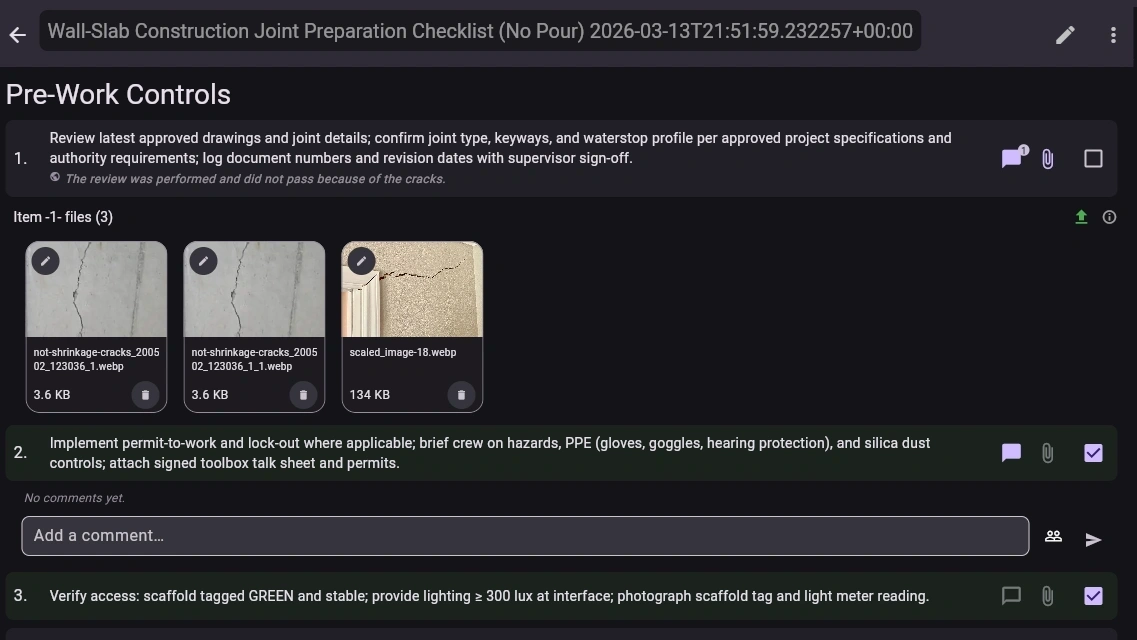
For each checklist item, the user can:
-
mark it checked
-
uncheck it if needed
-
open its comments
-
open its attachments
If grouped sections were defined in the template, the items appear under those group headings, making the run easier to navigate.
Progress tracking
The checklist run screen shows progress information such as the number of completed items out of the total.
This gives users a quick understanding of how far the run has progressed.
Check all
If appropriate, the run also supports a bulk action to mark all items checked at once.
Comments in QChecklists
QChecklists supports comments at two levels.
Checklist-level comments
These comments apply to the whole checklist run.
Use them for:
-
general observations
-
overall inspection remarks
-
summary notes
-
closing comments
-
report-level remarks
Item-level comments
These comments belong to one specific checklist item.
Use them for:
-
specific observations
-
clarifications
-
issue descriptions
-
follow-up notes
-
explanation of why an item was checked or left unchecked
Comment visibility
Comments support visibility levels:
-
owner only
-
collaborators only
-
external
This is important because external comments are the comments intended for public-facing reporting in the exported PDF. Owner-only comments stay restricted. Collaborator comments support normal internal teamwork.
A practical recommendation is:
-
use owner-only for private internal notes
-
use collaborators-only for internal team discussion
-
use external for report-facing comments that should appear in exported public-style output
Attachments and evidence capture
QChecklists also supports attachments at two levels.
Checklist-level attachments
These files belong to the whole checklist run.
Use them for:
-
overall site photos
-
summary documents
-
signed sheets
-
general evidence
-
cover images
-
area-wide evidence
Item-level attachments
These files belong to one specific checklist item.
Use them for:
-
close-up photos
-
item-specific documents
-
defect photos
-
manufacturer sheets
-
before/after evidence
-
exact proof related to one checkpoint
File sources
The app supports practical file input methods such as:
-
gallery
-
camera
-
file picker
-
paste
This makes it suitable for both office and field workflows.
Editing attachment details
After uploading, attachment details can be managed, including file name, alt text, and description.
Best practice for evidence
A simple rule works well:
-
item-level files for evidence tied to one exact checkpoint
-
checklist-level files for evidence that applies to the run as a whole
Collaborating on a checklist run
Checklist runs can be shared with collaborators.
The owner of the run can invite users and assign one of the available access levels:
-
Full Access
-
Can Comment
-
View Only
This lets the owner control how much each collaborator can do.
What happens when a run link is shared
A shared checklist run link is not public.
The user opening that link must already be a collaborator on the run. Otherwise they receive a 403 access error.
So the link acts as a direct access path for authorized collaborators, not as an open public page.
What collaborators can do
The collaborator’s experience depends on their assigned access level:
-
Full Access: broad access to the run
-
Can Comment: can participate in the run discussion and comment workflow
-
View Only: can open and review the run without editing
This makes QChecklists suitable for internal teams, external consultants, reviewers, and controlled client visibility.
Organizing checklist runs with groups
Groups help users organize runs.
Choosing a group at creation time
When creating a run, users can assign it to a group immediately.
If they do not choose a group, the run is shown under Ungrouped.
Moving a run later
A run can be moved later through the more menu next to the run name.
The implemented workflow is:
-
open the three-dots menu
-
click Move
-
a modal appears showing available groups
-
choose the desired group
This is the normal way to reorganize runs after they have already been created.
Exporting reports
QChecklists supports exporting the checklist run as both PDF and Excel.
PDF export
The PDF export is designed as a full checklist run report. It includes the run context and any additional custom context fields added by the user.
This makes the PDF useful as a professional inspection or audit record.
The PDF also includes:
-
checklist run context
-
custom reporting fields
-
checklist content
-
reporting-visible comment content
-
QR code for authenticity verification
External comments are the ones intended to appear in the PDF as public-facing report content.
Download a sample PDF generated by QChecklists
Excel export
The Excel export is useful when users want a spreadsheet-style output for review, internal tracking, or further processing.
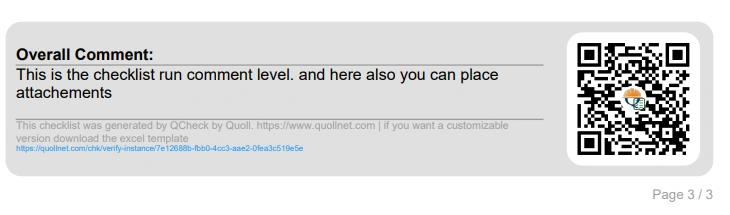
QR verification and authenticity
The PDF includes a QR code.
When scanned, this QR code opens a public authenticity page. This page confirms the authenticity of the exported checklist run.
The verification page shows summary information such as counts and the run comment, helping readers confirm that the report is valid and linked to a real checklist run.
This authenticity page is public, even though direct access to the live run itself requires collaborator authorization.
That distinction is important:
-
live run link = protected, collaborator-only
-
QR authenticity page = public verification page
Closing and reopening a checklist run
When the checklist run is complete, the user can close it.
Once closed:
-
item checking is locked
-
the run becomes effectively read-only for normal completion work
If more work is needed later, the run can be reopened.
A practical end-of-run workflow is:
-
review unchecked items
-
add any missing item comments
-
upload missing evidence
-
add final external report-facing comments if needed
-
export PDF or Excel
-
close the run
Common mistakes to avoid
Confusing a template with a checklist run
Templates are reusable designs. Checklist runs are live working copies.
Trying to upload hero or logo images before the first save
The template must exist first.
Using the wrong comment visibility
If a comment is intended for exported reporting, mark it as external.
Forgetting to assign a group
If no group is selected, the run goes into Ungrouped. This is fine, but teams using many runs may prefer to group them early.
Attaching evidence only at checklist level
When evidence belongs to one exact item, attach it to that item rather than only to the whole run.
Summary
QChecklists supports the full lifecycle of a structured checklist workflow:
-
create a reusable template
-
generate or edit checklist items
-
save and enrich the template with images
-
launch a live checklist run
-
add context details
-
complete items
-
add comments and attachments at both checklist and item level
-
collaborate securely with other users
-
organize runs into groups
-
export PDF and Excel reports
-
verify authenticity through QR-based public verification
For teams that need clear inspections, structured evidence, and controlled collaboration, QChecklists provides a practical end-to-end checklist workflow.