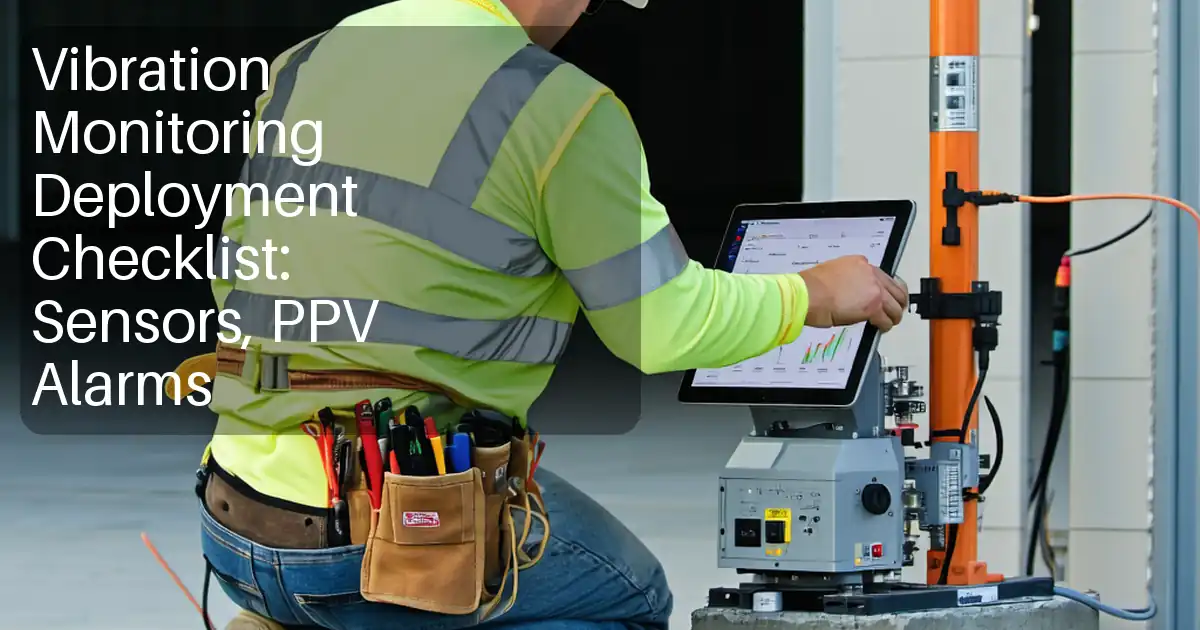
Vibration Monitoring Deployment Checklist guides contractors and engineers to place sensors, set PPV thresholds, verify calibration, and commission alarm pathways for compliant, reliable construction vibration monitoring.
- Practical deployment steps with tools, tolerances, and acceptance evidence.
- Protect receptors by setting PPV limits aligned to project requirements.
- Test calibration and alarm pathways for reliable, timely exceedance alerts.
- Interactive, commentable checklist with export and QR code verification.
The checklist
Pre-Deployment Planning
- Confirm monitoring scope and receptors per approved project specifications and authority requirements; list structures/utilities to be protected and intended works timeline. Evidence: approved monitoring plan with site drawing and asset register.
- Verify instrument suitability: 3‑axis geophones/accelerometers sized for expected PPV and frequency range; calibration certificate dated within 12 months. Evidence: model, serial numbers, and certificate copies.
- Survey proposed sensor locations using GNSS/total station; record coordinates to ±0.5 m and elevation; avoid soft/isolated surfaces. Evidence: georeferenced file (CSV/DWG) and location photos.
- Compile alarm contact list and escalation matrix with 24/7 details for contractor, client, and authorities. Evidence: signed distribution list and approved alarm flowchart.
Sensor Placement and Installation
- Prepare firm substrate; anchor sensor base per manufacturer (adhesive/anchor screws). Level within ±2° and label axes. Evidence: close-up photos showing level bubble and fasteners.
- Verify coupling: check no rocking, re-torque fixings to manufacturer value, document method (epoxy/anchor). Evidence: torque value, curing time, and coupling photo.
- Route and protect cables in UV‑rated conduit or trays; add drip loops, strain relief, and hazard signage at crossings. Evidence: photos and cable schedule with lengths.
- Assign persistent IDs to sensors; affix weatherproof labels and record GPS coordinates and axis orientation. Evidence: label photo and ID-to-coordinate register.
Power and Communications
- Provide stable power: mains with UPS or solar/battery sized for autonomy ≥ 72 h or project minimum. Evidence: load calculation, battery capacity, and power-up log.
- Configure telemetry (4G/LTE/Wi‑Fi); confirm SIM/APN, static IP if required, and signal strength ≥ −90 dBm. Evidence: connection screenshots and ping test results.
- Seal equipment in IP65+ enclosures; fit glands, desiccant, and strain relief; verify no ingress. Evidence: enclosure inspection photos and checklist.
Calibration and Verification
- Perform field verification using a portable shaker or bump test; confirm measured PPV within ±10% of expected response. Evidence: verification report with plots.
- Check axis mapping and polarity by exciting X, Y, Z individually; confirm channel naming matches physical orientation. Evidence: annotated screenshots and sensor labels.
- Record 10 minutes of baseline with works paused; confirm stable noise floor and no spurious triggers. Evidence: PPV trend screenshot and baseline PPV value (mm/s).
- Synchronize time via NTP or GPS; verify drift < 1 s over 24 h. Evidence: time sync log and comparison check.
Thresholds and Alarms Configuration
- Enter PPV thresholds per approved project specifications and authority requirements; define informative, warning, and action levels for each sensor. Evidence: configuration screenshot.
- Set manufacturer-recommended filters and integration settings for PPV; document frequency range and damping assumptions. Evidence: settings export and notes.
- Apply schedules by receptor and working hours; suppress alarms during approved tests; log exceptions. Evidence: calendar/schedule screenshot and approval email.
- Simulate exceedance to test pathways; verify SMS/email delivery within 30 s and audible/visual beacons where installed. Evidence: alarm log, recipient acknowledgements, and timestamps.
- Define escalation: if unacknowledged after X minutes or repeated events, notify next tier. Evidence: approved escalation matrix and auto-escalation test record.
Data Acquisition and Logging
- Set sampling rate ≥ 10× highest frequency of interest (e.g., 1000 Hz per axis); confirm anti-aliasing enabled. Evidence: device settings screenshot.
- Configure data retention: local buffer ≥ 72 h offline and cloud retention per contract (e.g., 12 months); enable encryption. Evidence: storage status and policy export.
- Build dashboard: name sensors, assign to map pins using surveyed coordinates, and display live PPV trends. Evidence: dashboard URL and screenshot.
- Run a representative live trial during works; verify events captured and alarms executed; finalize commissioning report. Evidence: signed report with photos and data export.
Preview the printable checklist
Preview page one below. Open the image or download the PDF for all pages.

At a glance
- Deploy a robust PPV monitoring network by selecting appropriate geophones or accelerometers, fixing them to stable substrates, protecting cabling, synchronizing time sources, and validating telemetry. Capture survey coordinates, serial numbers, and calibration certificates to create an auditable chain of custody from day one.
- Establish clear PPV thresholds per approved project specifications and authority requirements, configure filters and schedules, and test alarm pathways via deliberate simulations. Verify delivery time, recipients, and escalation. This prevents nuisance alerts while ensuring genuine exceedances are acknowledged and acted upon quickly.
- Commission data acquisition with suitable sampling rates, retention policies, encryption, and dashboards. Record a quiet-period baseline, verify axis mapping, and run a representative live trial. Deliver a signed commissioning report with photos, trend plots, and configuration screenshots to hand over a reliable, maintainable system.
- Interactive online checklist with tick, comment, and export features secured by QR code.
How to Use This Interactive Vibration Monitoring Checklist
- Preparation: gather calibrated geophones/accelerometers, anchors/epoxy, tools, GNSS/total station, spirit level, UPS/solar kits, SIMs, and PPE. Confirm approved monitoring plan, alarm matrix, and site access permits. Brief the team on roles and evidence capture.
- Using the Interactive Checklist: open the checklist, select your project, and start interactive mode. Tick items as you complete them, attach photos, calibration certificates, screenshots, and survey files to each step.
- Comments and Reviews: add contextual comments with @mentions, note deviations from specifications, and request approvals. Use timestamps to document verification tests, alarm simulations, and stakeholder acknowledgements.
- Export and Share: generate an export as PDF/Excel that compiles completed items, evidence, and comments. The export includes a QR code for authentication; share with contractor, client, and authorities.
- Sign-Off and Archive: capture digital signatures from responsible parties, lock the record, and archive with the commissioning report. Store configuration exports, maps, and logs for maintenance handover.
Placing Sensors for Reliable PPV Measurement
Accurate PPV data starts with where and how you mount sensors. Select firm, continuous substrates that transmit ground-borne vibration—such as concrete foundations or structural slabs—rather than cladding or lightweight finishes. Prepare the surface, then anchor the geophone or accelerometer per the manufacturer, maintaining level within ±2° and labeling axes to match data channels. Protect cabling with UV-rated conduit, add drip loops and strain relief, and keep runs away from pedestrian trip zones. Record precise coordinates and elevations so plotted maps align with the as-built environment. Avoid resonant plates, loose plinths, or isolated pedestals that can amplify or filter signals. Before leaving each location, conduct a quick functional bump test to confirm coupling and polarity, then photo-document the mounting method, labels, and surroundings. These steps minimize spurious triggers and preserve traceability from field hardware to data streams.
- Mount on firm structural elements, not lightweight finishes.
- Level sensors within ±2° and label axes clearly.
- Protect cables with conduit, drip loops, strain relief.
- Record coordinates to ±0.5 m with elevation noted.
- Photo-document mounts, labels, and surroundings.
Setting PPV Thresholds and Commissioning Alarm Pathways
Thresholds must align with approved project specifications and authority requirements, and they should reflect receptor sensitivity and construction methods. Configure informative, warning, and action levels per sensor, then apply appropriate filters and schedules for working hours and quiet periods. Test the full alarm chain by simulating exceedances, confirming SMS/email recipients receive alerts within 30 seconds, and verifying any local sirens or beacons operate. Establish escalation rules for unacknowledged alarms or repeated exceedances to ensure rapid response. Keep an audit trail: screenshots of settings, recipient lists, and alarm logs with timestamps and acknowledgements. This commissioning approach prevents nuisance alarms, improves responsiveness, and ensures that exceedances are both visible and actionable to the right people at the right time.
- Align levels to approved specifications and receptor sensitivity.
- Use schedules for working hours and quiet periods.
- Simulate alarms and verify delivery times.
- Define escalation for unacknowledged or repeated events.
- Archive settings and alarm logs with timestamps.
Data Integrity: Sampling, Baselines, and Handover
Reliable monitoring depends on suitable sampling rates, clean baselines, and secure data handling. Set the sampling rate at least ten times the highest frequency of interest and enable anti-aliasing. Synchronize time using NTP or GPS and verify drift below one second per day to keep events aligned across sensors. Record a quiet-period baseline to characterize ambient PPV and confirm stable triggers. Configure local buffering for outages and cloud retention per contract, with encryption enabled. Build a clear dashboard that maps sensors using surveyed coordinates and displays live PPV trends. Close out with a live trial capturing real events, then issue a commissioning report including configuration exports, baseline plots, screenshots, and signatures. These measures provide defensible data and a maintainable system.
- Sample ≥ 10× highest frequency of interest.
- Time sync drift less than 1 s per day.
- Capture 10-minute quiet-period baseline.
- Enable buffering, retention, and encryption.
- Deliver a signed commissioning report.