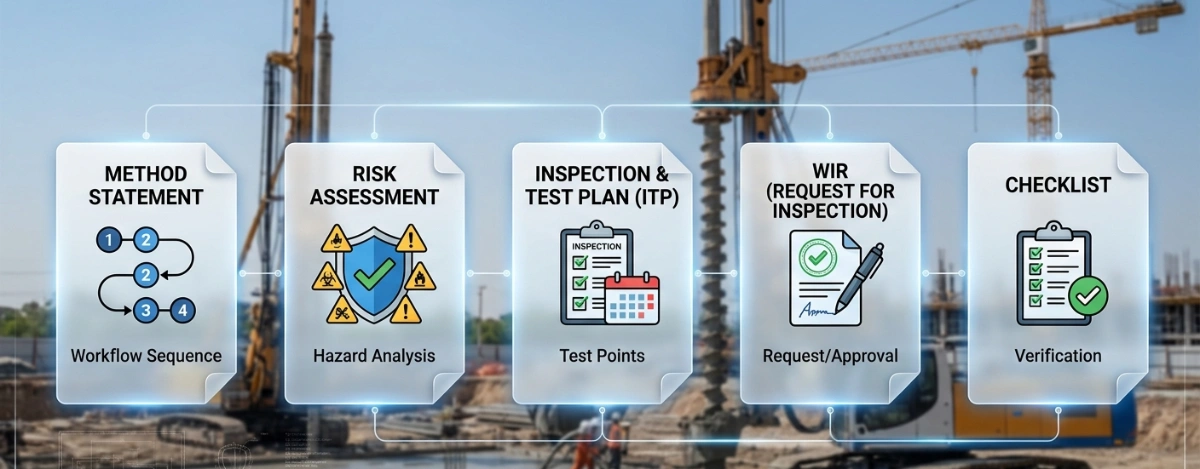
Method Statement – Heavy-Duty Escalator Installation (Transit/Commercial Building) – Method Statement
AI-assisted method statement with matching ITP, PDF download, and Excel export.
More than a static template
Unlike a downloadable Word or PDF template, this method statement is an AI-assisted editable starting point connected directly to a matching Inspection and Test Plan. Every section is structured, project-adaptable, and ready to export.
- AI-assisted drafting — Customize every section with AI for your specific project scope.
- Linked ITP — A matching inspection and test plan is generated alongside the method statement.
- Multiple export formats — Download as a formatted PDF or editable Excel spreadsheet.
- Editable starting point, not a final document — Review, verify, and adjust all content against your project requirements before use.
Static template vs. Quollnet workflow
| Feature | Static template | Quollnet |
|---|---|---|
| Project-specific content | Manual fill-in required | AI-assisted customization |
| Linked ITP | Separate document, no link | Matching ITP included |
| Export formats | Usually PDF only | PDF and Excel |
| Structured sections | Free-form layout | 13 standardized sections |
| Saved to your account | Local file only | Cloud-saved, reusable |
| Content accuracy | You verify everything | AI-assisted, you still verify |
| Cost | Often free but time-intensive | Free to customize and download |
What you can customize
When you save this method statement to your account, every section becomes editable. The following 13 sections are included:
- Scope — Defines the activity and its boundaries.
- References — Standards, specifications, and drawings.
- Responsibilities — Roles and accountabilities.
- Resources — Labour, plant, and equipment summary.
- Materials — Materials and compliance requirements.
- Equipment — Tools and equipment details.
- Prerequisites — Hold points and pre-conditions.
- Method sequence — Step-by-step construction sequence.
- Safety controls — HSE risk controls and PPE.
- Environmental controls — Environmental mitigation measures.
- QA/QC — Quality inspection and test requirements.
- ITP — Inspection and Test Plan table (has its own page).
- Attachments — Referenced drawings and documentation.
Why this method statement is used
This method statement is used to define and communicate the approved procedure for carrying out method statement – heavy-duty escalator installation (transit/commercial building) on site. It ensures the work is planned in advance, the correct resources and controls are in place, and all personnel understand responsibilities, sequence, quality requirements, and safety controls before work begins. It aligns site execution with the documented scope and acceptance expectations.
Who uses this method statement
This method statement is used by contractors, site supervisors, project engineers, QA/QC engineers, HSE officers, consultants, and client representatives. It serves as a shared reference for planning, execution, supervision, inspection, and approval of the activity on site.
When it is prepared and submitted
The method statement is prepared before the work activity starts and submitted as part of the pre-construction documentation package for review and approval.
Who reviews or approves it
The method statement is usually submitted to the client representative, consultant, resident engineer, or project management consultant for review and approval before the work commences.
Important approval note
This method statement is an AI-assisted editable starting point, not a pre-approved document. Before use on any project, all content must be reviewed and approved by the relevant parties (superintendent, principal contractor, or client representative) in accordance with your contract and project quality plan.
For example: if your specification requires a departure from a referenced standard, that departure must be documented and approved separately — this method statement will not capture that automatically. Always verify against your applicable drawings, specifications, and regulatory requirements.
Method statement content
Scope
Workscope
- Installation of heavy-duty escalator(s) including: offloading, rigging, truss placement into pit/shaft, alignment/leveling, permanent anchorage, precision grouting, step chain assembly and tensioning, drive/motor/gear installation, handrail drive and return assemblies, balustrade panels (glass/metal), skirt panels, comb plates, landing plates, newels, decking and trims, lighting/signage, safety devices, lubrication systems, wiring and control integration, pre-commissioning and functional testing.
- Interface coordination with: structural supports, pit plinths/embedded plates/anchor systems, MEP rough-ins (power, earthing/grounding, fire alarm interlocks), architectural finishes, floor protection, temporary works, access/egress, and cranage logistics.
- Quality control: survey checks, tolerances, torqueing, grout testing, electrical tests, functional/safety device tests to applicable standards.
- HSE: task-specific risk controls for lifting, pit works, electrical energization, glass handling, resin anchors, pinch points, and noise/vibration.
Exclusions
- Structural modifications beyond provided supports.
- Permanent power supply beyond provided isolator/DB.
- Builder’s works for pit/shafts and architectural finishes except escalator-provided trims and prescribed sealants.
Key Performance Requirements [Verify per project specifications]
- Truss levelness: ≤1 mm/m, overall ≤3 mm.
- Truss alignment/centerline: ≤3 mm deviation over total run.
- Skirt-to-step gap: typically 3–4 mm, max 6 mm local; uniformity within ±1 mm. [Verify vs EN 115-1 and OEM]
- Comb plate tooth engagement: uniform, depth typically 4–7 mm; no tooth-to-step interference.
- Handrail speed vs step speed: 0 to −2% (handrail not faster than steps) per EN 115-1.
- Electrical insulation resistance: ≥1 MΩ at 500 V DC (typical) [Verify].
- Anchor bolt installation torque/pull-out per OEM and anchor data sheet.
- Grout compressive strength: ≥40 MPa at 28 days (non-shrink) [Verify].
- Functional safety chain continuity: per OEM and EN 115-1.
References
| Document Type | Reference / Number | Revision | Notes |
|---|---|---|---|
| Standard | EN 115-1 (latest) | Primary safety and performance standard in EU/International contexts [Verify local adoption] | |
| Code | ASME A17.1/CSA B44 | North America jurisdictions [Verify local requirement] | |
| Standard | IEC/EN 60204-1 | Electrical safety and verification | |
| Standard | ISO 25745-2 | Energy measurement (if required) | |
| Standard | ASTM C1107 / EN 1504-6 | Grouting of baseplates/anchors | |
| Standard | ISO 898-1 | Bolt grades and torque basis | |
| Guideline | ETA/TR 055 / ACI 318-19 Ch.17 | Anchor qualification and proof testing [Verify jurisdiction] | |
| Standard | ISO 17123 series | Survey equipment verification | |
| Standard | BS 7121 series / ISO 23853 | Rigging and lifting guidance [Verify local regulation] |
Responsibilities
| Role | Responsibility | Name / Party |
|---|---|---|
| Project Manager | Project Manager | Contractor |
| Supervisor | Installation Supervisor | Contractor |
| Lifting AP | Appointed Person (Lifting) | Contractor |
| Surveyor | Land Surveyor | Contractor |
| QA/QC | QA/QC Engineer | Contractor |
| HSE | HSE Officer | Contractor |
| OEM Specialist | Manufacturer’s Specialist | Manufacturer |
| Electrician | Licensed Electrician | Contractor |
| Site Engineer | Site Engineer (Civil) | Contractor |
Resources
| Resource Type | Description | Quantity | Remarks |
|---|---|---|---|
| Manpower | Certified Mobile Crane Operator | 1 | |
| Manpower | Qualified Riggers & Banksman | 3–4 | |
| Manpower | Escalator Installers/Technicians | 4–8 | |
| Manpower | Licensed Electricians/Commissioning Engineer | 2–3 | |
| Manpower | Surveyor with Total Station | 1 |
Materials
| Material | Specification / Grade | Quantity | Remarks |
|---|---|---|---|
| Escalator Assembly (OEM) | EN 115-1 compliant; capacity/rise/angle per design [Verify] | Per BOQ | |
| Anchor Bolts & Studs | ISO 898-1; post-installed anchors ETA-approved; torque per data sheet | As required | |
| Shim Plates/Stainless Shims | Thickness steps 0.1–5 mm; corrosion resistant | Set | |
| Non-Shrink Grout | ASTM C1107 / EN 1504-6, ≥40 MPa @28d, expansion controlled | Per supports | |
| Cables, Lugs, Earthing Bar | IEC 60204-1; copper conductors; green/yellow PE | As required | |
| Gear Oil & Grease | ISO VG 220 gear oil; NLGI 2 lithium grease [Verify OEM] | As required | |
| Balustrade Glass/Panels, Comb Plates | Tempered/laminated glass per EN 12150/EN 14449; anodized/SS panels | Per unit |
Equipment
| Equipment | Capacity / Type | Quantity | Inspection Required |
|---|---|---|---|
| Mobile Crane / Tower Crane | ≥ truss weight × SF [Verify] | 1 | LOLER/Third-party certificate valid |
| Lifting Beam/Spreader Bars, Slings, Shackles | WLL per plan | Set | Color-coded, inspected pre-lift |
| Chain Blocks/Come-alongs | 2–5 t each | 2–4 | Visual inspection |
| Total Station, Digital Level, Laser | 1 | Calibration certificate | |
| Calibrated Torque Wrenches | Up to 600 N·m [Verify] | 2 | Calibration certificate |
| Rotary Hammer/Drill with Dust Extraction | 2 | PAT/inspection tag | |
| Glass Suction Lifters/Panel Trolleys | Per panel mass | 1–2 | Pre-use check |
| MEWP/Scaffold Platforms | 1–2 | Tag/inspection per site rules | |
| Insulation Tester (Megger), Multimeter, Tachometer | 500 V DC megger | 1 | Calibration certificate |
| Grout Mixer, Buckets, Trowels | 1 set | Pre-use check |
Prerequisites
Approvals & Documentation
- Approved shop drawings, calculations (truss support reactions), method statement, ITP, lift plan, risk assessment, and OEM installation manuals available on site.
- Permits to Work: lifting, confined space (if pit classified), hot works (drilling/cutting), electrical energization. [Verify per project HSE plan and local regulations]
Site Readiness
- Pit/shaft structurally complete, dry, illuminated, and accessible; plinths/embedded plates cast to datum. Concrete strength report ≥ design requirement (e.g., ≥25–30 MPa) and curing age adequate for anchoring/grouting. [Verify]
- Survey control points established; centerlines and elevations transferred to pit and landings.
- Permanent power supply availability confirmed up to isolator; earthing points ready; cable containment installed and cleared.
- MEP/architectural interfaces coordinated: no clashes with sprinkler, ducts, finishes; landing nosing finishes recessed per OEM trim requirements.
- Truss offloading/route surveyed; floor loading capacities checked; temporary protections/mats installed.
Tools & Calibrations
- All lifting gear and measuring instruments calibrated/inspected within validity. Color coding per site rules.
Training & Briefings
- Toolbox talk covering rigging, pinch points, glass handling, resin anchor use, and emergency response.
- OEM specialist availability scheduled for critical steps: truss setting, chain tensioning, commissioning.
Materials Verification
- Receipt inspection against packing list; damage check; storage in dry, secure area; glass panels stored on A-frames with edge protection.
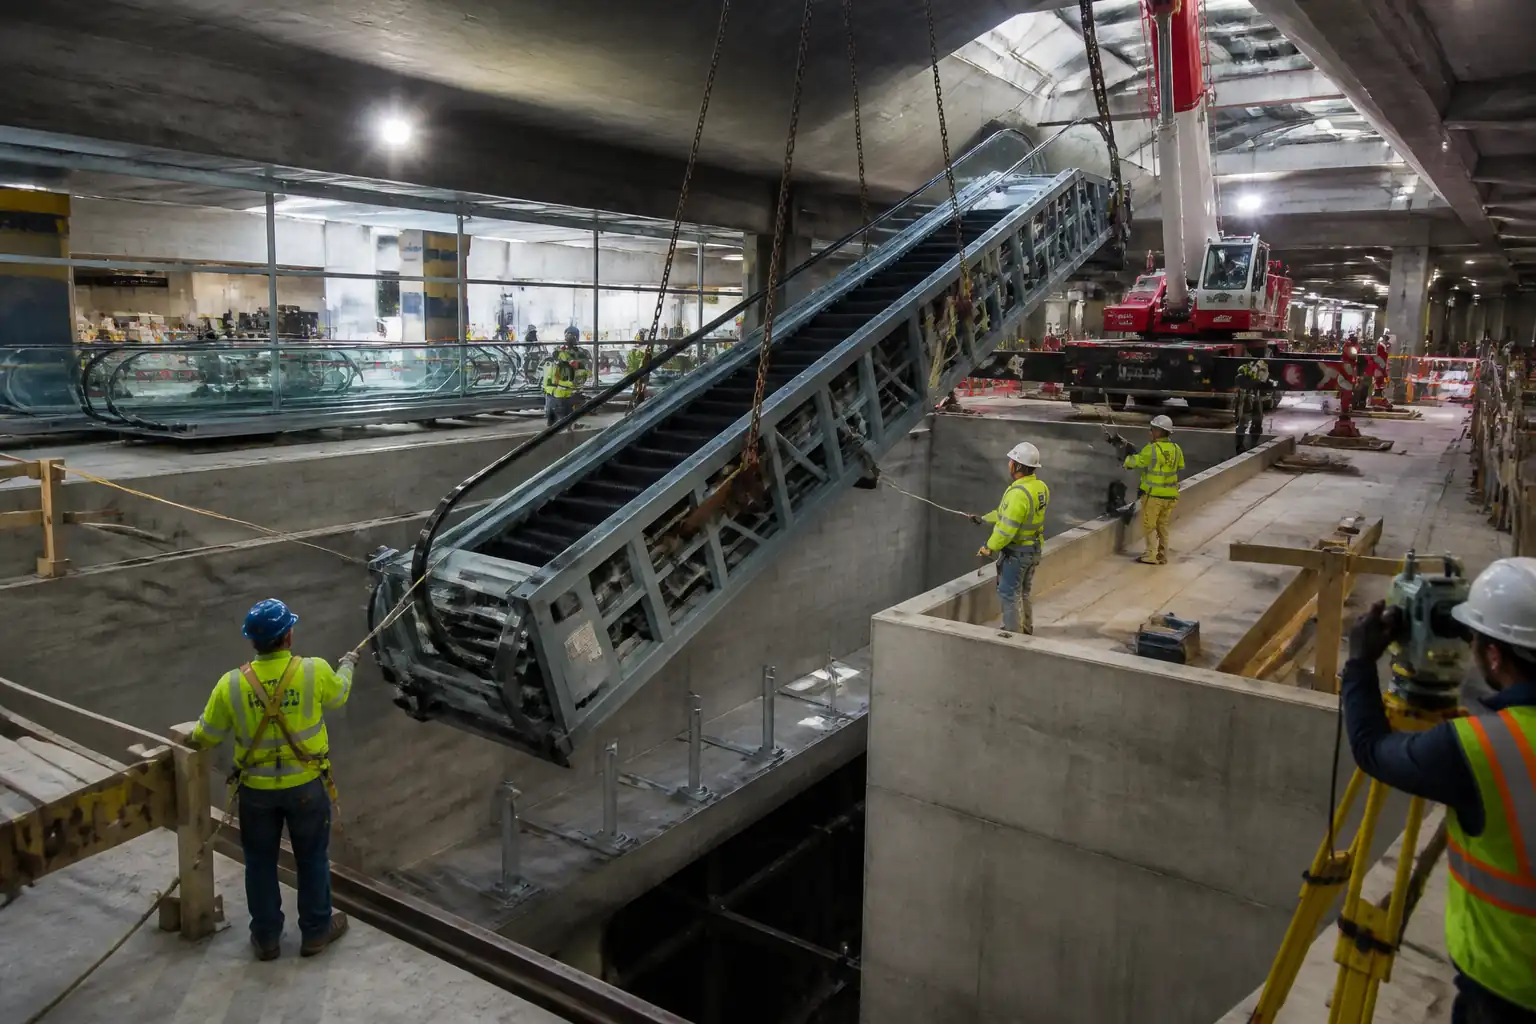
Method Sequence
| Step | Activity | Description | Responsibility | Inspection / Hold Point |
|---|---|---|---|---|
| 1 | Pre-install survey and pit verification | Verify pit dimensions, plinth levels, embedded plates/anchors positions; check clearances per OEM GA. | Site Engineer/Surveyor | Total station/laser level; dimensional check sheet |
| 2 | Lifting plan execution | Confirm crane position, radius, load, slinging points per OEM truss lift diagram; perform lift briefing. | Appointed Person/Crane Operator | Third-party certificates; pre-lift checklist |
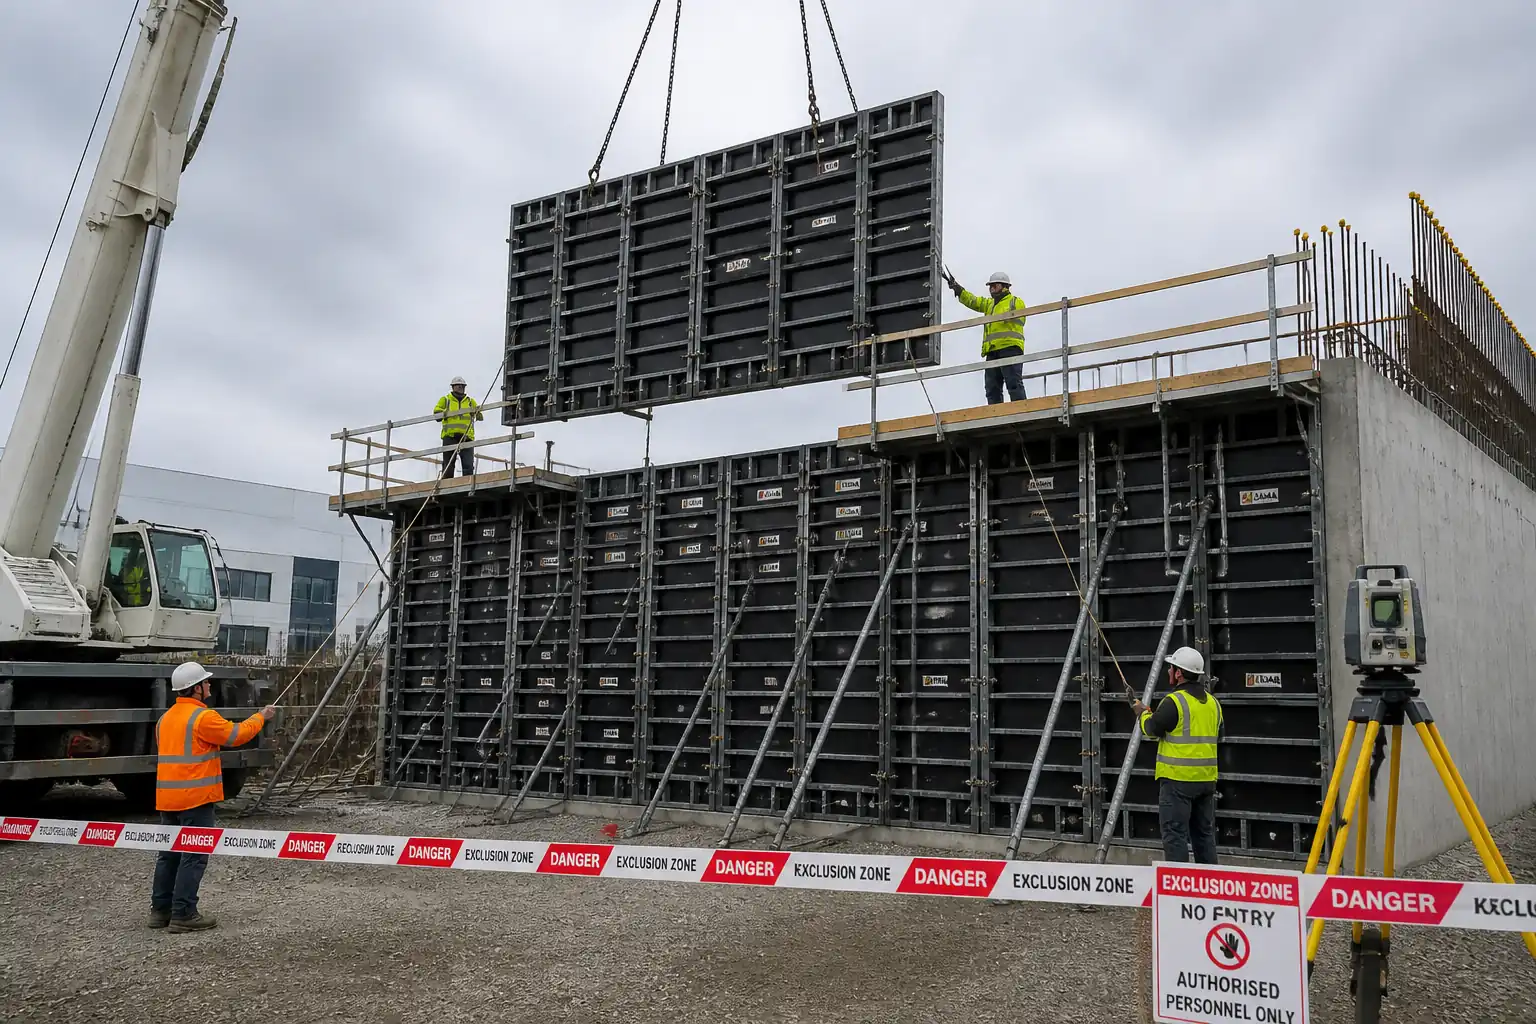
| 3 | Truss lifting and placement | Rig truss using certified spreaders; lift, slew, and lower into pit; maintain clear exclusion zone. | Crane Operator/Riggers | Banksman directs; spotter monitors clearances |
| 4 | Temporary support & coarse alignment | Seat truss on bearing points; install temporary props/chain blocks to adjust height/position. | Installation Supervisor | Visual, initial level check |
| 5 | Final alignment and shimming | Fine-tune level, plumb and centerline; insert precision shims at supports; verify diagonals. | Surveyor/OEM Specialist | Survey verification |
| 6 | Anchoring and torqueing | Drill/clean holes (if post-installed), install anchors per ETA/OEM; tighten to specified torque sequence. | Installers | Hole depth/cleanliness; torque log |
| 7 | Baseplate grouting | Formwork, pre-wet, place non-shrink grout from one side, avoid air entrapment; cure per datasheet. | Installers/QA | Material batch, temperature, flow |
| 8 | Drive/motor/gear alignment | Install main drive, gearbox, and couplings per OEM; align shafts; fill lubricant to level. | OEM Specialist/Electrician | Dial indicator/laser alignment |
| 9 | Step chain installation & tensioning | Install step chains over sprockets; set tension devices; verify chain sag and symmetry. | OEM Specialist | Tension scale/indicator reading |
| 10 | Electrical termination and safety chain | Terminate power/control cables; verify earthing; connect safety devices in safety chain. | Electrician | Visual, continuity |
| 11 | Handrail drive and return assembly | Install handrail drive, return rollers, tensioning; feed handrail loop per OEM. | Installers/OEM | Visual, alignment |
| 12 | Balustrade and skirt installation | Fit balustrade panels (glass/metal) with gaskets; install skirts with uniform gap. | Installers | Glass edge condition; gap gauge |
| 13 | Step installation and landing plates | Install steps, ensure correct chain pinning; install landing plates and trims. | Installers | Visual, fastener torque |
| 14 | Comb plate fitment and adjustment | Set comb plates to mesh uniformly with step cleats; set impact switches. | OEM Specialist | Feeler gauge, visual |
| 15 | Pre-energization checks | Verify mechanical clearances, guards, oil levels, fasteners torqued, safety chain closed. | Supervisor/OEM | Checklist sign-off |
| 16 | Initial run-in at low speed | Bump test rotation; run no-load both directions; observe noise/vibration/temperatures. | OEM/Commissioning Engineer | Thermal/visual observation |
| 17 | Functional and safety device testing | Test E-stops, skirt obstruction, comb impact, missing step, step sag, speed monitor, direction limit, handrail entry, pit stop, phase failure, brake test. | OEM/QA/QC | Witness by Consultant/Authority (as required) |
| 18 | Handrail-speed vs step-speed check | Measure both speeds with tachometer over fixed time/distance. | Commissioning Engineer | Measurement record |
| 19 | Final finishing and signage | Install decking, trims, skirt brushes, lighting, pictograms; clean and protect. | Installers | Visual |
| 20 | As-built, handover, and training | Submit as-built survey, O&M manuals, spares, test certificates; provide operator training. | Project Manager/OEM | Document review |
Health, Safety, and Environment – Safety Controls
Task-specific Hazards and Controls
- Hazard: Truss lifting and suspended load striking personnel/structure
- Consequence: Crush injuries, structural damage
- Control: Engineered lift plan; verified lift points; use spreader beam; tag lines; exclusion zone ≥ load radius; controlled slew and landing
- PPE: Helmet with chin strap, gloves, safety boots, high-vis, eye protection
- Collective Measure: Barriers and spotters; radio comms; banksman control
-
Inspection/Permit: Crane and lifting gear certificates; pre-lift checklist; Lifting PTW [Verify per project HSE plan and local regulations]
-
Hazard: Work in pit/edges and potential falls
- Consequence: Fall from height, fractures
- Control: Edge protection/guardrails or temporary covers; MEWP/scaffold for landing works; maintained access/egress
- PPE: Harness with lanyard where required, hard hat, boots
- Collective Measure: Fixed barriers and toe boards; rescue plan for pit
-
Inspection/Permit: Scafftag/MEWP inspection; Working at Height PTW
-
Hazard: Pinch/shear points during chain/step installation
- Consequence: Finger/hand injuries, entanglement
- Control: Lock-out/tag-out; install mechanical guards; use push/pull tools; slow manual rotation only
- PPE: Cut-resistant gloves, eye protection
- Collective Measure: Exclusion of non-essential persons; clear signage
-
Inspection/Permit: LOTO log; supervisor sign-off before energization
-
Hazard: Electrical energization and testing
- Consequence: Electric shock, arc flash, equipment damage
- Control: LOTO; verify de-energized; IR and continuity tests before first power; rated isolators; correct PE bonding
- PPE: Electrically rated gloves, arc-rated clothing as required, insulated tools
- Collective Measure: Barriers and warning tags; dedicated test area
-
Inspection/Permit: Electrical PTW; test instrument calibration certificates
-
Hazard: Handling and installation of glass balustrades
- Consequence: Lacerations, glass breakage, dropped object
- Control: Use suction lifters and panel trolleys; install edge protectors; lift by trained team
- PPE: Cut-resistant gloves, eye/face protection, safety boots
- Collective Measure: Exclusion zone below workface; secure staging
-
Inspection/Permit: Panel inspection for chips/cracks; lifting gear check
-
Hazard: Resin anchors and chemical exposure
- Consequence: Skin/eye irritation, sensitization
- Control: Follow SDS; mixing/curing times per TDS; adequate ventilation; spill kits ready
- PPE: Chemical-resistant gloves, goggles, long sleeves
- Collective Measure: Dedicated mixing area with trays
-
Inspection/Permit: COSHH/SDS briefing; chemical PTW if required
-
Hazard: Power tools, drilling, and hot works (if any cutting)
- Consequence: Noise-induced hearing loss, sparks, dust inhalation
- Control: Dust extraction; wet suppression where safe; hot work permit and fire watch; rated extinguishers
- PPE: Hearing protection, dust masks (FFP2/3 as required), gloves, goggles
- Collective Measure: Acoustic screens if needed; housekeeping of slurry/dust
-
Inspection/Permit: PAT testing; hot work PTW; noise monitoring if required
-
Hazard: Manual handling of steps/components
- Consequence: Musculoskeletal injuries
- Control: Team lifts, trolleys, lift-assist devices; weight labeling
- PPE: Gloves, supportive footwear
- Collective Measure: Manual handling training; limit lift distances
-
Inspection/Permit: Supervisor checks; lifting assessment
-
Hazard: Fire and confined space (if pit classified)
- Consequence: Asphyxiation, smoke inhalation
- Control: Gas test (O2/CO/LEL) if required; continuous ventilation; fire watch during hot works
- PPE: As required per gas test; standard PPE
- Collective Measure: Emergency retrieval plan; extinguishers
-
Inspection/Permit: Confined space PTW; gas test records
-
Hazard: Noise and vibration from initial runs
- Consequence: Hearing damage, nuisance
- Control: Schedule noisy tests; maintain equipment; limit exposure duration
- PPE: Hearing protection
- Collective Measure: Noise barriers where practical
-
Inspection/Permit: Noise monitoring if stipulated by project HSE
-
Hazard: Slips/trips from debris, oil, grout
- Consequence: Sprains/fractures
- Control: Spill trays, absorbents, immediate cleanup; cable management
- PPE: Non-slip safety boots
- Collective Measure: Good housekeeping regime
- Inspection/Permit: HSE inspections and daily walkdowns
[Verify per project HSE plan and local regulations]
Environmental Controls
Environmental Risks and Controls
- Oils and lubricants
- Risk: Spills contaminating floors/drains
- Control: Store in bunded trays; spill kits at point of use; label waste oil drums; dispose via licensed contractor
-
Inspection: Weekly spill kit check; waste transfer notes retained
-
Grout and cement washout
- Risk: Alkaline runoff
- Control: Use lined mixing area; collect washwater; prohibit discharge to drains; cure compound per TDS
-
Inspection: Supervisor sign-off of containment before pour
-
Dust and silica from drilling
- Risk: Air quality degradation
- Control: Vacuum extraction; wet suppression where safe; FFP2/FFP3 RPE as needed
-
Inspection: Spot checks; maintain filters
-
Noise and vibration
- Risk: Nuisance and hearing risks
- Control: Limit noisy activities to approved hours; maintain tools; use acoustic screens
-
Inspection: Noise logs if required
-
Packaging and scrap
- Risk: Waste accumulation
- Control: Segregate wood, metal, cardboard, plastics; recycle where possible
-
Inspection: Waste area audits; removal tickets filed
-
Energy consumption during commissioning
- Risk: Unnecessary emissions
- Control: Limit run times; verify load only when necessary; switch off when idle
- Inspection: Commissioning log review
QA/QC
Quality Assurance
- Adhere to approved ITP with defined hold, witness, and surveillance points. OEM specialist to sign critical checks (truss alignment, chain tension, safety tests).
- Instruments: Total station, torque wrenches, megger, tachometer—use within calibration validity; keep certificates on file.
Key Quality Controls and Records
- Survey controls: Pre- and post-install as-built; record level/offsets; maintain within tolerances.
- Anchors: Hole drilling per TDS; embedment depth verified; torque recorded; proof load test where specified (e.g., 1.25–1.5× service load) [Verify].
- Grout: Batch records; flow/slump per datasheet; compressive strength tests (e.g., cubes at 7/28 days) meeting specified MPa.
- Fasteners: Torque checklists; cross-marking/paint marks after final torque.
- Electrical: IR ≥ specified; continuity and polarity correct; PE bonding resistance per IEC 60204-1.
- Mechanical clearances: Skirt gap, comb engagement, step-to-skirt uniformity; guards/brushes fitted.
- Functional testing: All safety devices per EN 115-1/OEM; stopping distance at rated load/speed within standard; handrail speed differential 0 to −2%.
- Documentation: IRs, checklists, cube tests, torque logs, electrical test sheets, OEM commissioning sheets, as-built survey, O&M manuals.
Hold/Witness Points [Indicative]
- Hold: Truss alignment prior to final torque/grout.
- Witness: Anchor installation/torque; grout pour; pre-energization checks; functional/safety device tests.
Nonconformance and Correction
- Record NCR for deviations; implement corrective actions; re-test affected parameters; update as-built and logs accordingly.
Attachments
Attachments (Indicative)
- OEM General Arrangement drawings and installation manual
- Approved lift/rigging plan and rigging sketch
- Truss setting survey report (pre/post)
- Anchor data sheets, installation instructions, torque values
- Grout technical data sheet and MSDS; cube test results
- Electrical single-line diagram, cable schedules, test sheets (IR, continuity)
- QA/QC checklists: alignment, torque, skirt gap, comb engagement
- Functional and safety device test sheets (EN 115-1/ASME A17.1 as applicable)
- As-built drawings and deviation records
- O&M manuals, spare parts list, warranty certificates
- HSE documents: PTWs, TBT records, lifting gear certificates, COSHH/SDS
This content is a read-only public reference. Download or customize to get an editable version.
ITP preview
The first inspection activities from the linked ITP for Method Statement – Heavy-Duty Escalator Installation (Transit/Commercial Building):
| Activity | Inspection / Test | Acceptance Criteria | Responsibility | Record |
|---|---|---|---|---|
| Pre-install documentation/approvals | Verify approved drawings, lift plan, MS/ITP, permits | All approvals current and available | PM/QA-QC | Approval register/IR |
| Pit/plinth survey verification | Dimension/level survey | Within tolerances (level ≤3 mm; dims ±5 mm) [Verify] | Surveyor/Consultant | Survey report/IR |
| Concrete strength confirmation | Review cube results or core tests | ≥ specified compressive strength [Verify] | QA-QC/Consultant | Test certificates |
Showing 3 of 18 inspection activities. View full ITP →
Related Inspection and Test Plan
An Inspection and Test Plan (ITP) is available for Method Statement – Heavy-Duty Escalator Installation (Transit/Commercial Building). The ITP defines the inspection activities, acceptance criteria, hold and witness points, responsible parties, and records required to verify the work described in this method statement.
View the Method Statement – Heavy-Duty Escalator Installation (Transit/Commercial Building) ITP →Frequently asked questions
Continue with related Quollnet resources connected to this method statement.