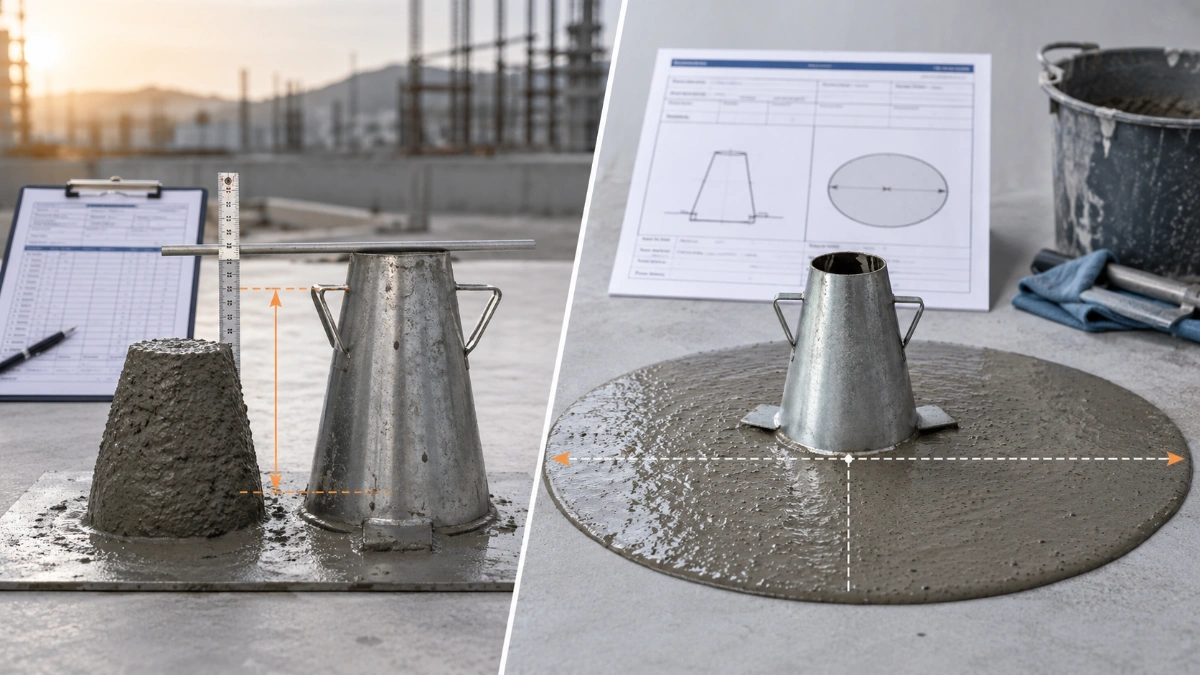
Concrete Slump Test: Procedure, Values, Acceptance and Field Troubleshooting
The concrete slump test measures the consistency of fresh conventional concrete by the vertical subsidence after a standard cone is lifted. A useful slump result depends on representative sampling, correct test procedure, the project-specified target, range or class, and traceable recording; the test itself does not define acceptance, water content, strength or pumpability. For self-compacting concrete (SCC), use the specified slump-flow test rather than ordinary slump.
Think of the slump test as one link in a chain:
Truck & mix identity → representative sample → correct test → compare with project requirement → record → disposition.
A precise number is not useful if the sample, requirement or load identity is wrong.
Concrete slump test: choose the answer you need
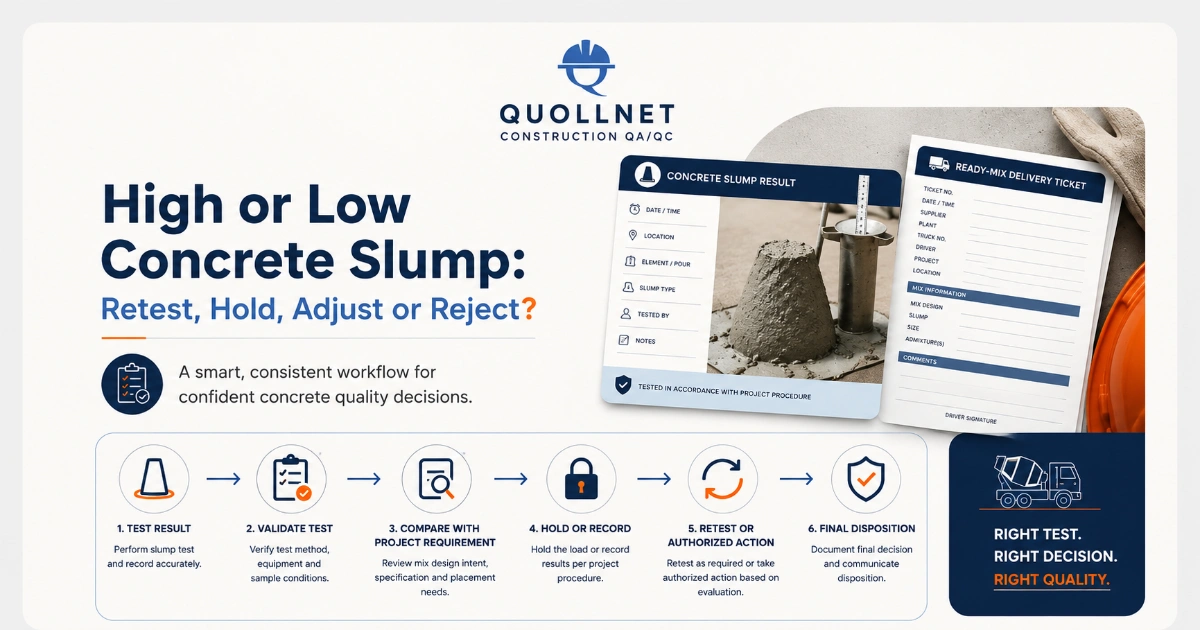
Follow High or Low Concrete Slump: Retest, Hold, Adjust or Reject?
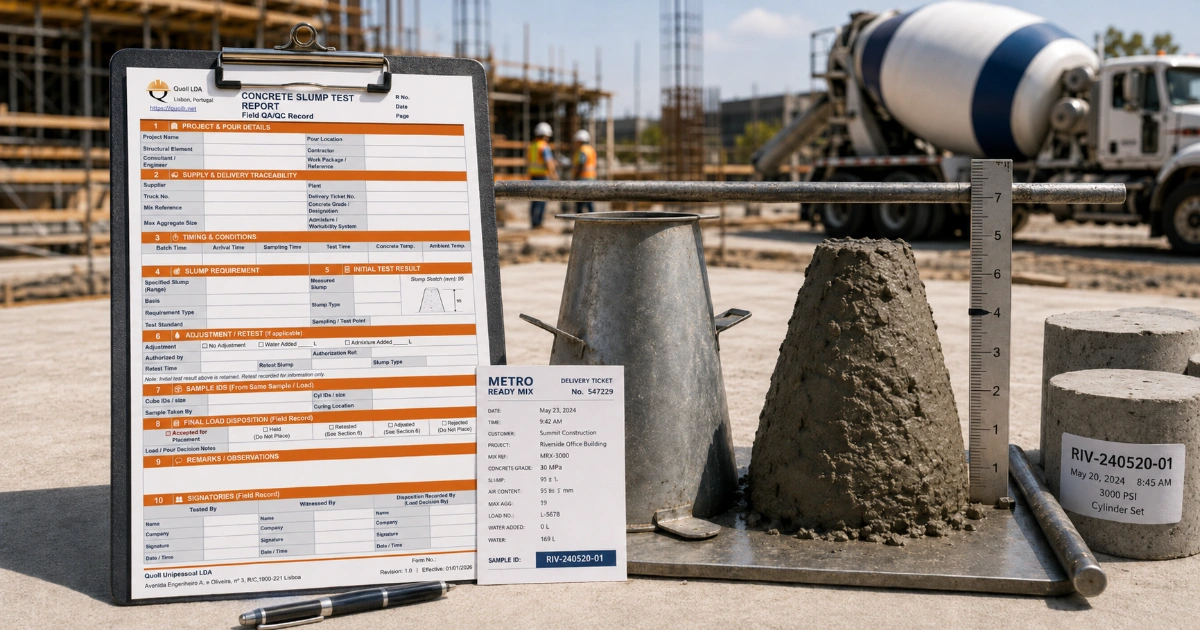
Use the Concrete Slump Test Report Template.
Compare Slump Test vs Slump Flow Test.
What does the concrete slump test actually measure?
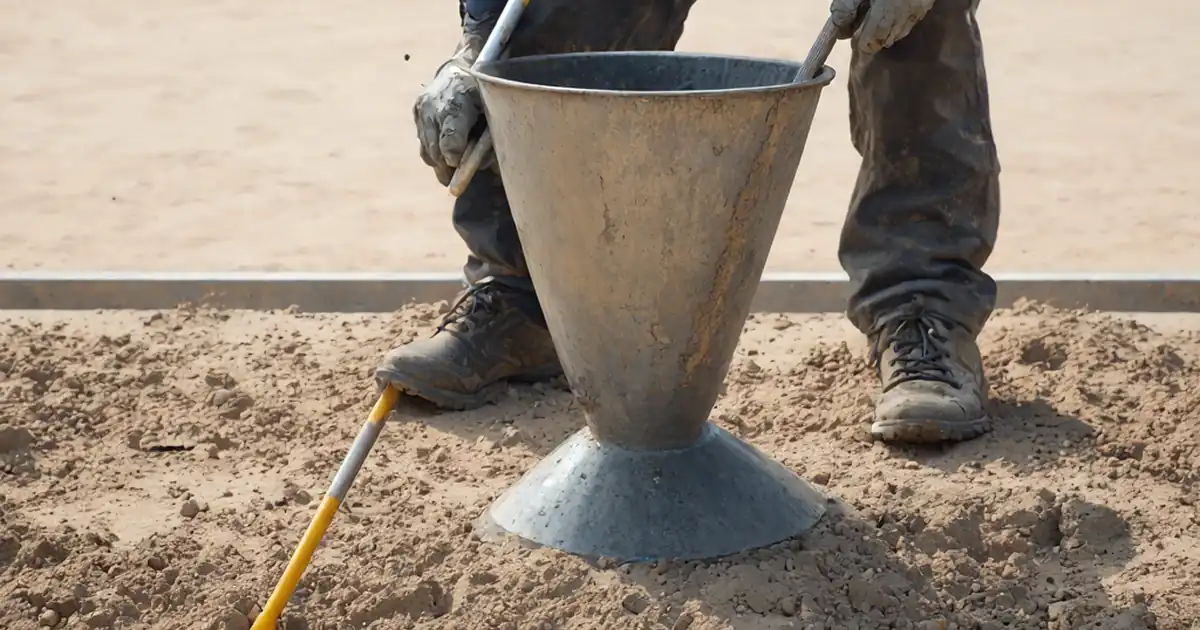
The concrete slump test measures fresh-concrete consistency: how much a moulded mass of plastic concrete subsides vertically after the slump cone is removed. It is a rapid field test that is sensitive to changes in the fresh mixture and is useful for checking whether delivered concrete is behaving consistently with the approved requirement.
That is narrower than the way the word workability is often used on site. Workability is a broader practical idea that can include mobility, compactability, finishability, pumpability, cohesion and response to vibration. Slump gives one useful consistency measurement, but it does not capture all of those behaviors.
What slump can and cannot tell you
| Slump can help you assess | Slump does not prove by itself |
|---|---|
| Fresh consistency relative to a specified requirement | Compressive strength |
| Changes between loads or over time | Water-cement or water-binder ratio |
| Whether a conventional concrete result is within the project target, range or class | Pumpability or passing ability |
| Whether further investigation is needed when consistency changes unexpectedly | Whether concrete should automatically be accepted or rejected without the project disposition rules |
Representative sampling comes before the slump test
A technically correct slump test performed on a poor sample can still produce a misleading result. The sample needs to represent the concrete being assessed and remain traceable to the correct truck, batch, mix and pour location.
Under the ASTM route, ASTM C172/C172M-25 provides procedures for obtaining representative samples of freshly mixed concrete. Under the EN route, BS EN 12350-1:2019 covers sampling and common apparatus for fresh-concrete testing. Project procedures may add sampling locations, frequencies, witness points and documentation requirements.
On site, the practical sequence is simple: verify the load, obtain the required representative sample, protect it from contamination or segregation, identify it, then move promptly into the fresh-concrete tests. The Fresh Concrete Sampling Checklist focuses specifically on that first step.
How the concrete slump test is performed
The detailed procedure must follow the test method adopted by the project. ASTM C143/C143M-26b is the current ASTM slump test method. BS EN 12350-2:2019 is the current BSI/EN slump-test standard.
At a high level, the field sequence is:
- Prepare the apparatus and test surface. The cone, base, rod and measuring equipment must be suitable, clean and ready for use.
- Place the fresh concrete in the cone in the prescribed layers. Both common routes use three layers and controlled rodding, but the adopted standard governs the exact procedure.
- Strike off the top surface. Complete the moulding without unnecessary delay or disturbance.
- Lift the cone vertically. The lift should be smooth and controlled so the concrete is allowed to subside naturally.
- Measure the slump using the method required by the adopted standard.
- Observe the shape and validity of the result. Shear, collapse or continuing movement may require the test to be treated according to the repeat or suitability rules of the adopted method.
- Record the result immediately with the load and project requirement.
ASTM C143 and BS EN 12350-2 are test methods, not universal acceptance tables
This distinction prevents many site arguments. A slump test method tells you how to obtain the measurement. It does not create one universal acceptable slump for slabs, beams, columns, walls or every concrete mix.
ASTM C94/C94M-26c is the current ASTM specification for ready-mixed concrete and recognizes that purchaser requirements can govern where specified. In the EN system, BS EN 206-1:2026 is the current concrete specification, performance, production and conformity standard, while BS EN 12350-2 provides the slump test method.
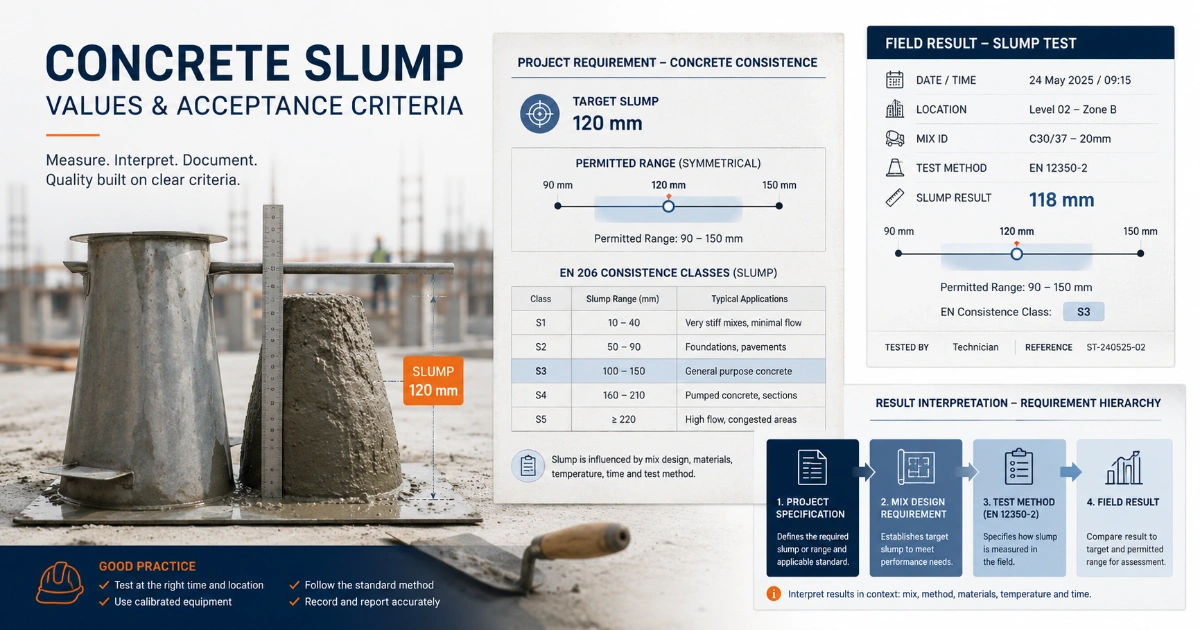
The practical hierarchy is therefore:
Project specification / approved mix / concrete order — defines what consistency is required.
Applicable concrete specification — provides the governing specification framework.
Test method — defines how the slump measurement is made.
Field result — is compared with the actual requirement.
What is a good concrete slump value?
There is no single “good” concrete slump value that applies to all structural elements. The useful value is the one appropriate to the approved concrete system, placement method and project requirement.
A project may express its requirement as a target slump, a permitted range, a minimum, a maximum or a consistence class. Under the EN route, slump classes such as S1 to S5 may be used. The required class is not selected simply because the concrete is going into a slab, beam, column or wall.
When designers or specifiers choose the requirement, placement method, reinforcement congestion, section geometry, compaction access, finishing needs, pump arrangement and approved admixture strategy should be considered. The detailed design-side discussion is in How to Specify Concrete Slump for Slabs, Beams, Columns and Walls.
For actual target, range and class interpretation, use Concrete Slump Values & Acceptance Criteria.
How should a measured slump be accepted?
A measured slump should be accepted or investigated against the requirement that applies to that specific concrete, not against a generic internet table or a remembered “normal” value.
Before deciding anything, confirm:
- the correct truck, delivery ticket and approved mix;
- the point at which the project requires the slump to be measured;
- the specified target, range, maximum, minimum or class;
- the applicable tolerance or assessment rule;
- whether the sample and test were valid;
- whether authorized water or admixture adjustments occurred; and
- the project procedure for retesting, holding, adjusting, accepting or rejecting a load.
What to do when slump is too high
When the measured slump is higher than the permitted requirement, first protect the decision process rather than jumping directly to a cause. Confirm that the sample, test and requirement are correct. Then hold the load if required by the project procedure and investigate the delivery ticket, mix identity, batching information and any recorded additions.
A high slump can be caused by excess water, but it can also result from an approved high-range water reducer, an intentionally high-workability mix, delayed or unexpected admixture response, incorrect batching, measurement problems or another change in the concrete system.
Do not diagnose the cause from the slump number alone.
What to do when slump is too low
A low slump should be handled with the same discipline. Confirm the validity of the test and compare it with the actual project requirement. Possible causes include slump loss with time, hot weather, long waiting time, under-dosing or admixture incompatibility, incorrect water content, mix or ticket mismatch, aggregate changes or an unsuitable sampling/test sequence.
Low slump does not prove that the concrete is stronger or that the water-cement ratio is lower. It may instead create a placement and consolidation problem.
For both high and low results, the detailed field workflow is in High or Low Concrete Slump: Retest, Hold, Adjust or Reject?.
How plasticizers and superplasticizers change slump
Water-reducing admixtures can change the relationship between slump and water content. A superplasticized mix may achieve high workability without simply increasing mixing water, because the admixture improves dispersion of the cementitious particles.
This is why two concretes can have similar slump but different water-binder ratios, and why a high slump does not automatically mean weak concrete. Conversely, adding uncontrolled water can directly change the water content and may alter the approved mix.
Slump retention is also important. Concrete may lose workability during haul, waiting or placement, while retention-oriented admixture systems are designed to preserve useful consistency for longer periods. The complete explanation is in Plasticizers and Superplasticizers: How They Affect Concrete Slump.
Does slump tell you whether concrete will pump well?
No. Slump can be part of the picture, but pumpability depends on the complete fresh-concrete rheology: paste volume, aggregate grading, cohesion, lubrication, stability, line configuration, temperature and workability retention all matter.
A very high slump does not automatically solve difficult pumping, reinforcement congestion or restricted compaction access. In some situations the better engineering decision is to change the concrete system, not simply increase ordinary slump.
Slump test vs slump flow test for SCC
Self-compacting concrete (SCC), also called self-consolidating concrete in ASTM terminology, is assessed using a different test approach when slump flow is specified. Ordinary slump measures vertical subsidence; slump flow measures the horizontal spread of SCC after the cone is lifted.
ASTM C1611/C1611M-21 is the active ASTM slump-flow test for self-consolidating concrete. BS EN 12350-8:2019 covers slump flow and T500 time for self-compacting concrete under the EN route.
The results are not interchangeable, even though both may be expressed in millimetres and both use a cone-shaped mould. Use Slump Test vs Slump Flow Test: When to Use Each when deciding which test belongs to the approved concrete system.
How to report one concrete slump test
A good slump report should make the result traceable enough that another engineer can understand what was tested, against what requirement, and what happened next.
Useful fields include:
- project, pour and location;
- date and test time;
- truck and delivery-ticket identity;
- approved mix designation;
- sampling and test location;
- specified slump requirement;
- measured slump and test method;
- retest information where applicable;
- authorized water or admixture addition where applicable;
- related temperature and specimen IDs where the project record links them; and
- final disposition and authorization.
The Concrete Slump Test Report Template provides the single-test record in Excel and PDF form.
Why a slump register is different from a slump report
A slump report documents one test in detail. A slump register or slump log tracks many tests across the project so trends, retests, outside-range results and related records can be found quickly.
The register should link each entry back to its load, detailed report, pour location, specimens and disposition rather than trying to replace those records. Use the Concrete Slump Register & Log Template for that project-level view.
Concrete truck traceability matters as much as the test number
The slump result belongs to a specific concrete delivery. If the test cannot be connected back to the correct truck, batch ticket, approved mix and placement location, the QA/QC value of the measurement drops sharply.
A separate Concrete Truck Arrival & Delivery Record can connect truck arrival, ticket review, fresh-concrete testing, specimen IDs, ITP references and final load disposition without turning the slump report into a complete delivery log.
The complete site workflow: from truck arrival to disposition
| Stage | What the team should establish | Record / resource |
|---|---|---|
| 1. Receive | Correct truck, ticket, mix, pour and timing | Truck delivery record |
| 2. Sample | Representative, identified fresh-concrete sample | Sampling checklist |
| 3. Test | Valid slump measurement using the adopted method | Slump procedure checklist |
| 4. Compare | Applicable target, range, class or limit | Values & acceptance guide |
| 5. Record | Traceable result and linked evidence | Test report + register |
| 6. Disposition | Release, retest, authorized adjustment, hold or rejection according to project rules | High/low result workflow |
For a broader operational procedure covering ready-mix receipt, testing and acceptance, see the Method Statement: Receiving and Acceptance Testing of Ready-Mix Concrete on Site and its ITP: Receipt and Field Testing of Ready-Mix Concrete.
Common concrete slump test mistakes
- Testing a sample that is not representative of the load.
- Using the wrong project requirement or an old mix revision.
- Confusing slump with a direct measure of strength or water content.
- Choosing an element-based “standard slump” from a generic table.
- Using ordinary slump for SCC when slump flow is the specified test.
- Performing the test correctly but failing to link the result to the truck and delivery ticket.
- Ignoring the effect of temperature, waiting time and admixture response on slump loss.
- Adding water or admixture informally before the authorized adjustment process is confirmed.
- Automatically rejecting any outside-range result without following the project’s retest and disposition rules.
- Recording only the measured number without the specified requirement and final disposition.
Troubleshooting unexpected slump results
When a result looks wrong, investigate the system rather than chasing the number. A useful troubleshooting order is:
- Check the test. Was the sample representative? Was the apparatus suitable? Was the procedure completed correctly and promptly?
- Check the requirement. Are you comparing against the correct mix, revision, measurement point and specification?
- Check the load. Verify ticket, batch time, mix ID, truck identity and any authorized additions.
- Check time and temperature. Consider haul duration, waiting time and environmental conditions.
- Check admixtures. Review dosage, retention strategy, compatibility and any site redosing.
- Check whether the concrete system is appropriate. Difficult placement may require a different consistency strategy or SCC rather than ever-higher ordinary slump.
- Apply the approved disposition process. Hold, retest, adjust, accept or reject only within the project’s defined authority.
Concrete slump test: the practical takeaway
A good slump test is not just a cone, a ruler and a number. It is a controlled QA/QC decision point connecting the approved mix to the actual delivery and placement. The test is most useful when the team knows what requirement applies, samples correctly, follows the adopted method, records the result with full traceability and uses a defined process when the value is outside the permitted requirement.
If you are designing the requirement, start with how to specify concrete slump. If you are testing on site, use the slump procedure checklist. If the number is outside the limit, move to the controlled high/low slump workflow rather than improvising at the truck.
References
ASTM C143/C143M-26b – Standard Test Method for Slump of Concrete
ASTM C172/C172M-25 – Standard Practice for Sampling Freshly Mixed Concrete
ASTM C94/C94M-26c – Standard Specification for Ready-Mixed Concrete
ASTM C1611/C1611M-21 – Standard Test Method for Slump Flow of Self-Consolidating Concrete
BS EN 12350-1:2019 – Testing fresh concrete: Sampling and common apparatus
BS EN 12350-2:2019 – Testing fresh concrete: Slump test
BS EN 12350-8:2019 – Testing fresh concrete: Self-compacting concrete slump-flow test
BS EN 206-1:2026 – Concrete: Specification, performance, production and conformity