Method Statement: Vinyl Flooring Installation for Commercial Interiors – Method Statement
AI-assisted method statement with matching ITP, PDF download, and Excel export.
More than a static template
Unlike a downloadable Word or PDF template, this method statement is an AI-assisted editable starting point connected directly to a matching Inspection and Test Plan. Every section is structured, project-adaptable, and ready to export.
- AI-assisted drafting — Customize every section with AI for your specific project scope.
- Linked ITP — A matching inspection and test plan is generated alongside the method statement.
- Multiple export formats — Download as a formatted PDF or editable Excel spreadsheet.
- Editable starting point, not a final document — Review, verify, and adjust all content against your project requirements before use.
Static template vs. Quollnet workflow
| Feature | Static template | Quollnet |
|---|---|---|
| Project-specific content | Manual fill-in required | AI-assisted customization |
| Linked ITP | Separate document, no link | Matching ITP included |
| Export formats | Usually PDF only | PDF and Excel |
| Structured sections | Free-form layout | 13 standardized sections |
| Saved to your account | Local file only | Cloud-saved, reusable |
| Content accuracy | You verify everything | AI-assisted, you still verify |
| Cost | Often free but time-intensive | Free to customize and download |
What you can customize
When you save this method statement to your account, every section becomes editable. The following 13 sections are included:
- Scope — Defines the activity and its boundaries.
- References — Standards, specifications, and drawings.
- Responsibilities — Roles and accountabilities.
- Resources — Labour, plant, and equipment summary.
- Materials — Materials and compliance requirements.
- Equipment — Tools and equipment details.
- Prerequisites — Hold points and pre-conditions.
- Method sequence — Step-by-step construction sequence.
- Safety controls — HSE risk controls and PPE.
- Environmental controls — Environmental mitigation measures.
- QA/QC — Quality inspection and test requirements.
- ITP — Inspection and Test Plan table (has its own page).
- Attachments — Referenced drawings and documentation.
Why this method statement is used
This method statement is used to define and communicate the approved procedure for carrying out method statement: vinyl flooring installation for commercial interiors on site. It ensures the work is planned in advance, the correct resources and controls are in place, and all personnel understand responsibilities, sequence, quality requirements, and safety controls before work begins. It aligns site execution with the documented scope and acceptance expectations.
Who uses this method statement
This method statement is used by contractors, site supervisors, project engineers, QA/QC engineers, HSE officers, consultants, and client representatives. It serves as a shared reference for planning, execution, supervision, inspection, and approval of the activity on site.
When it is prepared and submitted
The method statement is prepared before the work activity starts and submitted as part of the pre-construction documentation package for review and approval.
Who reviews or approves it
The method statement is usually submitted to the client representative, consultant, resident engineer, or project management consultant for review and approval before the work commences.
Important approval note
This method statement is an AI-assisted editable starting point, not a pre-approved document. Before use on any project, all content must be reviewed and approved by the relevant parties (superintendent, principal contractor, or client representative) in accordance with your contract and project quality plan.
For example: if your specification requires a departure from a referenced standard, that departure must be documented and approved separately — this method statement will not capture that automatically. Always verify against your applicable drawings, specifications, and regulatory requirements.
Method statement content
Scope
Overview
This method statement covers the complete installation of resilient vinyl floor finishes (sheet, tile, and LVT) in commercial interiors, including:
- Substrate inspection and preparation (concrete, screed, or approved underlayment)
- Moisture/vapour emission and pH testing
- Surface levelling, patching, and priming
- Adhesive selection and application
- Sheet and tile layout, cutting, fitting, rolling
- Heat welding of sheet seams (where specified)
- Edge detailing (coved skirtings, cap strips, thresholds, trims)
- QA/QC inspections, testing, ITP hold/witness points
- Final cleaning, protection, and handover documentation
Exclusions
- Structural slab works, screed casting, and major substrate remediation beyond light to moderate preparation. Major remediation to be separately instructed.
- Waterproofing systems unless specified as part of moisture mitigation.
Location
- Interior dry and moderately wet commercial spaces such as corridors, offices, classrooms, retail areas, back-of-house. For wet rooms or healthcare areas, confirm system suitability and detailing [Verify per project specifications].
Constraints/Assumptions
- Building envelope is sealed and HVAC operational prior to installation to maintain stable temperature and humidity.
- Substrate is sound, dry, dimensionally stable, and free of laitance and contaminants prior to works.
References
| Document Type | Reference / Number | Revision | Notes |
|---|---|---|---|
| Standard | ASTM F710 | General substrate prep requirements. | |
| Standard | ASTM F2170 | RH testing. Typical limit 75–85–95% RH depending on adhesive/system [Verify per project specifications and manufacturer]. | |
| Standard | ASTM F1869 | MVER typical limit 3–5 lb/1000 ft²/24h [Verify per project specifications and manufacturer]. | |
| Standard | ASTM F3010 | For epoxy moisture mitigation systems when RH/MVER exceed limits. | |
| Standard | BS 8203 | Installation guidance for vinyl and other resilient coverings. | |
| Standard | BS 8204 | Typical SR1 = 3 mm under 2 m straightedge [Verify per project specifications]. | |
| Standard | ISO 10581 / EN 649 / ISO 10582 | Material performance classification (wear group, slip, reaction to fire) [Verify per project specifications]. | |
| Product Data | Per selected brands | Open time, notch, coverage rates, RH/pH limits, welding parameters. |
Responsibilities
| Role | Responsibility | Name / Party |
|---|---|---|
| PM | Ensure prerequisites, approvals, and hold points are met | Main Contractor |
| SE | Verify SR tolerance, levels, and layout per drawings | Main Contractor |
| QA/QC | Arrange inspections, testing, and sign-offs | Main Contractor |
| HSE | Toolbox talks, permits, inspections, PPE compliance | Main Contractor |
| Supervisor | Method compliance, workmanship, productivity | Approved Flooring Subcontractor |
| Installers | Follow TDS, use correct tools and techniques | Approved Flooring Subcontractor |
| Engineer/Consultant | Review ITP milestones, mock-up, final acceptance | Engineer |
Resources
| Resource Type | Description | Quantity | Remarks |
|---|---|---|---|
| Manpower | Lead crew of 4–8 installers | 1 | |
| Manpower | Cutting, fitting, welding | 4-8 | |
| Manpower | Handling, cleaning, disposal | 2-4 | |
| Manpower | Inspections and records | 1 |
Materials
| Material | Specification / Grade | Quantity | Remarks |
|---|---|---|---|
| PVC Sheet | Wear layer, color/pattern per schedule | As per drawings + 5% waste | |
| PVC Tile/LVT | Design per finishes schedule | As per drawings + 5% waste | |
| PVC Welding Rod | Diameter 3–4 mm | As required | |
| Adhesive | RH/MVER limits per TDS [Verify] | Coverage per TDS | |
| Adhesive | High bond/chemical resistance | Coverage per TDS | |
| Primer | Per system | As required | |
| SLU | Feather to 10–30 mm [Verify] | As required | |
| Patching Compound | Skim finishing | As required | |
| Epoxy DPM | Manufacturer-approved | As required | |
| Profiles | Per detail drawings | As required | |
| Trims | Compatible with flooring | As required | |
| Protection | Ram-type board or equivalent | As required |
Equipment
| Equipment | Capacity / Type | Quantity | Inspection Required |
|---|---|---|---|
| In-situ RH probes | As required | ||
| MVER test kits | As required | ||
| pH testing | 1 set | ||
| Grinder + vac | 1–2 sets | ||
| Measuring | 2 | ||
| Application | As required | ||
| Welding | 1–2 sets | ||
| Cutting | As required | ||
| Ventilation | As required | ||
| PPE | Sets for crew |
Prerequisites
Approvals and Documentation
- Approved shop drawings, room finish schedules, and detail drawings.
- Approved materials submittals: vinyl, adhesives, primers, levelling compounds, trims, welding rods.
- Manufacturer’s TDS/SDS available on site.
- ITP approved with defined hold/witness points.
Site and Environmental Conditions
- Building envelope sealed; HVAC operational maintaining 18–27°C and 35–65% RH for at least 48 h before, during, and 48 h after installation [Verify per manufacturer].
- Substrate age: Concrete/screed cured for minimum 28 days or as required to meet RH/MVER/pH limits [Verify].
- Lighting suitable for inspection of finish (≥500 lux recommended in workface areas).
Substrate Readiness
- Base structurally sound; no loose areas, laitance, oil, paint, curing compounds, or contaminants.
- Surface regularity: Target SR1 (≤3 mm under 2 m straightedge) unless specified otherwise [Verify].
- Moisture and pH tests planned and scheduled per standards; locations marked.
Samples/Mock-up
- Provide a mock-up area of 5–10 m² showing joints, welding, edge profiles, transitions, and protection. Obtain written approval prior to full installation.
Utilities and Safety
- Power supply available for grinders, welders, vacuums.
- Waste bins/segregation in place. Spill kit available.
- Task-specific risk assessment and toolbox talk completed for crew on the day of works.
Method Sequence
| Step | Activity | Description | Responsibility | Inspection / Hold Point |
|---|---|---|---|---|
| 1 | Pre-Start Briefing and Area Handover | Confirm area readiness, drawings, finishes schedule, and clear working zone. Conduct toolbox talk and verify permits (incl. hot work if welding policy requires). | Flooring Supervisor / HSE Officer | Pre-start checklist |
| 2 | Substrate Survey | Check levels, cracks, weak zones. Map defects. Verify SR tolerance with 2 m straightedge at 3–5 locations per 100 m² minimum. | Site Engineer / QA/QC | Visual + SR checks |
| 3 | Surface Preparation | Mechanically abrade to remove laitance/contaminants using grinder/shot blaster with HEPA extraction. Repair cracks; fill holes. Vacuum to dust-free standard. | Installers | In-process check |
| 4 | Moisture and pH Testing | Conduct RH per ASTM F2170 (min 3 probes for first 100 m² +1/100 m² thereafter) and/or MVER per ASTM F1869 (min 3 tests/1000 ft²). Test pH (typical acceptable 7–10) [Verify]. | QA/QC | Witness by Consultant if required |
| 5 | Moisture Mitigation (If Required) | Apply epoxy moisture mitigation per ASTM F3010 following surface prep and primer requirements. Broadcast sand if needed for key. Cure per TDS. | Installers | QC hold/witness |
| 6 | Levelling and Patching | Prime substrate as required. Place self-levelling underlayment to achieve SR tolerance. Feather edges/ramps as per details. Allow to cure. | Installers | QC checks |
| 7 | Layout and Setting Out | Confirm datum, room centers, and pattern orientation. Dry lay tiles/sheet ends. Position seams away from high-traffic lines and avoid door thresholds where possible. | Site Engineer / Supervisor | QC review |
| 8 | Adhesive Application | Select notch per TDS (e.g., A2 or 1/16x1/32x1/32). Spread uniformly. Observe open time and working time. Maintain ventilation. Do not exceed coverage rates. | Installers | Supervisor check |
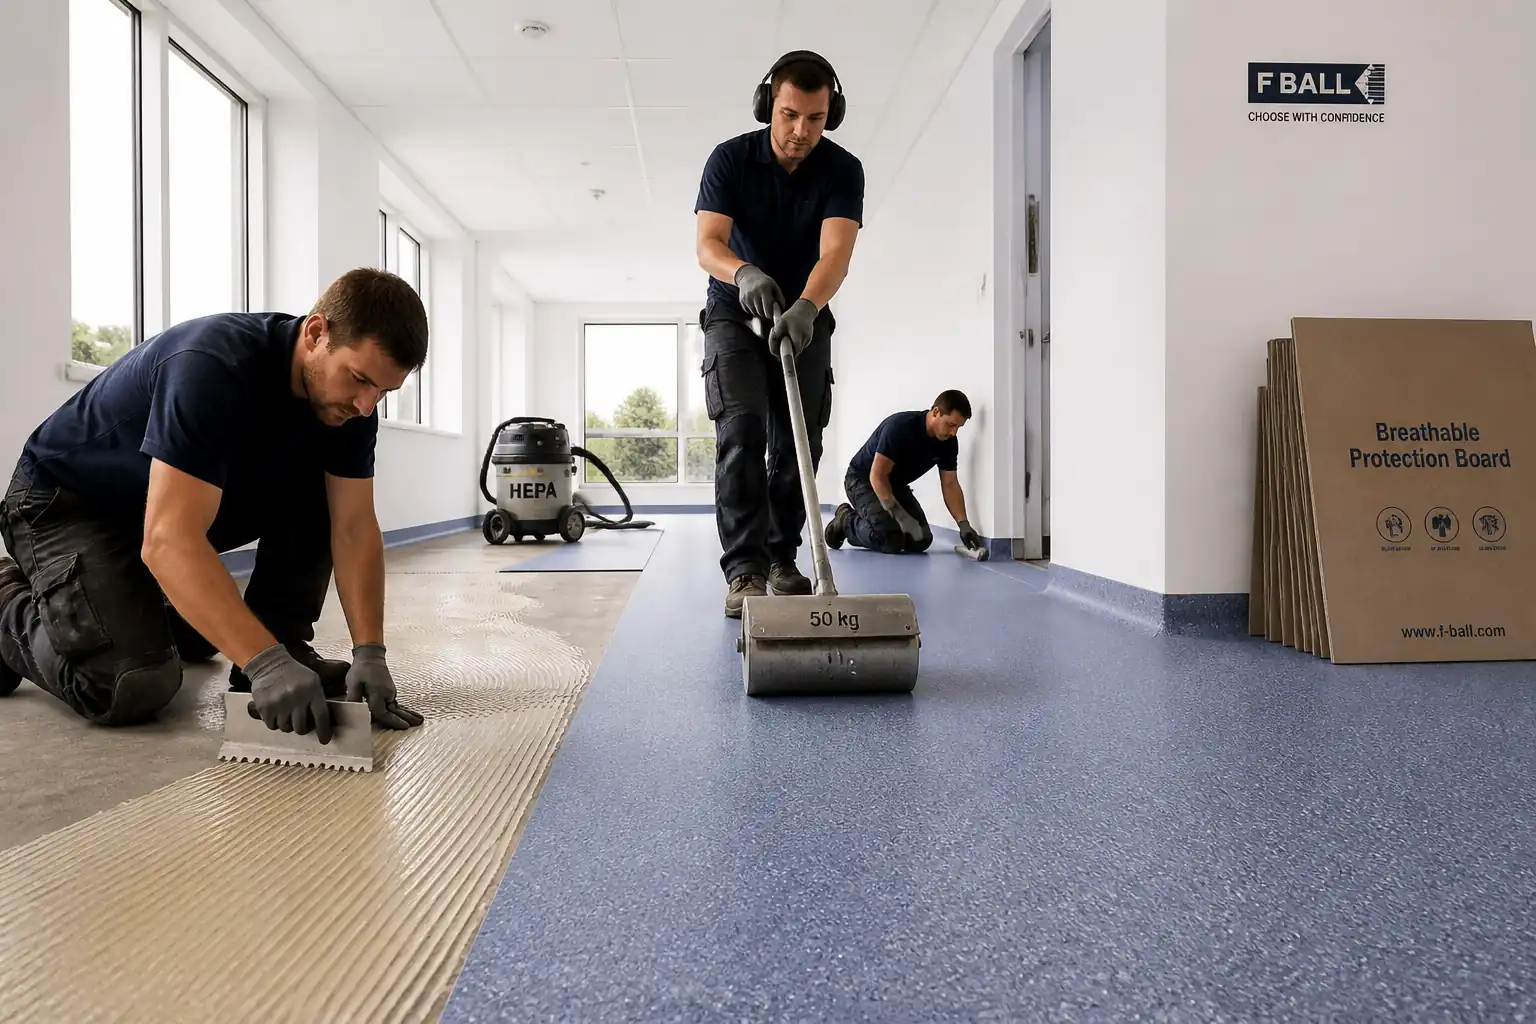
| 9 | Sheet Vinyl Laying | Place sheets into semi-wet/pressure-sensitive adhesive as specified. Roll with 45–68 kg roller in both directions within 10–20 minutes of placement. Trim seams with double-cut method where applicable. | Installers | In-process QC |
| 10 | Tile/LVT Installation | Install tiles to chalk lines; maintain joint straightness. Roll with 34–68 kg roller. Maintain stagger/pattern per drawings. | Installers | In-process QC |
| 11 | Seam Preparation and Heat Welding (Sheet) | After adhesive cure (typically ≥24 h), rout seam groove 2/3 depth of material (2.0–2.5 mm for 3–4 mm rods, confirm TDS). Hot-air weld 350–450°C; travel speed 2–3 m/min. Skive in two passes: first warm, second after cool. | Skilled Installer (Welder) | QC check; potential witness |
| 12 | Edge Detailing | Install cove former (typically 20 mm radius) and cap strip for coved skirtings (height ~100 mm) [Verify]. Form internal/external corners neatly. Fix thresholds/trims at ~200 mm c/c with countersunk screws or adhesive per detail. | Installers | QC check |
| 13 | Cleaning and Initial Protection | Remove adhesive residue with approved cleaner. Dry clean only until adhesive cures. Lay breathable protection boards; tape joints avoiding floor contact with aggressive adhesives. | Installers | Supervisor check |
| 14 | QA/QC Inspection and Snag Rectification | Conduct final inspection against acceptance criteria. Complete snagging and re-inspect. Prepare as-built and O&M inputs. | QA/QC Engineer | Final QC + Consultant |
| 15 | Handover | Remove protection at agreed milestone. Demonstrate cleaning/maintenance guidance. Submit warranties, batch lists, and test records. | Project Manager / Supervisor | Client/Consultant acceptance |
Health and Safety Controls
Task-Specific Hazards and Controls
- Hazard: Silica/particulate dust from grinding and shot blasting
- Likely Consequence: Respiratory irritation, long-term lung disease
- Engineering/Procedural Control: Use HEPA/M-class vacuums, on-tool extraction; wet suppression where compatible; limit grinding to required depth
- Required PPE: RPE P2/P3, safety glasses, gloves
- Collective Measure: Local exhaust ventilation and exclusion zones
-
Inspection/Permit/Supervision: Equipment inspection before use; HSE Officer to verify LEV; records per [Verify per project HSE plan and local regulations]
-
Hazard: Hot-air seam welding (350–450°C)
- Likely Consequence: Burns, localized fire
- Engineering/Procedural Control: Heat-resistant mats at workface; keep flammables clear; temperature set per TDS; fire extinguisher on hand
- Required PPE: Heat-resistant gloves, long sleeves, eye protection
- Collective Measure: Hot Work Permit if required by site; fire watch during and 30 minutes post-works
-
Inspection/Permit/Supervision: Permit-to-work as applicable; Supervisor to monitor temperatures
-
Hazard: Solvent/exposure to VOCs from adhesives/cleaners
- Likely Consequence: Headache, nausea, dermatitis, fire risk (if solvent-based)
- Engineering/Procedural Control: Select low-VOC products; provide cross-ventilation; follow TDS for open time and flash-off
- Required PPE: Nitrile gloves, safety glasses; RPE if ventilation inadequate
- Collective Measure: Ventilation fans; SDS available
-
Inspection/Permit/Supervision: COSHH assessment; HSE checks; [Verify per project HSE plan and local regulations]
-
Hazard: Manual handling of heavy vinyl rolls and boards
- Likely Consequence: Strains, musculoskeletal injury
- Engineering/Procedural Control: Team lifts, roll trolleys, cut to manageable lengths; use knee protection and anti-fatigue mats
- Required PPE: Safety footwear, knee pads, gloves
- Collective Measure: Mechanical aids and lift plans for bulk movements
-
Inspection/Permit/Supervision: Supervisor to plan lifts; toolbox talk on handling
-
Hazard: Sharp cutting tools and routers
- Likely Consequence: Lacerations, punctures
- Engineering/Procedural Control: Sharp, guarded tools; cut away from body; dedicated cutting zones
- Required PPE: Cut-resistant gloves, eye protection
- Collective Measure: Blade disposal containers; exclusion of non-essential personnel
-
Inspection/Permit/Supervision: Daily tool inspection by Supervisor
-
Hazard: Noise and vibration from grinders
- Likely Consequence: Hearing loss; HAVS
- Engineering/Procedural Control: Low-vibration tooling; task rotation; limit exposure duration
- Required PPE: Hearing protection (SNR suitable for measured dB)
- Collective Measure: Noise zoning and signage
-
Inspection/Permit/Supervision: Noise assessment; HAV monitoring records
-
Hazard: Slip/trip due to wet adhesive and offcuts
- Likely Consequence: Falls, sprains
- Engineering/Procedural Control: Maintain clean workface; cordon freshly adhered areas; immediate cleanup of spills
- Required PPE: Safety footwear with slip-resistant soles
- Collective Measure: Housekeeping schedule
-
Inspection/Permit/Supervision: Supervisor walkdowns every 2 hours
-
Hazard: Electrical tools (grinders, welders)
- Likely Consequence: Electric shock, fire
- Engineering/Procedural Control: PAT-tested equipment; 110V center-tapped supply or RCDs; cables managed overhead or with ramps
- Required PPE: Dielectric gloves if required, standard PPE
- Collective Measure: Lock-out/tag-out for maintenance
-
Inspection/Permit/Supervision: Pre-use checks; permits as applicable
-
Hazard: Working near edges/stairs during stair-nosing works
- Likely Consequence: Fall from height
- Engineering/Procedural Control: Temporary edge protection; work platforms for risers
- Required PPE: Safety footwear, gloves
- Collective Measure: Guardrails or barriers
- Inspection/Permit/Supervision: Supervisor to approve access equipment
Note: Where controls depend on local law or site standards, confirm and implement per [Verify per project HSE plan and local regulations].
Environmental Controls
Controls and Good Practice
- Dust and Air Quality
- Control: On-tool extraction with HEPA filters; sealed waste bags; avoid dry sweeping.
-
Monitoring: Visual checks; spot particulate monitoring where required.
-
Noise
- Control: Schedule noisy grinding within permitted hours; acoustic screens if near occupied areas.
-
Monitoring: Periodic noise measurements; maintain equipment to minimize noise.
-
VOC Management
- Control: Specify low-VOC adhesives/primers; forced ventilation during/after application.
-
Monitoring: Odor checks and, if required, VOC meters for sensitive environments.
-
Waste Segregation
- Control: Segregate vinyl offcuts, clean cardboard cores, and contaminated materials. Adhesive containers and solvent wipes treated as hazardous waste.
-
Disposal: Licensed waste carrier; keep manifests.
-
Spill Prevention
-
Control: Secondary containment for liquids; spill kits at point of use; train crew in spill response.
-
Resource Efficiency
-
Control: Batch mixing to reduce waste; return unopened materials; use manufacturer take-back/recycling where available.
-
Water and Drain Protection
-
Control: No washing of adhesive or epoxy tools to drains; use absorbent wipes and appropriate disposal.
-
Energy
- Control: Use efficient equipment; switch off idle tools; maintain HVAC setpoints only as required for curing and acclimation.
Comply with project Environmental Management Plan and local regulations. [Verify per project HSE plan and local regulations].
Quality Assurance / Quality Control
Key Quality Requirements
- Materials
-
Verify product approvals, batch numbers, and expiry dates. Store flat and acclimate 24–48 h at 18–27°C.
-
Substrate
- Surface regularity: SR1 (≤3 mm under 2 m) [Verify per project]. Check frequency: min 1 check/20 m² and all doorways.
- Moisture: ASTM F2170 (min 3 probes/first 100 m² +1/100 m²), ASTM F1869 (min 3 tests/1000 ft²). pH 7–10 typical [Verify per TDS].
-
Cleanliness: Tape test; no dust transfer; no contaminants.
-
Adhesive and Laying
- Notch size and coverage per TDS; verify transfer by lift tests every 20–30 m².
- Rolling: Sheet 45–68 kg, tile 34–68 kg; roll both directions within 10–20 minutes; re-roll after 30–60 minutes if advised.
- Seams: Gap ≤0.5 mm pre-weld; post-weld bead flush (+0.1/−0.2 mm); no scorch.
-
Alignment: Tile courses within ±1 mm over 2 m; pattern match within ±3 mm over 10 m.
-
Edge/Detailing
-
Cove height and radius per detail; trims fixed typically at 200 mm c/c or per manufacturer; no exposed sharp edges.
-
Protection
- Breathable protection only; no polyethylene sheeting that may trap moisture.
Inspection/Test Frequency
- Incoming materials check: each delivery.
- Substrate SR check: per room and every 20 m².
- Moisture/pH tests: per standards and per area change.
- Adhesive coverage checks: every room and at changes in crew/conditions.
- Seam welding probe test: all seams.
Documentation and Records
- ITP with signed hold/witness points.
- Moisture/pH test results with locations and calibration data.
- Batch/lot numbers for vinyl, adhesives, welding rods, SLU.
- Daily laying records and area maps.
- As-built layouts of seams and transitions (where required).
- Warranty certificates and maintenance guides.
Attachments
- Manufacturer technical data sheets (TDS) and safety data sheets (SDS) for vinyl, adhesives, primers, SLU, epoxy DPM
- Room finish schedules and approved shop drawings (layouts, seams, cove/skirting details, thresholds)
- ITP forms, checklists, and inspection reports
- Calibration certificates for RH probes, hygrometers, and measurement devices
- Batch/lot number registers for materials
- Toolbox talk records and permits (including Hot Work Permit if required)
- Handover dossier: warranties, maintenance instructions, as-built seam/transition plans (if required)
This content is a read-only public reference. Download or customize to get an editable version.
ITP preview
The first inspection activities from the linked ITP for Method Statement: Vinyl Flooring Installation for Commercial Interiors:
| Activity | Inspection / Test | Acceptance Criteria | Responsibility | Record |
|---|---|---|---|---|
| Substrate acceptance | Visual + SR check (2 m straightedge) | SR1 target ≤3 mm under 2 m; substrate sound, clean, and dry [Verify] | QA/QC Engineer / Consultant | Substrate acceptance form |
| Moisture and pH testing | ASTM F2170 RH / ASTM F1869 MVER / pH test | Within system limits per TDS [e.g., RH ≤75–85–95%; MVER ≤3–5 lb/1000 ft²/24h; pH 7–10] [Verify] | QA/QC Engineer | Moisture/pH reports, calibration certs |
| Moisture mitigation (if required) | WFT/DFT checks; adhesion spot test (if specified) | Applied per ASTM F3010 and TDS; DFT/coverage met; adhesion adequate [Verify] | QA/QC Engineer / Consultant | Mitigation inspection record |
Showing 3 of 9 inspection activities. View full ITP →
Related Inspection and Test Plan
An Inspection and Test Plan (ITP) is available for Method Statement: Vinyl Flooring Installation for Commercial Interiors. The ITP defines the inspection activities, acceptance criteria, hold and witness points, responsible parties, and records required to verify the work described in this method statement.
View the Method Statement: Vinyl Flooring Installation for Commercial Interiors ITP →Frequently asked questions
Continue with related Quollnet resources connected to this method statement.