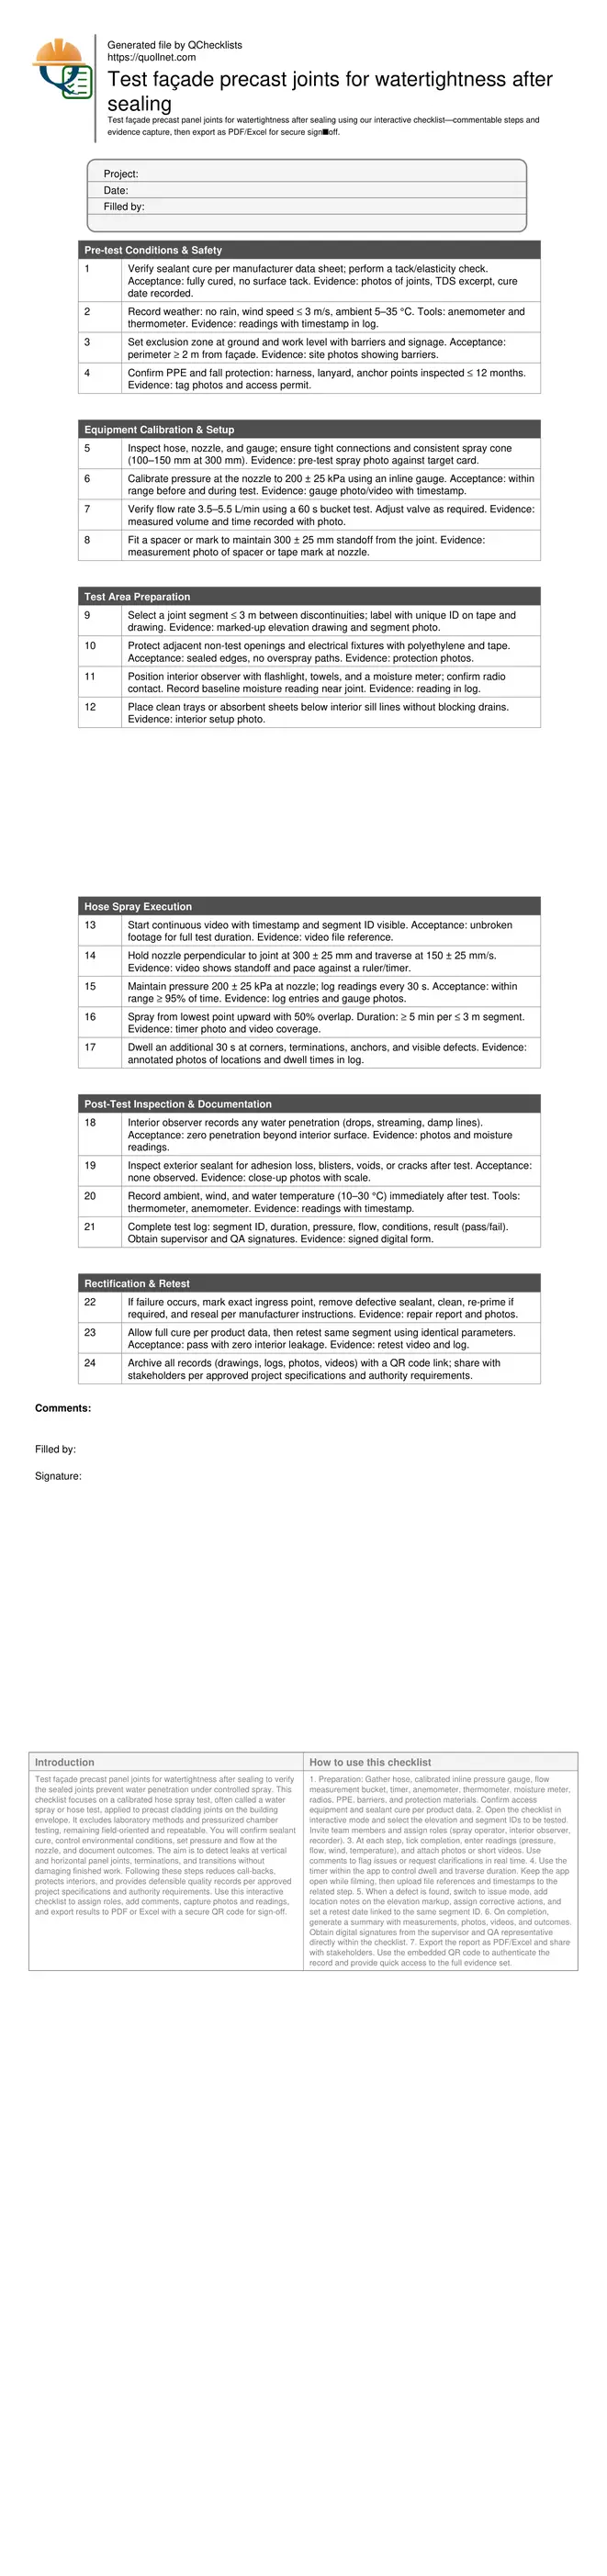
Test façade precast panel joints for watertightness after sealing
Definition: Test façade precast panel joints for watertightness after sealing with this field checklist for site engineers, QA inspectors, and contractors, detailing preparation, calibrated hose-spray execution, acceptance criteria, documentation, and retesting.
- Confirms sealant cure, safe access, calibrated pressure and flow setup
- Defines hose spray distance, speed, coverage, and pass/fail criteria
- Captures readings, photos, videos, and signatures for traceable evidence
- Interactive, commentable steps with export and QR code verification
Test façade precast panel joints for watertightness after sealing to verify the sealed joints prevent water penetration under controlled spray. This checklist focuses on a calibrated hose spray test, often called a water spray or hose test, applied to precast cladding joints on the building envelope. It excludes laboratory methods and pressurized chamber testing, remaining field-oriented and repeatable. You will confirm sealant cure, control environmental conditions, set pressure and flow at the nozzle, and document outcomes. The aim is to detect leaks at vertical and horizontal panel joints, terminations, and transitions without damaging finished work. Following these steps reduces call-backs, protects interiors, and provides defensible quality records per approved project specifications and authority requirements. Use this interactive checklist to assign roles, add comments, capture photos and readings, and export results to PDF or Excel with a secure QR code for sign-off.
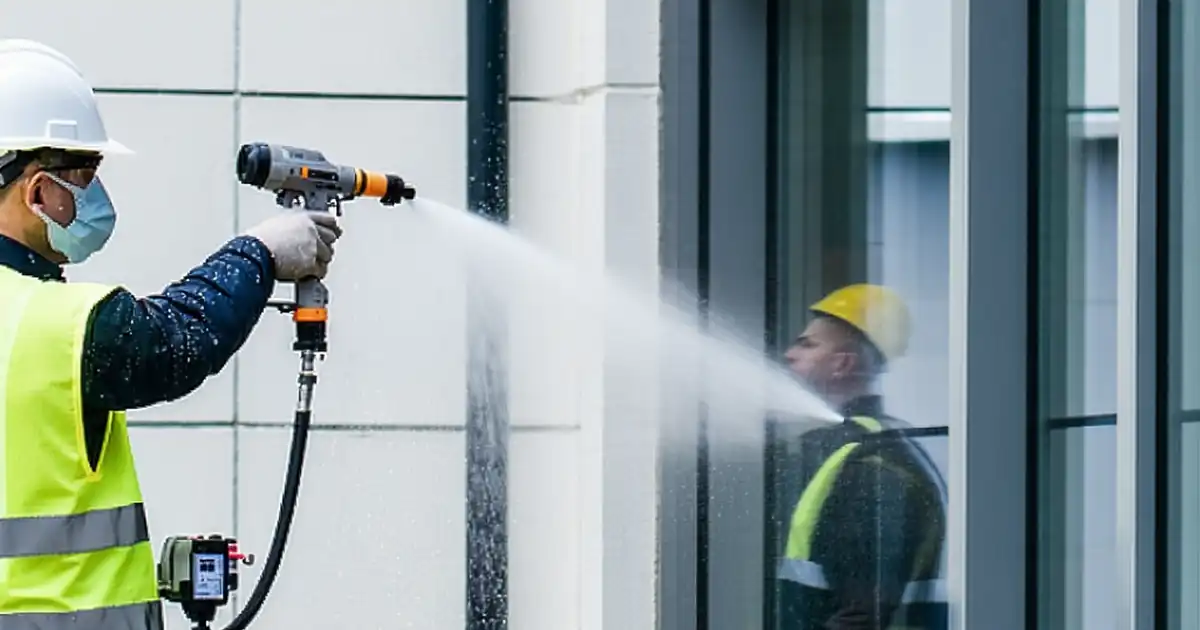
- Field-proven hose spray methodology validates precast façade joint sealing by controlling pressure, flow, standoff distance, and travel speed. Clear acceptance criteria—zero interior penetration—prevent ambiguity and enable quick root-cause identification when defects appear at joint edges, terminations, or interfaces.
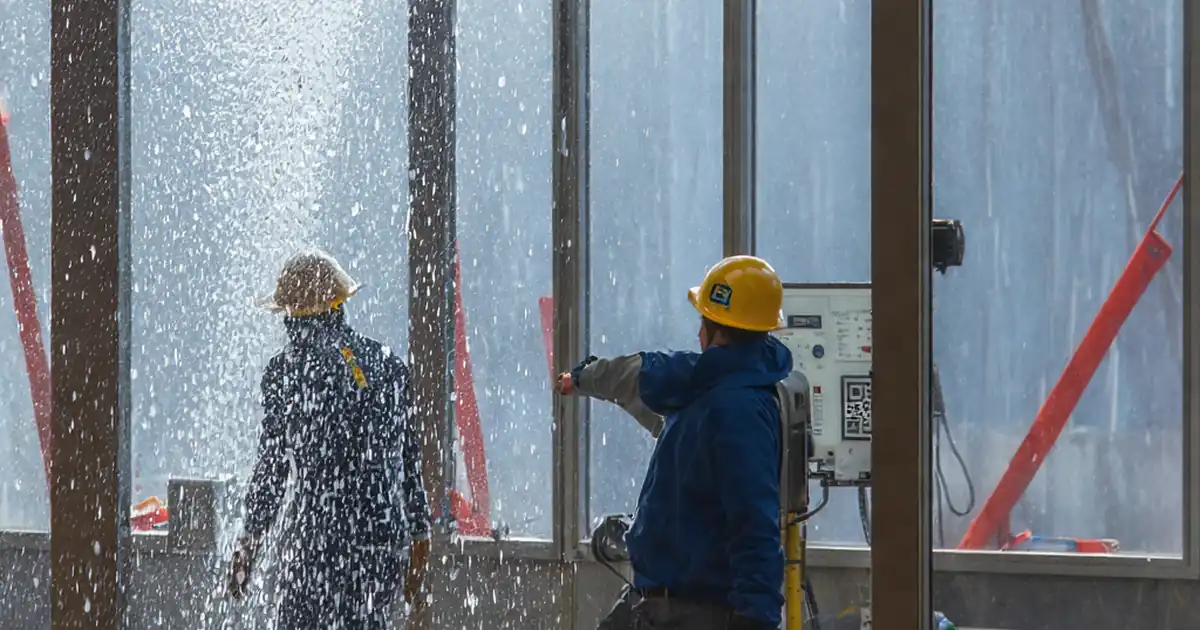
- Practical preparation steps ensure reliable results: verify sealant cure per manufacturer data, stabilize environmental conditions, calibrate the nozzle gauge and flow, and brief an interior observer with a moisture meter and flashlight. Evidence is captured as photos, videos, readings, and signed forms.
- Traceable documentation strengthens quality assurance and closeout. Each segment is labeled on drawings, video-stamped, and logged with duration, pressure, flow, and outcomes. Failures trigger targeted repairs, full cure, and retesting to the same parameters, ensuring consistent, defensible results across elevations.
- Interactive online checklist with tick, comment, and export features secured by QR code. Teams coordinate in real time, annotate issues directly at step level, and instantly produce shareable PDF or Excel reports for supervisors, consultants, and client representatives.
Pre-test Conditions & Safety
Equipment Calibration & Setup
Test Area Preparation
Hose Spray Execution
Post-Test Inspection & Documentation
Rectification & Retest
Why hose spray testing validates sealed precast façade joints
A calibrated hose spray test applies controlled water and kinetic energy to the sealed joint, revealing discontinuities that static dampness or visual checks miss. By holding a consistent standoff distance, pressure, and traverse speed, you create repeatable conditions that expose weak adhesion, voids, and terminations—common at panel corners and transitions. Field teams should segment joints to manageable lengths and maintain documentary control with videos and marked-up elevations. Acceptance is straightforward: no water penetration to interior surfaces and no post-test sealant distress. When leakage occurs, dwell sequences and annotated footage help pinpoint paths and guide repairs without unnecessary removals. Practical controls—wind speed, water temperature, and baseline moisture—reduce false positives and protect finishes. The method complements factory QA by verifying as-installed performance after curing and cleaning. It also supports defensible sign-off because every parameter is measured, logged, and tied to a specific elevation and segment ID.
- Acceptance: zero interior penetration and no sealant defects post-test
- Maintain 300 ± 25 mm standoff for consistent energy on joint
- Control pressure 200 ± 25 kPa and flow 3.5–5.5 L/min
- Segment joints ≤ 3 m and label on drawings
- Use continuous video to capture coverage and dwell times
Common failure points and practical fixes before retesting
Leakage often originates at three places: incomplete substrate cleaning leading to poor adhesion, thin beads at wide gaps, and unsealed terminations where vertical and horizontal joints meet. Water may track behind trim, through hairline cracks at returns, or via anchor penetrations. Before cutting out entire lengths, isolate the ingress by repeating a short dwell around suspect areas and watching interior indicators. Repairs should follow the sealant manufacturer’s instructions: remove to sound edges, solvent-clean compatible substrates, re-prime if required, and tool the bead to specified width and depth using appropriate backer rod. Allow full cure, then perform a like-for-like retest using the same environmental and equipment parameters. Document the defect cause and corrective action; this data informs crew training and improves subsequent work on remaining elevations.
- Focus on corners, terminations, anchors, and returns
- Repair only to sound boundaries, then reseal and tool
- Respect cure time before retesting for valid results
- Repeat original parameters for comparability
- Log root cause and corrective action clearly
Documentation that stands up to review and closeout
Quality records need to be clear, searchable, and verifiable. Label each tested segment on an elevation drawing and mirror the ID in file names for photos and videos. Record measured parameters—pressure, flow, standoff, traverse speed, duration, wind, ambient, and water temperature—in a structured log. Interior observers should capture moisture readings and note the exact time of any observed ingress. Include signatures from the supervisor and quality representative, and store everything in a shared repository with access controls. A QR code embedded in the report or tag at the elevation links reviewers directly to the digital folder. When failures occur, attach the repair method statement, product batch numbers, and retest evidence. This level of traceability accelerates approvals and reduces disputes during substantial completion and warranty handover.
- Use unique IDs tying segments to drawings and media
- Capture readings with timestamps for each parameter
- Secure signatures and retain records centrally
- Embed QR code linking to full evidence set
- Attach repair reports and batch numbers on failures
How to use this interactive checklist
- Preparation: Gather hose, calibrated inline pressure gauge, flow measurement bucket, timer, anemometer, thermometer, moisture meter, radios, PPE, barriers, and protection materials. Confirm access equipment and sealant cure per product data.
- Open the checklist in interactive mode and select the elevation and segment IDs to be tested. Invite team members and assign roles (spray operator, interior observer, recorder).
- At each step, tick completion, enter readings (pressure, flow, wind, temperature), and attach photos or short videos. Use comments to flag issues or request clarifications in real time.
- Use the timer within the app to control dwell and traverse duration. Keep the app open while filming, then upload file references and timestamps to the related step.
- When a defect is found, switch to issue mode, add location notes on the elevation markup, assign corrective actions, and set a retest date linked to the same segment ID.
- On completion, generate a summary with measurements, photos, videos, and outcomes. Obtain digital signatures from the supervisor and QA representative directly within the checklist.
- Export the report as PDF/Excel and share with stakeholders. Use the embedded QR code to authenticate the record and provide quick access to the full evidence set.
Call to Action
- Start Checklist Tick off tasks, leave comments on items or the whole form, and export your completed report to PDF or Excel—with a built-in QR code for authenticity.
- Download Excel - Façade Precast Panel Joint Watertightness Test
- Download PDF - Façade Precast Panel Joint Watertightness Test
- View Image - Façade Precast Panel Joint Watertightness Test
Cite & Embed
“Façade Precast Panel Joint Watertightness Test by Quollnet”
with a link to
this source page.
FAQ
Question: How long should we wait after sealing before performing the watertightness test?
Question: What counts as a failure during the hose spray test?
Question: Can we test in windy or cold conditions without affecting results?
Question: How do we ensure repeatability across different crews and elevations?
Question: What evidence should be archived for closeout and warranty?
Related Articles
Broader reading and guidance connected to this checklist topic.


Master Construction Project Cashflow With Cashflowpot

Is It Important To Customize Your Qr Code And How To Do It?
Related Checklists
Keep the workflow moving with nearby templates chosen from similar checklist content.