Test façade mock-up for water penetration under static pressure
Definition: Test façade mock-up for water penetration under static pressure defines a practical, standardized approach to verify watertightness of façade assemblies for contractors, consultants, and manufacturers before project deployment.
- Confirm mock-up fidelity, instrumentation, and acceptance criteria before testing.
- Control static water head, duration, and measurements with calibrated devices.
- Capture photos, readings, and signatures for auditable, repeatable results.
- Interactive, commentable, export, QR code for secure field documentation.
Test façade mock-up for water penetration under static pressure is a preconstruction and project-specific verification method to assess watertightness before full-scale installation. This checklist supports façade water tightness testing using a static water column or chamber, sometimes called a static head water penetration test or mock-up chamber testing. The scope covers exterior wall assemblies, interfaces, and joints configured in a controlled mock-up that matches approved submittals. You will prepare the assembly, calibrate instruments, apply and hold a specified static head, then observe, measure, and document any interior wetting. By focusing on static pressure only, this guide avoids spray-cyclic or dynamic wind-driven methods. Following it reduces costly rework, prevents concealed moisture, protects finishes and equipment, and produces traceable evidence for stakeholders per approved project specifications and authority requirements. Start in interactive mode to tick items, add comments, and export your results to PDF/Excel with a secure QR for authentication.
- Use this checklist to plan, execute, and document a static water penetration test on a façade mock-up that replicates approved details, ensuring instruments are calibrated, acceptance criteria are clear, and results are traceable and defensible.
- Field teams will verify mock-up conformity, control static head within tight tolerances, continuously observe the interior face, quantify any leakage, and log environmental conditions to understand performance and prevent building-in failures.
- Interactive online checklist with tick, comment, and export features secured by QR code.
- Outcomes include validated watertightness before installation, clear punch items when failures occur, and a consolidated record set with photos, readings, signatures, and calibration certificates aligned with approved project specifications and authority requirements.
Pre-Test Documentation
Mock-Up Preparation
Instrumentation and Calibration
Test Execution
Observations and Recording
Post-Test Actions
Scope, Boundaries, and Mock-Up Fidelity
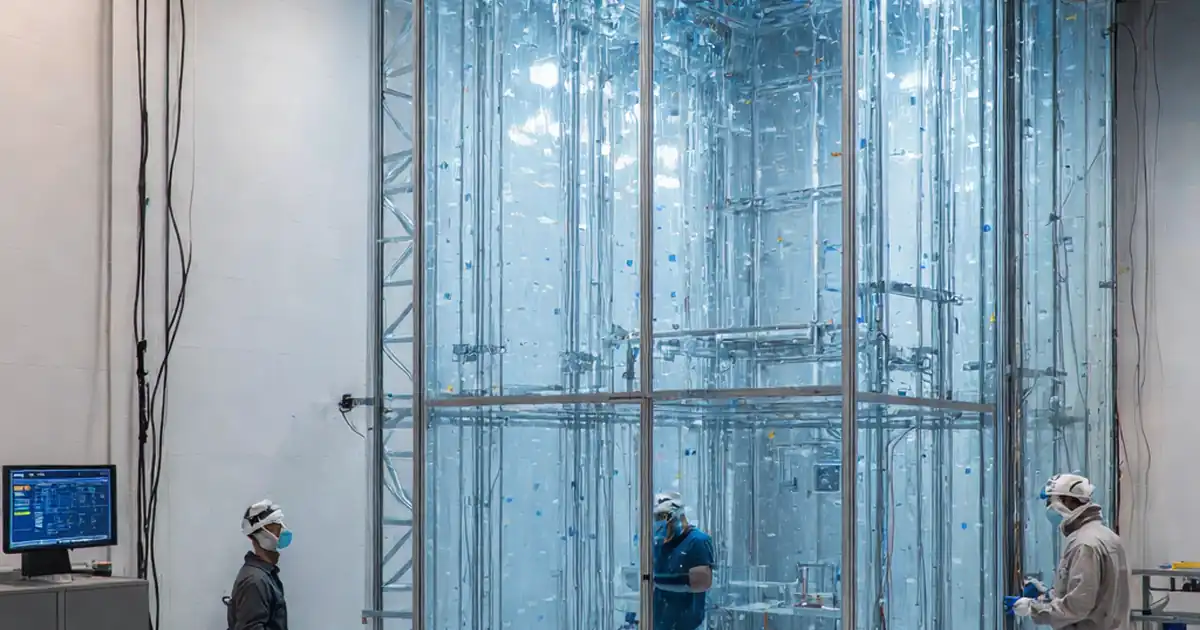
This checklist focuses exclusively on static water pressure applied to a façade mock-up. It does not cover cyclic spray, dynamic pressure, or in-situ building testing. Success depends on a faithful replica of project details: frame sections, anchors, sealant types, backer rods, gaskets, joint widths, and interfaces. Before testing, confirm drawings, materials, and workmanship match approved submittals. Establish acceptance criteria per approved project specifications and authority requirements, such as duration at target head and allowable interior wetting thresholds. Control variables that influence leakage pathways, including temperature, wind, and drainage. Ensure masking limits the test area to intended joints only. Finally, verify all documentation pathways are ready: calibrated instruments, data loggers, photo protocols, and sign-off workflow. These foundations make results reliable, defensible, and repeatable across rounds and locations while preventing misleading outcomes from non-representative assemblies or uncontrolled boundary conditions.
- Replicate approved details and materials without substitutions.
- Define acceptance criteria before water is introduced.
- Mask only the non-tested joints and openings.
- Control ambient conditions and document stability.
- Verify calibration and evidence capture workflows.
Setting, Holding, and Measuring Static Head
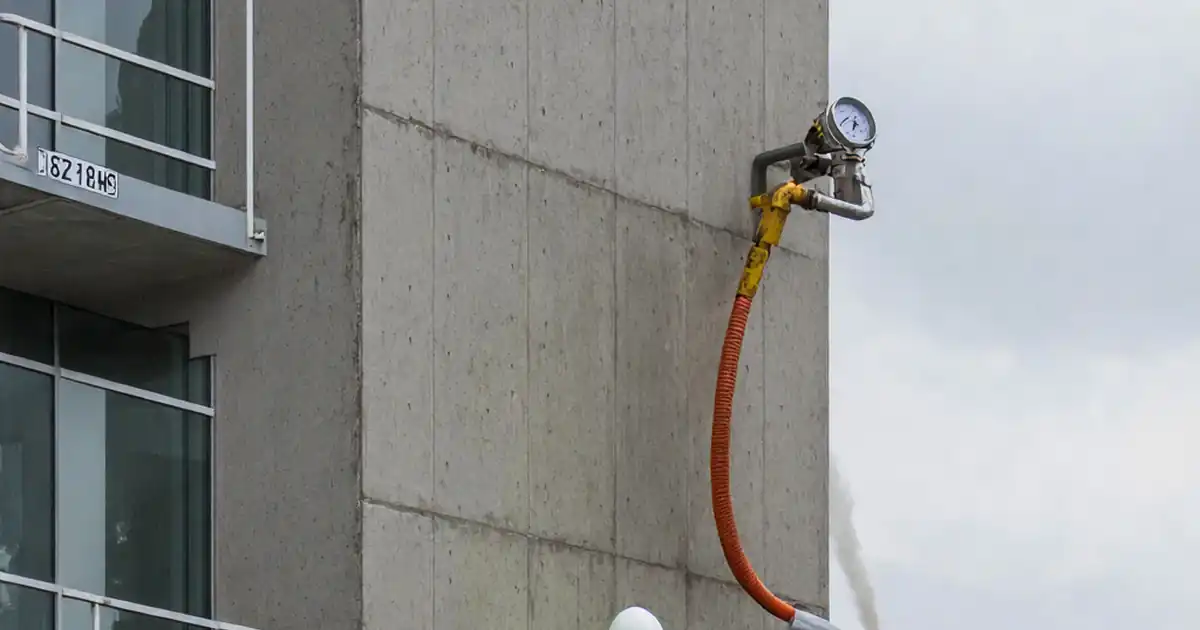
Static pressure is produced by a water column acting on the exterior face via a chamber or containment box. Calculate the setpoint using fluid density and head height, then record the equivalent pressure in pascals. Fill the chamber steadily to avoid pressure shock. Use a calibrated manometer or sight tube to control head within a narrow band; document readings on a fixed interval. Maintain steady temperature to minimize density changes. Keep weeps and drains in their normal operating state unless the protocol requires otherwise. Continuous interior observation is essential; employ flashlights, mirrors, and high-resolution photos to capture first wetting. If sources are unclear, non-staining tracer dye can help reveal leak paths without compromising materials. Combine qualitative observations with quantitative measures—volumes, times, and locations—so results guide effective remediation and retesting.
- Increase head gradually; avoid pressure spikes.
- Hold head within ±5 mm of target.
- Log readings at fixed time intervals.
- Observe interior continuously with adequate lighting.
- Use dye tracing only when necessary.
Acceptance, Documentation, and Retest Strategy
Define pass/fail expectations up front, such as no interior wetting or a maximum allowable collected volume over a specified duration, per approved project specifications and authority requirements. When failures occur, mark locations on a grid, quantify leakage rates, and connect observations to specific details (e.g., gasket corners, mullion-to-sill joints). Capture photos, videos, instrument logs, and signatures so stakeholders can audit the evidence trail. After repairs, repeat the same static head and duration to confirm effectiveness, keeping variables identical. For long-term lessons, archive datasets to inform design tweaks and installer training. A thorough record enables transparent decisions, prevents disputes, and supports warranty claims by showing that testing was controlled, measured, and repeatable.
- Specify measurable acceptance thresholds.
- Map leaks to exact coordinates.
- Archive calibrated data and media.
- Retest with identical parameters.
- Secure digital sign-offs and dates.
How to Use the Interactive Static Water Test Checklist
- Preparation: Confirm approved drawings and acceptance criteria; assemble test chamber, manometer, flow meter, moisture sensors, lighting, dye, absorbents, and PPE (gloves, boots, eye protection). Ensure site access, power isolation if needed, and safe water disposal arrangements.
- Using the Interactive Checklist: Start interactive mode, tick each item as completed, attach photos and readings, and add time-stamped comments for anomalies. When finished, export the record as PDF/Excel and share the QR-authenticated link.
- Sign-Off: Capture digital signatures from contractor, consultant, and manufacturer representatives. Distribute the report to stakeholders, archive in the project CDE, and verify the QR link resolves to the immutable dataset.

Call to Action
- Start Checklist Tick off tasks, leave comments on items or the whole form, and export your completed report to PDF or Excel—with a built-in QR code for authenticity.
- Download Excel - Façade Mock-Up Static Water Penetration Test
- Download PDF - Façade Mock-Up Static Water Penetration Test
- View Image - Façade Mock-Up Static Water Penetration Test
Cite & Embed
“Façade Mock-Up Static Water Penetration Test by Quollnet”
with a link to
this source page.
FAQ
Question: What static head and duration should we use for the façade mock-up?
Question: How do we confirm the mock-up is representative of the final façade?
Question: What evidence is essential if we observe water penetration?
Question: When should we use tracer dye, and will it stain materials?
Related Articles
Broader reading and guidance connected to this checklist topic.


Is The Crack You See On Your Wall Serious Or Minor Cosmetic Issue?

Concrete Cube Test Register Excel Format – Pdf & Excel Sample
Related Checklists
Keep the workflow moving with nearby templates chosen from similar checklist content.