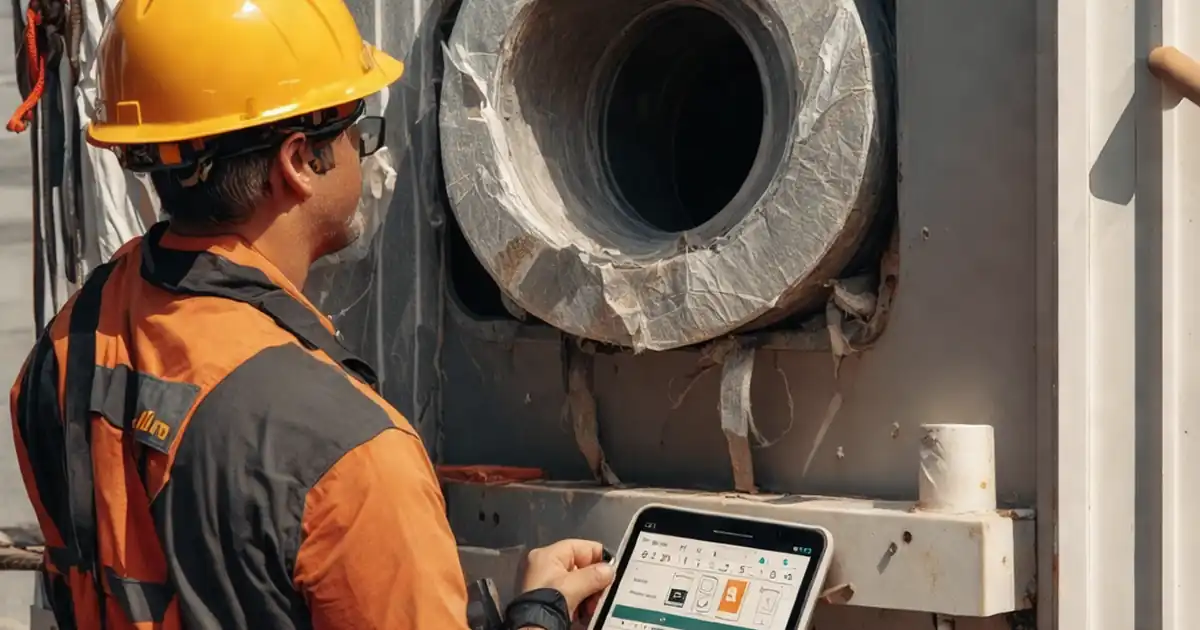
Test Façade Firestop Systems at Perimeter Joints Before Concealment
Definition: Test façade firestop systems at perimeter joints before concealment to verify continuity, compression, and sealing quality for contractors, inspectors, and façade installers before the assembly is covered.
- Validate joint width, mineral wool compression, and sealant depth.
- Prove continuity behind mullions using mirrors and borescopes.
- Record photos, measurements, batch numbers, and digital approvals.
- Interactive, commentable, export, QR code for secure sign-offs.
Test façade firestop systems at perimeter joints before concealment to confirm continuity, compression, and sealing quality at the slab-edge curtain wall interface. This pre-cover inspection focuses on the perimeter fire barrier, smoke seal continuity, safing insulation placement, and movement accommodation so compliant performance is assured before finishes or covers are installed. You will verify materials against approved submittals, measure joint widths in SI units, check mineral wool orientation and compression, and confirm sealant depth, adhesion, and coverage including concealed areas behind mullions. Field checks such as smoke-pencil observation, torque verification of clips, and borescope confirmation reduce the risk of rework, air leakage, and noncompliance. The outcome is a photo-rich, traceable record that supports approvals per approved project specifications and authority requirements. Use the interactive checklist to tick items, add comments at locations, and export your evidence and sign-offs as PDF/Excel with a QR-secured link.
- Ensure perimeter fire barrier integrity before finishes hide defects. Verify approved materials, measure joint dimensions, confirm mineral wool compression, and inspect continuous smoke seals, including behind obstructions, reducing rework and ensuring compliant performance at the façade-slab edge.
- Capture defensible evidence with photos, measurements, batch numbers, torque values, and signatures. Achieve traceability by tagging locations on marked plans, logging ambient conditions, and linking each tested segment to unique IDs for rapid audits and handover.
- Interactive online checklist with tick, comment, and export features secured by QR code. Standardize site workflows, enable real-time collaboration between installer, GC, and inspector, and streamline approvals before covering the joint.
- Reduce project risk by catching gaps, voids, improper depths, or obstructed movement allowances early. Document corrective actions and retests, and maintain a clear chain of custody aligned with approved project specifications and authority requirements.
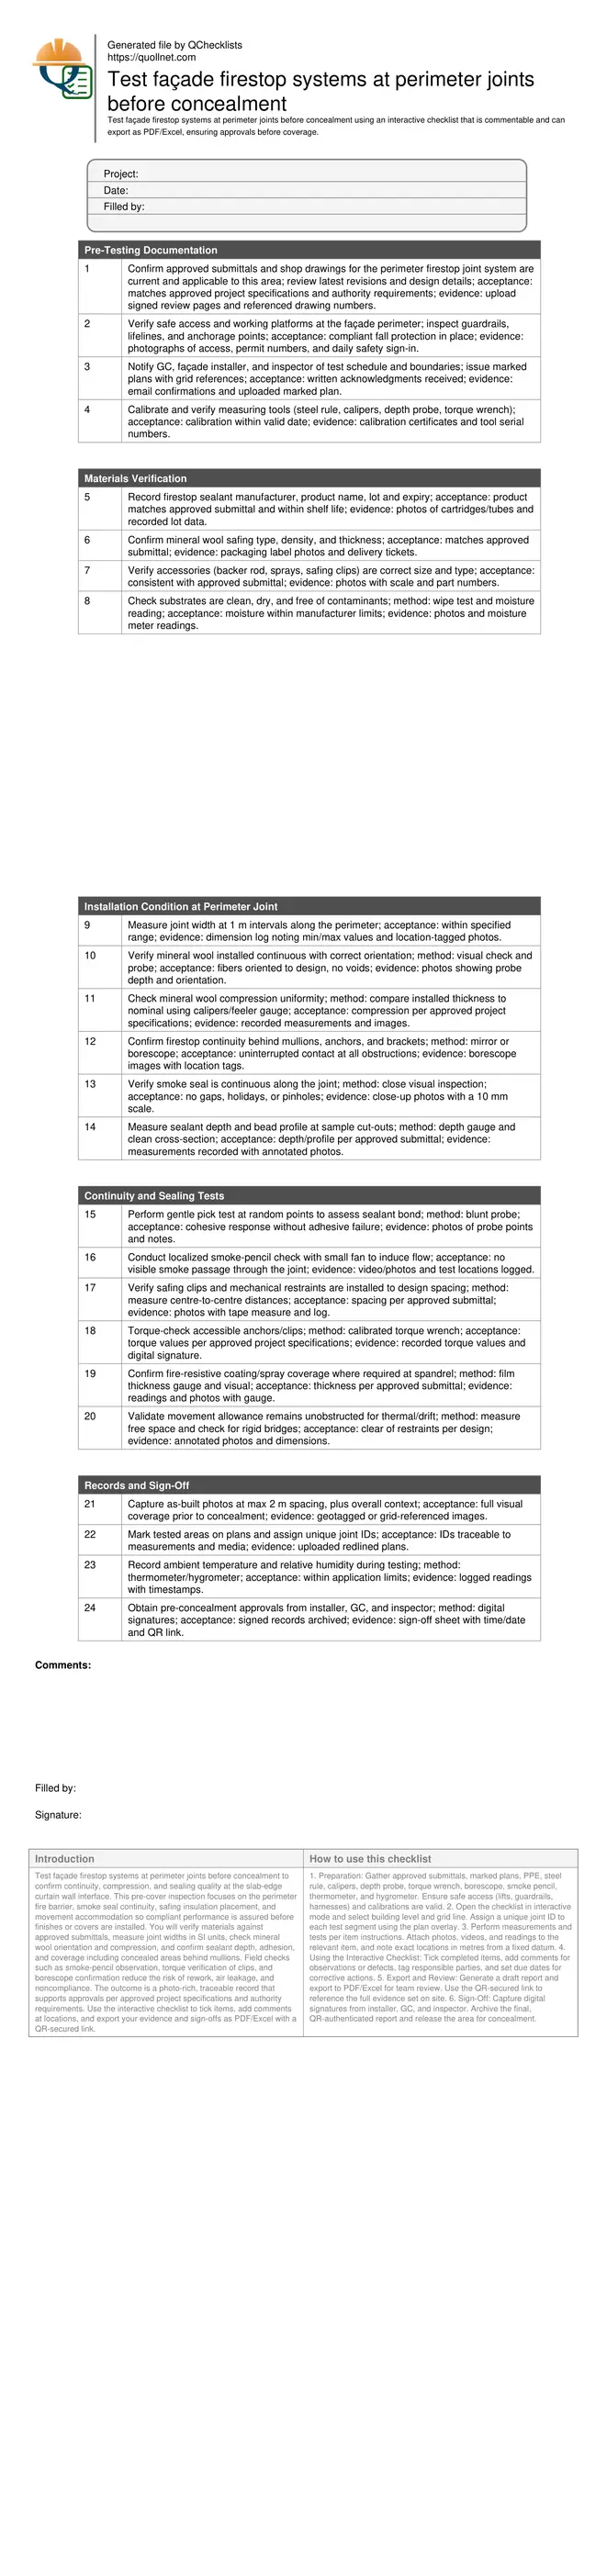
Pre-Testing Documentation
Materials Verification
Installation Condition at Perimeter Joint
Continuity and Sealing Tests
Records and Sign-Off
Why pre-concealment testing of perimeter firestopping matters
Before cladding or finishes hide the slab-edge interface, confirming the perimeter fire barrier is essential to life safety and building performance. Pre-concealment testing ensures the joint width follows design tolerances, mineral wool safing is oriented correctly and uniformly compressed, and smoke seals are continuous with proper adhesion to both substrates. It also verifies movement accommodation for thermal and drift, so firestopping will not crack or disengage in service. Inspectors should use SI tools—steel rules, calipers, depth gauges—to capture objective data. Mirrors and borescopes help confirm continuity behind mullions, anchors, and brackets that can mask discontinuities. By recording photos with measurement scales, batch numbers, and ambient conditions, teams produce a defensible record that supports approvals per approved project specifications and authority requirements, preventing costly rework and program delays once the façade line advances.
- Measure joint width at 1 m intervals and record min/max.
- Confirm mineral wool compression is uniform and documented.
- Verify smoke seal continuity, depth, and adhesion.
- Check continuity behind mullions using mirror or borescope.
- Capture photos with scales and location tags.
Field methods that reveal hidden gaps and failures
Use systematic, repeatable checks to surface issues early. Cross-section a small sample to measure sealant depth and bead shape; compare results to the approved submittal and record the values with photos. Perform gentle pick tests to confirm cohesive sealant behavior rather than adhesive peel. Where practical, run a smoke pencil with localized airflow to see if any leakage paths exist through the joint or penetrations. Verify safing clips and fasteners: measure their spacing, then apply a torque wrench to accessible anchors to confirm installation per specification. For concealed areas, insert a borescope behind mullions and anchors to verify firestopping continuity. Each method should be executed on representative locations and the most vulnerable transitions, with results documented and linked to unique grid references for quick retrieval during audits.
- Cross-section check for bead depth and profile.
- Smoke pencil test for visible leakage paths.
- Probe sealant bond with a blunt pick at random points.
- Measure clip spacing and verify anchor torque.
- Use borescopes to confirm behind-obstruction continuity.
Documentation, approvals, and avoiding rework
Consistent documentation closes the loop between installation and acceptance. Start by verifying materials against the approved submittal, including product names, lot numbers, and expiry dates. Mark the tested perimeter on plans and assign unique IDs to each segment so measurements, images, and observations are traceable. Record ambient conditions to confirm application within manufacturer limits. Identify nonconformities such as voids, discontinuous sealant behind mullions, improper compression, or obstructed movement gaps; then document corrective actions and retests before approval. Obtain digital signatures from the installer, general contractor, and the inspector, and archive the package in a central repository. This disciplined approach generates a verifiable record aligned with approved project specifications and authority requirements, strengthening turnover documentation and preventing concealed defects that lead to rework and delays.
- Trace each result to a unique joint ID.
- Log lot numbers and expiry for all materials.
- Record temperature and relative humidity.
- Document corrective actions and retests.
- Secure digital sign-offs before concealment.
How to Use This Pre-Concealment Testing Checklist
- Preparation: Gather approved submittals, marked plans, PPE, steel rule, calipers, depth probe, torque wrench, borescope, smoke pencil, thermometer, and hygrometer. Ensure safe access (lifts, guardrails, harnesses) and calibrations are valid.
- Open the checklist in interactive mode and select building level and grid line. Assign a unique joint ID to each test segment using the plan overlay.
- Perform measurements and tests per item instructions. Attach photos, videos, and readings to the relevant item, and note exact locations in metres from a fixed datum.
- Using the Interactive Checklist: Tick completed items, add comments for observations or defects, tag responsible parties, and set due dates for corrective actions.
- Export and Review: Generate a draft report and export to PDF/Excel for team review. Use the QR-secured link to reference the full evidence set on site.
- Sign-Off: Capture digital signatures from installer, GC, and inspector. Archive the final, QR-authenticated report and release the area for concealment.
Call to Action
- Start Checklist Tick off tasks, leave comments on items or the whole form, and export your completed report to PDF or Excel—with a built-in QR code for authenticity.
- Download Excel - Façade Perimeter Firestop Pre‑Concealment Testing
- Download PDF - Façade Perimeter Firestop Pre‑Concealment Testing
- View Image - Façade Perimeter Firestop Pre‑Concealment Testing
Cite & Embed
“Façade Perimeter Firestop Pre‑Concealment Testing by Quollnet”
with a link to
this source page.

FAQ
Question: What exactly is tested before concealment at façade perimeter joints?
Question: Which tools do I need, and what measurements should I record?
Question: How can I check smoke seal performance without pressurizing the whole building?
Question: Who must sign off before the perimeter joint is covered?
Question: What if I find gaps, poor adhesion, or obstructed movement allowances?
Related Articles
Broader reading and guidance connected to this checklist topic.


Open Ncrs At Taking-over / Dlp: What Happens At Handover And How To Escalate

Related Checklists
Keep the workflow moving with nearby templates chosen from similar checklist content.