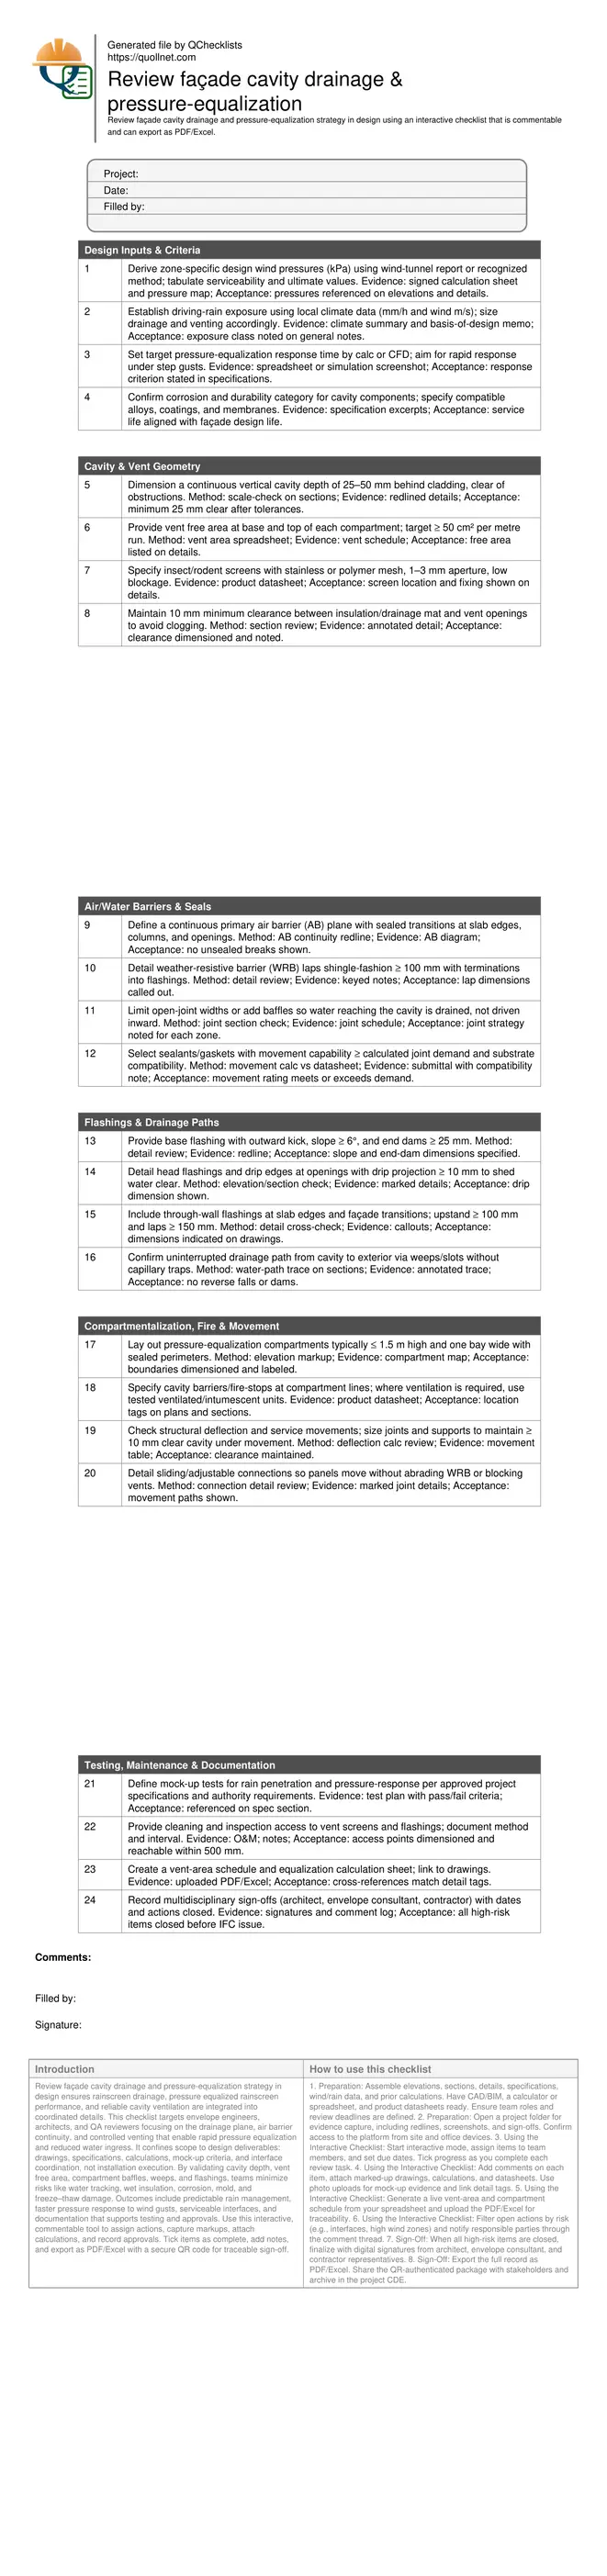
Review façade cavity drainage and pressure-equalization strategy in design
Definition: Review façade cavity drainage and pressure-equalization strategy in design helps envelope engineers and architects validate rainscreen drainage, cavity ventilation, and equalized compartments on coordinated drawings, calculations, and specifications.
- Verify cavity depth, vent area, flashings, and drainage continuity.
- Achieve rapid pressure equalization to limit water ingress under gust.
- Coordinate air barrier continuity and compartment seals across interfaces.
- Interactive, commentable checklist with export and QR code sign-off.
Review façade cavity drainage and pressure-equalization strategy in design ensures rainscreen drainage, pressure equalized rainscreen performance, and reliable cavity ventilation are integrated into coordinated details. This checklist targets envelope engineers, architects, and QA reviewers focusing on the drainage plane, air barrier continuity, and controlled venting that enable rapid pressure equalization and reduced water ingress. It confines scope to design deliverables: drawings, specifications, calculations, mock-up criteria, and interface coordination, not installation execution. By validating cavity depth, vent free area, compartment baffles, weeps, and flashings, teams minimize risks like water tracking, wet insulation, corrosion, mold, and freeze–thaw damage. Outcomes include predictable rain management, faster pressure response to wind gusts, serviceable interfaces, and documentation that supports testing and approvals. Use this interactive, commentable tool to assign actions, capture markups, attach calculations, and record approvals. Tick items as complete, add notes, and export as PDF/Excel with a secure QR code for traceable sign-off.
- Structure design decisions around wind-driven rain, venting, and drainage continuity. Confirm cavity geometry, vent free area, and compartment layout against calculated demands and practical tolerances, then capture evidence with redlined details, schedules, and signed calculations for a robust, auditable trail.
- Adopt a systems view: air barrier continuity, flashings, weeps, and equalized compartments must work together at every opening, floor line, and interface. Interactive online checklist with tick, comment, and export features secured by QR code.
- Plan verification early. Define mock-up performance, acceptable leakage limits per approved project specifications and authority requirements, and maintenance access. Close gaps with action owners, due dates, and attachments so issues are resolved on drawings before fabrication and procurement begin.
Design Inputs & Criteria
Cavity & Vent Geometry
Air/Water Barriers & Seals
Flashings & Drainage Paths
Compartmentalization, Fire & Movement
Testing, Maintenance & Documentation
Pressure-Equalized Rainscreen Principles in Design
Pressure equalization minimizes water ingress by allowing the cavity pressure to track exterior fluctuations through controlled venting while the air barrier stays continuous at the back. In design, this means sizing compartment vents for quick pressure response, laying out realistic compartment dimensions, and sealing compartment perimeters so air paths are short and predictable. The air barrier must be durable, continuous, and well-connected at interfaces so the cavity is the only available pressure reservoir. Joint strategies must limit direct rain access or convert it to drainable flow on the weathered face. Calculations and mock-up testing confirm response and leakage rates match targets. Documenting assumptions—such as wind pressure zones, driving rain intensity, and vent free area—keeps teams aligned and reduces later redesign. Practical acceptance cues include clearly dimensioned compartments, listed vent free areas, and traceable AB continuity details on coordinated elevations and sections.
- Vent areas sized for rapid pressure response.
- Compartment boundaries sealed and dimensioned.
- Air barrier continuity clearly redlined.
- Joint strategy limits direct rain entry.
- Assumptions documented and traceable.
Drainage Paths, Weeps, and Flashings That Work
Even with equalization, surfaces get wet; water must drain quickly to the exterior. Design continuous base and head flashings with positive slope, end dams, drip edges, and tie-ins to the WRB. Provide weep or slot outlets protected with low-blockage screens, and maintain clearances so insulation or battens do not clog vents. Trace the water path on each detail to catch reverse falls, capillary traps, and discontinuous laps. Size lap lengths and upstands so transient ponding cannot backflow into the wall. Ensure through-wall flashings are located at slab edges and façade steps where water might accumulate. Finally, include maintenance notes that enable periodic cleaning of screens and drainage paths. Acceptance cues include explicit slopes and dimensions on drawings, product data for screens, and notations that confirm drainage continuity across interfaces and transitions.
- Flashings slope out with end dams.
- Weeps protected by low-blockage screens.
- Clearances prevent vent obstruction.
- Water paths traced and annotated.
- Lap and upstand dimensions called out.
Interfaces, Fire Barriers, and Movement Accommodation
Interfaces concentrate risk: floor lines, columns, corners, and openings must keep the air barrier continuous while allowing the rainscreen cavity to vent and drain. Compartment lines often coincide with fire barriers; where ventilation must be retained, specify ventilated or intumescent barriers tested for the intended arrangement. Structural deflection, thermal movement, and seismic drift change joint widths; design connections and gaskets so movement does not pinch vents, tear membranes, or bridge the cavity. Provide details for adjustable brackets and sliding joints, and verify that minimum cavity depth remains after movement. Coordinate with mechanical intakes and exhausts to avoid short-circuiting compartments. Acceptance cues include compartment maps, barrier locations, movement tables, and details showing clear airflow around supports and penetrations. Clear O&M instructions ensure vents and barriers remain functional throughout service life.
- Fire barriers aligned with compartments.
- Movement paths avoid vent blockage.
- Minimum cavity depth maintained.
- AB continuous at all interfaces.
- O&M access to screens defined.
How to Use This Interactive Design Review Checklist
- Preparation: Assemble elevations, sections, details, specifications, wind/rain data, and prior calculations. Have CAD/BIM, a calculator or spreadsheet, and product datasheets ready. Ensure team roles and review deadlines are defined.
- Preparation: Open a project folder for evidence capture, including redlines, screenshots, and sign-offs. Confirm access to the platform from site and office devices.
- Using the Interactive Checklist: Start interactive mode, assign items to team members, and set due dates. Tick progress as you complete each review task.
- Using the Interactive Checklist: Add comments on each item, attach marked-up drawings, calculations, and datasheets. Use photo uploads for mock-up evidence and link detail tags.
- Using the Interactive Checklist: Generate a live vent-area and compartment schedule from your spreadsheet and upload the PDF/Excel for traceability.
- Using the Interactive Checklist: Filter open actions by risk (e.g., interfaces, high wind zones) and notify responsible parties through the comment thread.
- Sign-Off: When all high-risk items are closed, finalize with digital signatures from architect, envelope consultant, and contractor representatives.
- Sign-Off: Export the full record as PDF/Excel. Share the QR-authenticated package with stakeholders and archive in the project CDE.
Call to Action
- Start Checklist Tick off tasks, leave comments on items or the whole form, and export your completed report to PDF or Excel—with a built-in QR code for authenticity.
- Download Excel - Façade Cavity Drainage & Pressure-Equalization Design Review
- Download PDF - Façade Cavity Drainage & Pressure-Equalization Design Review
- View Image - Façade Cavity Drainage & Pressure-Equalization Design Review
Cite & Embed
“Façade Cavity Drainage & Pressure-Equalization Design Review by Quollnet”
with a link to
this source page.
FAQ
Question: How do I size vent free area for pressure-equalized compartments?
Question: What cavity depth should I allow where insulation fills the space?
Question: How do compartment sizes affect pressure-equalization performance?
Question: Which tests confirm drainage and equalization performance before construction?
Related Articles
Broader reading and guidance connected to this checklist topic.


Is It Important To Customize Your Qr Code And How To Do It?
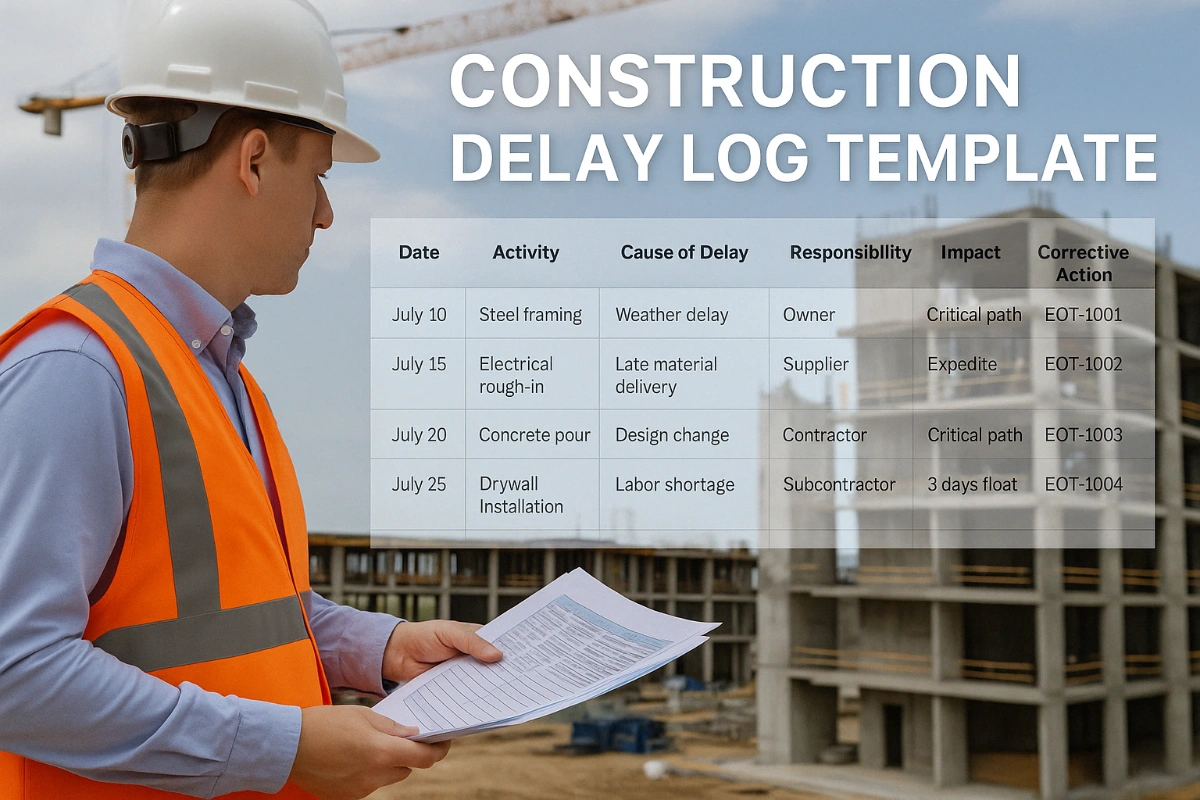
Construction Delay Log Template | Excel, Pdf & Word Download

Related Checklists
Keep the workflow moving with nearby templates chosen from similar checklist content.