Inspect stone cladding anchor installation before panel hanging
Definition: Inspect stone cladding anchor installation before panel hanging for QA teams: a structured pre-hanging field inspection assuring anchors, fixings, substrates, and layouts meet specifications, tolerances, and safety before façade panels are lifted.
- Confirms substrates, anchors, and brackets match drawings and specifications.
- Verifies embedment, torque, and edge distances within stated tolerances.
- Captures photos, readings, and approvals for traceable quality records.
- Interactive, commentable checklist with export and QR code verification.
Inspect stone cladding anchor installation before panel hanging is a critical control that validates anchor positioning, embedment, and fixing integrity prior to lifting any stone panel. This pre-installation inspection for dry cladding and façade anchor systems addresses undercut, expansion, and adhesive anchors, as well as support brackets and shims. It focuses strictly on the period after drilling/fixing and before panel hanging. By verifying substrates, grid layout, edge distances, torque values, and corrosion protection, you avoid loose fixings, cracked stone, water ingress, and misaligned façades. The outcome is a safe, compliant, and repeatable baseline ready for panel hoisting, with complete traceability of materials, batch numbers, and survey data. Use this interactive checklist on site: tick each requirement, add comments or photos where issues arise, and export to PDF/Excel with a scannable QR for sign-off and future audits.
- This pre-hanging inspection ensures anchors, brackets, and substrates conform to drawings and specifications, with documented measurements for spacing, edge distances, embedment, and torque. It reduces rework, protects workers, and prevents costly panel damage or misalignment during lifting.
- The checklist standardizes methods such as brush–blow–brush hole cleaning, calibrated torque verification, bracket levelling, and survey-based layout confirmation. It also secures material traceability with batch/heat numbers, expiry checks for adhesives, and photographic evidence tied to location IDs.
- Interactive online checklist with tick, comment, and export features secured by QR code. Supervisors, inspectors, and installers can collaborate in real time, close observations, and produce a verifiable audit trail that supports approvals per approved project specifications and authority requirements.
- Acceptance cues are practical and measurable: survey tolerances in millimetres, torque in N·m, hole depth by gauge, and levelness per metre. Each step captures on-the-spot evidence so deviations are identified early and corrected before panels arrive at the pick point.
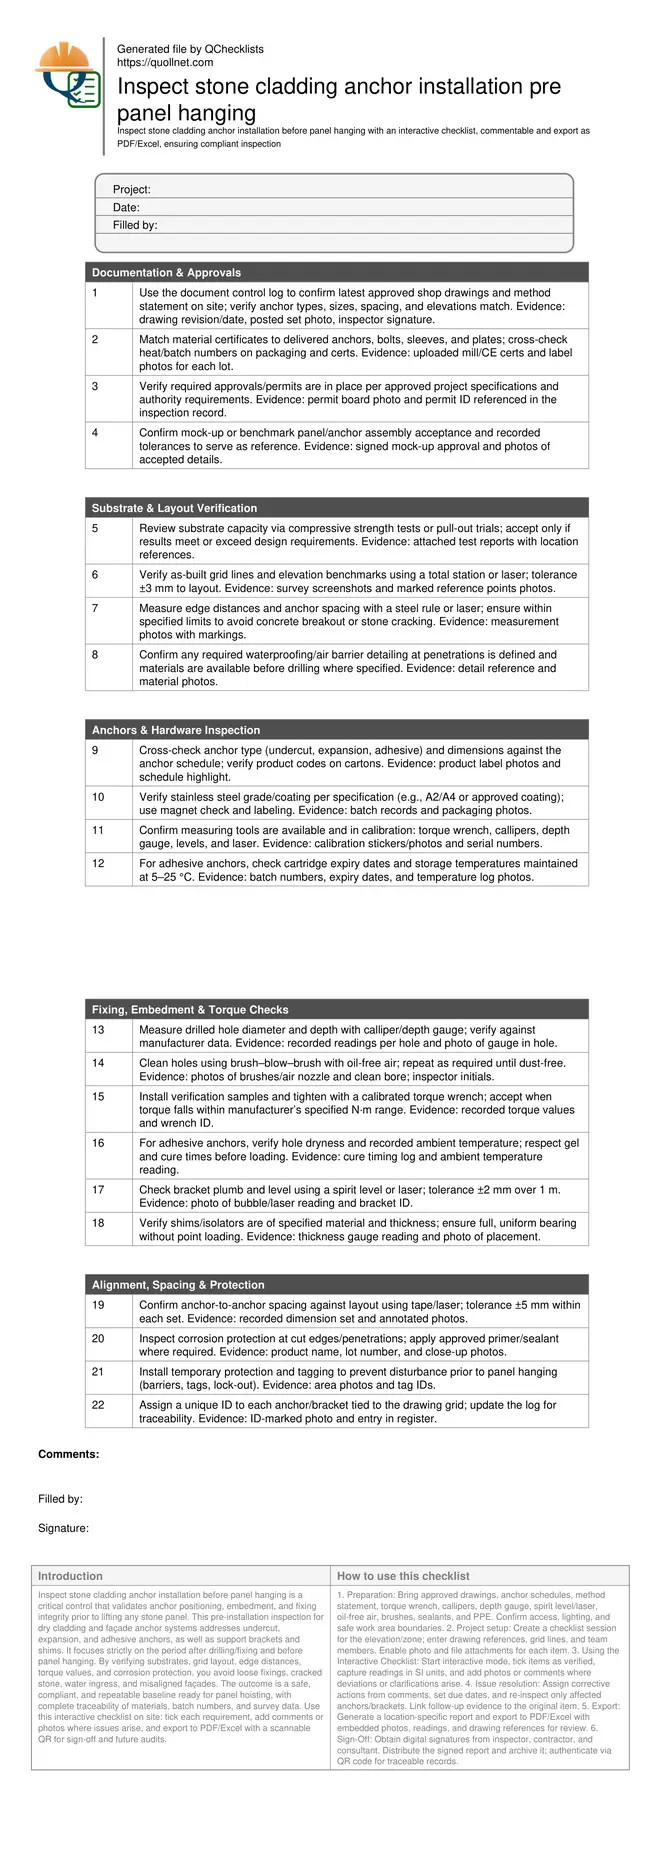
Documentation & Approvals
Substrate & Layout Verification
Anchors & Hardware Inspection
Fixing, Embedment & Torque Checks
Alignment, Spacing & Protection
Why pre-hanging anchor inspections prevent failures
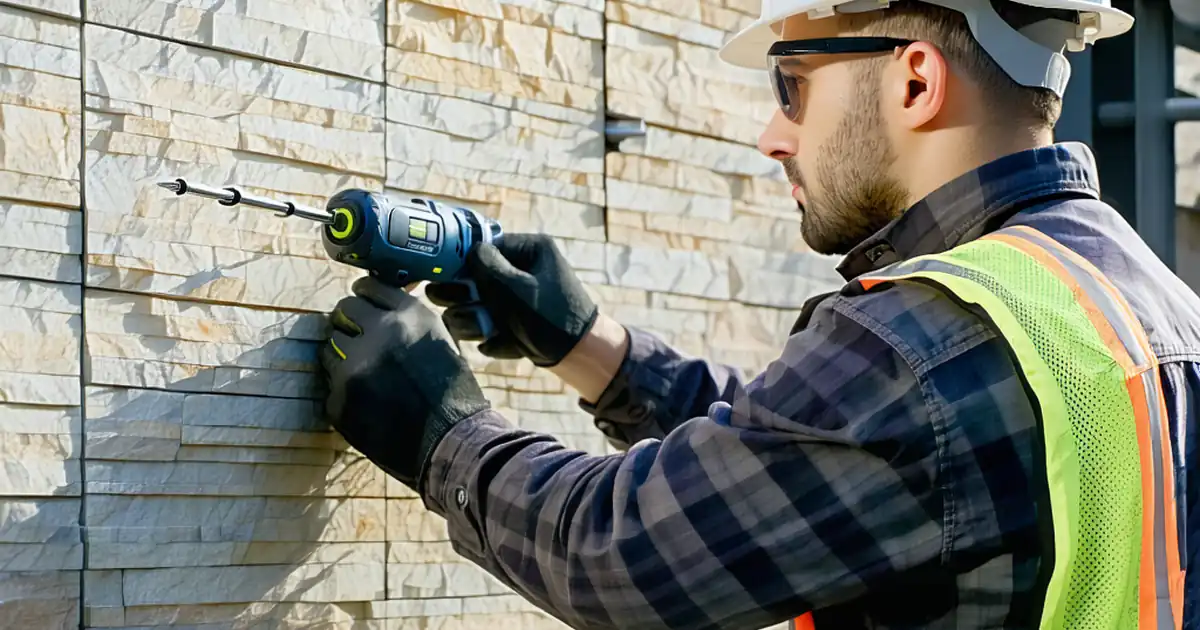
Before any stone panel is lifted, anchors and brackets must prove location accuracy, embedment, and fixation strength. Early verification prevents loose fixings, cracked stone, and misaligned façades—issues that often arise from poor layout control, unclean holes, or over/under-torque. A disciplined review of drawings, anchor schedules, and mock-up tolerances sets clear acceptance criteria. Field checks focus on edge distances, spacing, and substrate capacity via test results. Material traceability matters: wrong steel grades or expired adhesive cartridges accelerate corrosion or reduce bond performance. Inspectors should demand calibrated tools, record torque in N·m, and photograph each critical condition. By locking these basics before panel hanging, the lifting crew receives a ready, safe interface that resists slip, rotation, and water ingress, reducing rework and delays. This approach also streamlines approvals because all evidence sits in a structured record aligned with project specifications and authority requirements.
- Verify locations, embedment, torque, and bracket level before lifting.
- Use calibrated tools; record readings and serial numbers.
- Maintain material traceability with batch and heat numbers.
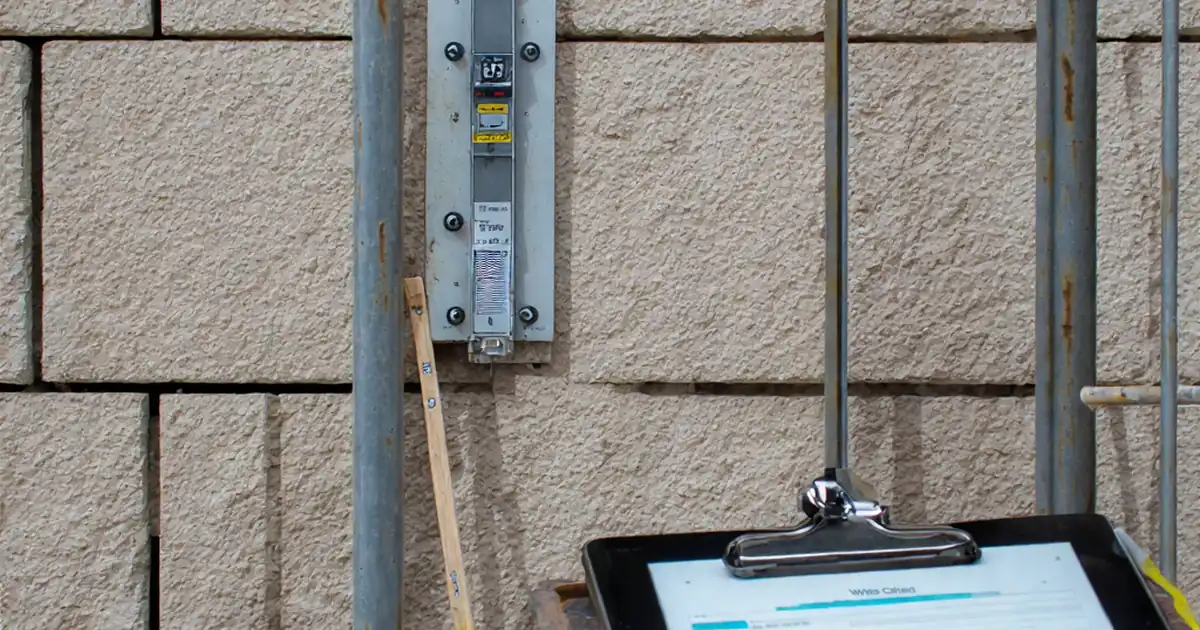
- Photograph measurements and conditions at each anchor set.
Methods and tolerances that deliver consistent results
Reliable cladding performance depends on consistent methods. For drilled anchors, confirm diameter and depth against the data sheet, then apply brush–blow–brush using oil-free air to remove dust. For adhesive anchors, check hole dryness, ambient temperature, and curing times; record every step. Verify bracket plumb and level to ±2 mm over 1 m so panel joints track straight. Use a total station or laser to verify layout to ±3 mm, and measure anchor spacing to within ±5 mm in each set. Capture torque with a calibrated wrench, meeting the manufacturer’s N·m range. Protect cut edges and penetrations with approved primer or sealant to limit corrosion and water ingress. Finally, use shims/isolators of specified thickness to achieve full bearing without point loads. When these tolerances and methods are observed and evidenced, installers can hang panels with confidence and minimal adjustment on the line.
- Clean holes thoroughly; dust ruins bond and torque accuracy.
- Record torque values and wrench ID for every anchor tested.
- Level brackets to ±2 mm over 1 m for straight joints.
- Survey layout to ±3 mm and spacing within ±5 mm.
Documentation and traceability for fast approvals
Strong records accelerate approvals and reduce disputes. Start by confirming the latest drawings and method statement. Link every installed anchor/bracket to a unique ID and drawing grid reference. Attach photos for layout marks, gauge readings, torque displays, and material labels. For adhesive anchors, log batch numbers, expiry dates, and curing durations. For mechanical anchors, retain the manufacturer’s torque/setting data alongside your readings. Store calibration certificates for torque wrenches, callipers, and levels. Add survey outputs (screenshots and point lists) that confirm position and elevation. Ensure corrosion protection products and sealants are traceable to lot numbers. By consolidating this evidence in a shared, interactive checklist, supervisors and inspectors can comment, close observations, and export reports instantly. This transparency supports conformance to the approved project specifications and authority requirements and gives the lifting team a clear “go/no-go” decision.
- Use unique IDs tied to drawing grids for each anchor.
- Capture photos of labels, gauges, and survey screens.
- Attach calibration and batch records to each location.
- Export signed reports for rapid stakeholder approval.
How to use this interactive pre-hanging anchor inspection checklist
- Preparation: Bring approved drawings, anchor schedules, method statement, torque wrench, callipers, depth gauge, spirit level/laser, oil-free air, brushes, sealants, and PPE. Confirm access, lighting, and safe work area boundaries.
- Project setup: Create a checklist session for the elevation/zone; enter drawing references, grid lines, and team members. Enable photo and file attachments for each item.
- Using the Interactive Checklist: Start interactive mode, tick items as verified, capture readings in SI units, and add photos or comments where deviations or clarifications arise.
- Issue resolution: Assign corrective actions from comments, set due dates, and re-inspect only affected anchors/brackets. Link follow-up evidence to the original item.
- Export: Generate a location-specific report and export to PDF/Excel with embedded photos, readings, and drawing references for review.
- Sign-Off: Obtain digital signatures from inspector, contractor, and consultant. Distribute the signed report and archive it; authenticate via QR code for traceable records.
Call to Action
- Start Checklist Tick off tasks, leave comments on items or the whole form, and export your completed report to PDF or Excel—with a built-in QR code for authenticity.
- Download Excel - Stone Cladding Anchor Pre-Hanging Inspection
- Download PDF - Stone Cladding Anchor Pre-Hanging Inspection
- View Image - Stone Cladding Anchor Pre-Hanging Inspection
Cite & Embed
“Stone Cladding Anchor Pre-Hanging Inspection by Quollnet”
with a link to
this source page.

FAQ
Question: What tolerances should I apply when checking anchor layout and bracket level?
Question: How do I verify adhesive anchors before panel hanging?
Question: Which evidence is most important for approvals and traceability?
Question: When should nonconformities block panel hanging activities?
Related Articles
Broader reading and guidance connected to this checklist topic.


Related Checklists
Keep the workflow moving with nearby templates chosen from similar checklist content.