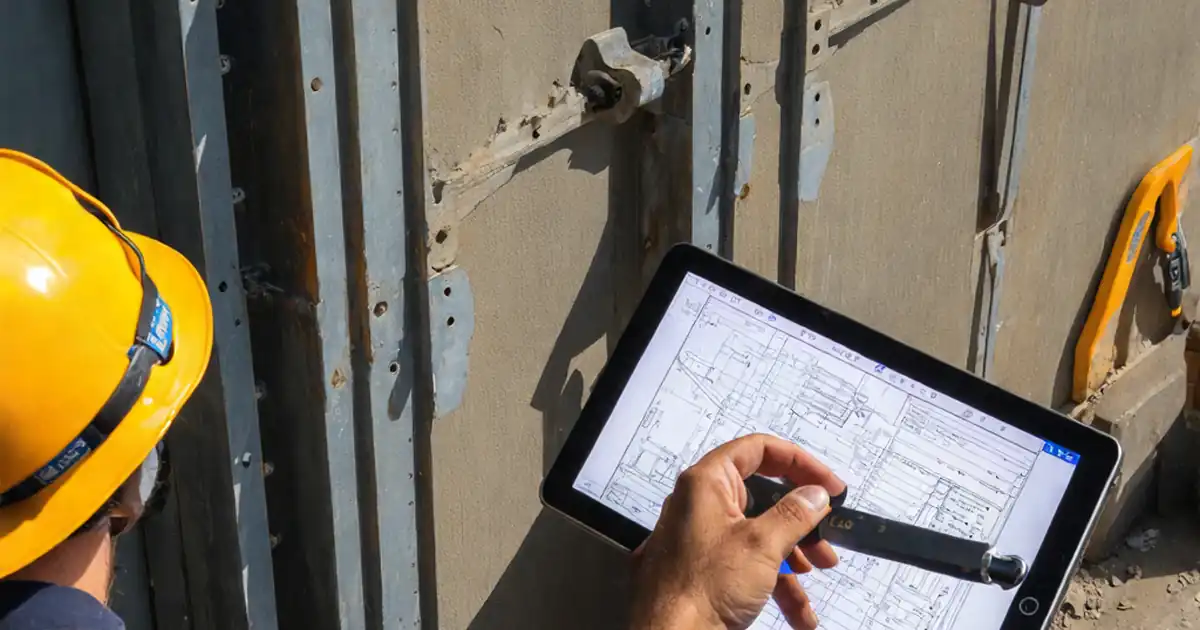
Curtain Wall Splice Joints and Movement Allowance Inspection
Definition: Inspect curtain wall splice joints and movement allowances for façade inspectors and installers, verifying alignment, sealing, fasteners, and slip capacity to accommodate thermal expansion and interstory drift per approved project specifications and authority requirements.
- Confirm alignment, gaps, and sleeve engagement with calibrated lasers and gauges.
- Verify bolts, slots, and washers permit specified thermal and drift movement.
- Inspect gaskets, backer rods, and sealant for continuity and drainage.
- Interactive, commentable, export, QR code for traceable field sign-offs.
Inspect curtain wall splice joints and movement allowances to ensure the façade can accommodate thermal expansion, interstory drift, and construction tolerances without leakage or binding. This curtain wall joint inspection focuses specifically on mullion and transom splice interfaces, movement joints, and their associated fasteners, gaskets, and sealants. By concentrating on splice alignment, connector engagement, slotted-hole orientation, and moisture management details, you prevent cracking sealant, stressed glazing, and fastener fatigue. Verifying movement capacity at the splice—rather than at anchors or perimeter seals—keeps scope tight and decisions clear. The outcome is a resilient, pressure-equalized envelope with continuous thermal breaks and documented evidence: torque logs, calibrated measurements, and photo records. Use this field-ready, interactive checklist to capture measurements, attach photos with scales, and reference approved submittals. Tick items as you go, add location-tagged comments for any nonconformities, and export your results as PDF/Excel with a QR-secured link for sign-off and future traceability.
- This checklist targets splice joints where curtain wall segments connect, ensuring alignment within tight tolerances, correct sleeve engagement, and appropriate fastener torque. It focuses on movement capacity at the splice to handle thermal expansion and interstory drift without binding, leakage, or thermal bridging.
- Technicians gain step-by-step methods using calibrated tools—lasers, calipers, feeler gauges, hygrometers, and torque wrenches—to verify gaps, slot orientation, gasket continuity, and sealant quality. Acceptance cues, simple tests, and photo-evidence requirements reduce ambiguity and speed sign-offs on complex façades.
- Interactive online checklist with tick, comment, and export features secured by QR code.
- Robust documentation is baked in: capture batch numbers, calibration stickers, torque logs, and annotated drawing snapshots. Export organized reports for quality records, share with project stakeholders, and maintain a defensible audit trail per approved project specifications and authority requirements.
Documentation and Access Preparation
Splice Joint Alignment and Fit-Up
Fasteners and Connectors
Sealing and Moisture Management
Movement Allowances and Verification
Common splice joint risks and how to spot them early
Splice joints often fail quietly before they fail visibly. Small face offsets create glazing stress; over-torqued bolts clamp out intended slip; misplaced gaskets bridge pressure-equalized cavities; and errant sealant bonds sliding parts. Each can eliminate movement allowance and force loads into brittle components. Start with alignment: a ≤1.0 mm face offset and ≤2 mm over 3 m plumb/level deviation prevent hard points. Next, ensure slotted holes face the correct movement direction and remain burr-free. Isolation materials—PTFE or bond-breaker tape—must separate moving interfaces so fasteners secure without locking. Finally, moisture management and thermal breaks must pass through the splice uninterrupted; blocked weeps or conductive bridges turn minor mistakes into leaks and condensation. Treat the splice as both a structural link and an environmental joint, demanding correct fit-up, freedom to move, and clear drainage.
- Small offsets amplify glazing stress and leakage risk.
- Slots must align with movement direction and stay burr-free.
- Isolation tapes prevent fasteners from locking the splice.
- Thermal breaks and weeps must be continuous at joints.
- Sealant must not bond sliding interfaces.
Measurement tactics that work on active façades
Consistent measurements beat perfect ones taken inconsistently. Use a laser over a 3 m base to assess cumulative misalignment, then confirm splice face offsets with a straightedge and feeler gauges. A digital caliper verifies the designed splice gap and sleeve engagement; document readings with clear, scaled photos. Torque wrenches must be calibrated and used in two stages: snug, then final torque, logging every bolt. For moisture control, run a simple 0.5 L pour test to confirm weeps and pressure-equalized cavities are open. Environmental checks matter: substrate must be dry, temperature 5–40 °C, and at least 3 °C above dew point before applying primers or sealants. Recording the method alongside the measurement—tool, range, and tolerance—creates credible evidence and accelerates approvals.
- Measure, then photograph each reading with a scale.
- Log torque by bolt ID; stay within ±10% of spec.
- Use pour tests to prove drainage performance.
- Confirm dew point margin ≥3 °C before sealing.
- Calibrate tools within six months.
Evidence-driven closeout and practical sign-off
A well-documented splice inspection prevents repeat access and disputes. Capture batch numbers for fasteners and sealants, calibration photos, and annotated drawing snippets showing required drift and thermal allowances. Note any substitutions and confirm compatibility with aluminum and sealants. When simulating movement, record the displacement, retightening torques, and any marks that prove slip occurred without binding. For thermal breaks, a quick infrared spot check helps confirm continuity. Organize evidence by gridline and elevation, then export a concise report for review. Digital signatures and a QR-secured link allow stakeholders to validate authenticity later. This method speeds approvals while maintaining a defensible audit trail per approved project specifications and authority requirements.
- Tag evidence by gridline, elevation, and date.
- Attach batch labels and calibration stickers.
- Record displacement and re-torque after slip tests.
- Export reports and archive with QR authentication.
How to Use This Interactive Curtain Wall Splice Inspection Checklist
- Preparation: review approved drawings and submittals for splice details, movement values, and sealant requirements. Gather calibrated tools (laser, calipers, feeler gauges, torque wrench, hygrometer), PPE, access equipment, and cleaning materials suitable for aluminum.
- Open the checklist in interactive mode. Set project, gridlines, elevations, and inspector details. Enable geolocation and time stamps so photos and readings are auto-tagged for traceability.
- During inspection, tick each item, input measurements with units, and attach close-up photos or short videos. Use comments to note observations, reference drawing details, and link to material batch labels.
- Manage nonconformities by flagging items, assigning actions, and setting due dates. Add responses and follow-up photos in comment threads to maintain a clear corrective record.
- Export results as PDF/Excel with embedded photos, torque logs, and drawings. Include a QR code for secure verification and quick retrieval during audits and walkthroughs.
- Sign-Off: obtain digital signatures from the inspector and reviewer, distribute the report to stakeholders, and archive the record per approved project specifications and authority requirements.

Call to Action
- Start Checklist Tick off tasks, leave comments on items or the whole form, and export your completed report to PDF or Excel—with a built-in QR code for authenticity.
- Download Excel - Curtain Wall Splice Joints & Movement Allowances Inspection
- Download PDF - Curtain Wall Splice Joints & Movement Allowances Inspection
- View Image - Curtain Wall Splice Joints & Movement Allowances Inspection
Cite & Embed
“Curtain Wall Splice Joints & Movement Allowances Inspection by Quollnet”
with a link to
this source page.

FAQ
Question: What alignment and gap tolerances should I use at a curtain wall splice?
Question: How do I confirm movement allowance without specialized test rigs?
Question: When is it acceptable to apply sealant at splice joints?
Question: What evidence should be captured for traceable sign-off?
Related Articles
Broader reading and guidance connected to this checklist topic.

Is The Crack You See On Your Wall Serious Or Minor Cosmetic Issue?

Fidic Site Instruction Form – Free Download And Usage Tips

Master Construction Project Cashflow With Cashflowpot

Open Ncrs At Taking-over / Dlp: What Happens At Handover And How To Escalate
Related Checklists
Keep the workflow moving with nearby templates chosen from similar checklist content.