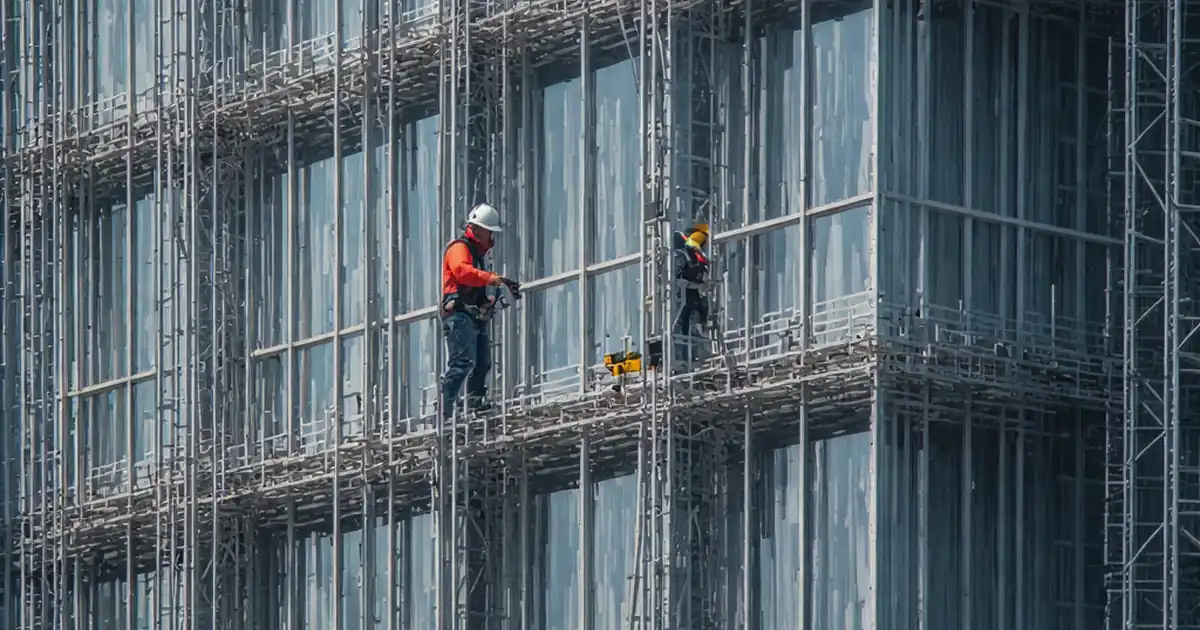
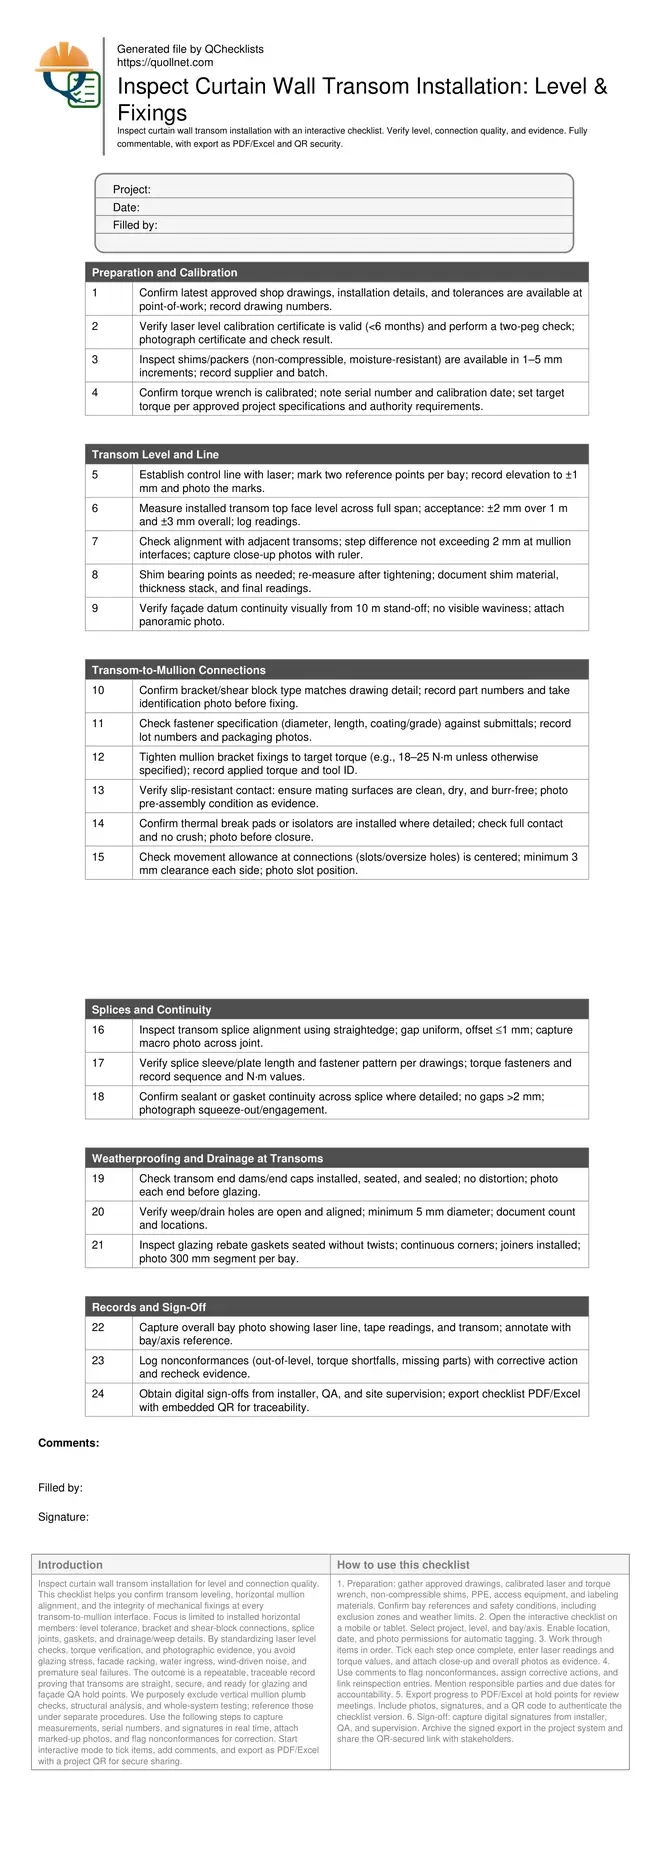
Inspect Curtain Wall Transom Installation: Level & Fixings
Definition: Inspect curtain wall transom installation for level and connection quality guides site engineers to verify horizontal alignment, bracket fixings, and drainage interfaces on installed transoms.
- Confirm transom levelness with laser; document readings and locations.
- Verify mechanical connections, torque, and slip resistance at brackets.
- Check splices, gaskets, and drainage paths for continuous performance.
- Interactive, commentable checklist with export and QR code verification.
Inspect curtain wall transom installation for level and connection quality. This checklist helps you confirm transom leveling, horizontal mullion alignment, and the integrity of mechanical fixings at every transom-to-mullion interface. Focus is limited to installed horizontal members: level tolerance, bracket and shear-block connections, splice joints, gaskets, and drainage/weep details. By standardizing laser level checks, torque verification, and photographic evidence, you avoid glazing stress, facade racking, water ingress, wind-driven noise, and premature seal failures. The outcome is a repeatable, traceable record proving that transoms are straight, secure, and ready for glazing and façade QA hold points. We purposely exclude vertical mullion plumb checks, structural analysis, and whole-system testing; reference those under separate procedures. Use the following steps to capture measurements, serial numbers, and signatures in real time, attach marked-up photos, and flag nonconformances for correction. Start interactive mode to tick items, add comments, and export as PDF/Excel with a project QR for secure sharing.
- Ensure transoms are level within agreed tolerances using a calibrated laser and controlled shimming methods, preventing glazing edge loading, air leakage, and aesthetic banding across adjacent bays and spandrels.
- Confirm connection quality at transom-to-mullion interfaces with verified fastener type, length, and torque, reducing slip under service loads and ensuring consistent movement accommodation at shear blocks and brackets.
- Validate splice alignment, gaskets, end dams, and drainage paths so pressure equalisation and weeping function as intended, lowering risk of trapped water, corrosion, and staining at façade surfaces.
- Interactive online checklist with tick, comment, and export features secured by QR code.
Preparation and Calibration
Transom Level and Line
Transom-to-Mullion Connections
Splices and Continuity
Weatherproofing and Drainage at Transoms
Records and Sign-Off
Practical leveling methods and tolerances that stand up on site
Use a calibrated rotary or cross-line laser to project the datum across each bay before fixing transoms. Mark two control points per opening so you can verify level after tightening. Typical acceptance is ±2 mm over 1 m and ±3 mm per transom span, but always follow approved project tolerances. Where bearing conditions vary, introduce non-compressible shims and recheck after torqueing; avoid stacking more than necessary to prevent creep. Panoramic sightlines from street level help flag cumulative waviness not obvious at close range. Record all readings with bay/axis references and photographs, ensuring repeatability for follow-up inspections. When level cannot be achieved within tolerance, stop, identify root cause (twisted mullion, bracket mis-set, packer compression), and correct before proceeding to glazing. Capturing pre- and post-adjustment photos demonstrates control and prevents disputes later.
- Laser datum first, then fix and remeasure after torque.
- Use non-compressible shims; avoid excessive stacking.
- Sightline checks reveal cumulative waviness early.
- Document readings with locations and photos.
Connection quality: torque, slip resistance, and movement
Reliable transom performance depends on correct bracket selection, fastener specification, and installation torque. Verify part numbers, fastener grade, and lengths against submittals, then tighten using a calibrated wrench with recorded N·m values. Ensure contact faces are clean and burr-free to maximize slip resistance under wind load. Many systems rely on slotted holes or shear blocks to accommodate thermal and building movement; confirm slots are centered at the inspection temperature and that thermal isolators are present and undamaged. If gaps or misalignment exist at splices, correct them before sealing. Over-torque can crush isolators or strip threads; under-torque leads to rattle, drift, and seal failures. Keep all evidence—photos, batch labels, torque logs—tied to the bay identifier for traceability and warranty support.
- Record torque values and tool serial numbers.
- Clean mating faces prevent slip under load.
- Center slots to allow thermal movement.
- Protect and verify thermal isolators.
Drainage, gaskets, and readiness for glazing
Even perfectly level transoms can fail if drainage and gasket details are incomplete. Verify end dams or caps are installed and sealed to prevent water bypass. Ensure weep paths are open and continuous; use a gauge pin to confirm clear 5 mm minimum openings. Gaskets must be fully seated without twists or gaps, with joiners or vulcanized corners as detailed. Sealant application at splices should show consistent squeeze-out without voids. These checks safeguard pressure equalisation and reduce staining, corrosion risk, and interior leaks once glazing loads the frame. Complete a final bay photo that shows the laser line, tape readings, gasket seating, and visible weeps to confirm readiness for the next trade.
- End dams and caps seated and sealed.
- Weep holes open; confirm with gauge pin.
- Gaskets continuous, untwisted, fully engaged.
- Final photo confirms readiness for glazing.
How to Use This Transom Level and Connection Checklist
- Preparation: gather approved drawings, calibrated laser and torque wrench, non-compressible shims, PPE, access equipment, and labeling materials. Confirm bay references and safety conditions, including exclusion zones and weather limits.
- Open the interactive checklist on a mobile or tablet. Select project, level, and bay/axis. Enable location, date, and photo permissions for automatic tagging.
- Work through items in order. Tick each step once complete, enter laser readings and torque values, and attach close-up and overall photos as evidence.
- Use comments to flag nonconformances, assign corrective actions, and link reinspection entries. Mention responsible parties and due dates for accountability.
- Export progress to PDF/Excel at hold points for review meetings. Include photos, signatures, and a QR code to authenticate the checklist version.
- Sign-off: capture digital signatures from installer, QA, and supervision. Archive the signed export in the project system and share the QR-secured link with stakeholders.
Call to Action
- Start Checklist Tick off tasks, leave comments on items or the whole form, and export your completed report to PDF or Excel—with a built-in QR code for authenticity.
- Download Excel - Curtain Wall Transom Level & Connection Inspection
- Download PDF - Curtain Wall Transom Level & Connection Inspection
- View Image - Curtain Wall Transom Level & Connection Inspection
Cite & Embed
“Curtain Wall Transom Level & Connection Inspection by Quollnet”
with a link to
this source page.

FAQ
Question: What is an acceptable level tolerance for curtain wall transoms?
Question: Which tools provide the most reliable transom level checks?
Question: How should I handle a misaligned transom splice joint?
Question: Do I need to check drainage and gaskets before glazing?
Related Articles
Broader reading and guidance connected to this checklist topic.

Is The Crack You See On Your Wall Serious Or Minor Cosmetic Issue?

How Bim Modeling Supports Prefabrication And Modular Construction


How To Create Your First Sang In 4 Easy Steps
Related Checklists
Keep the workflow moving with nearby templates chosen from similar checklist content.