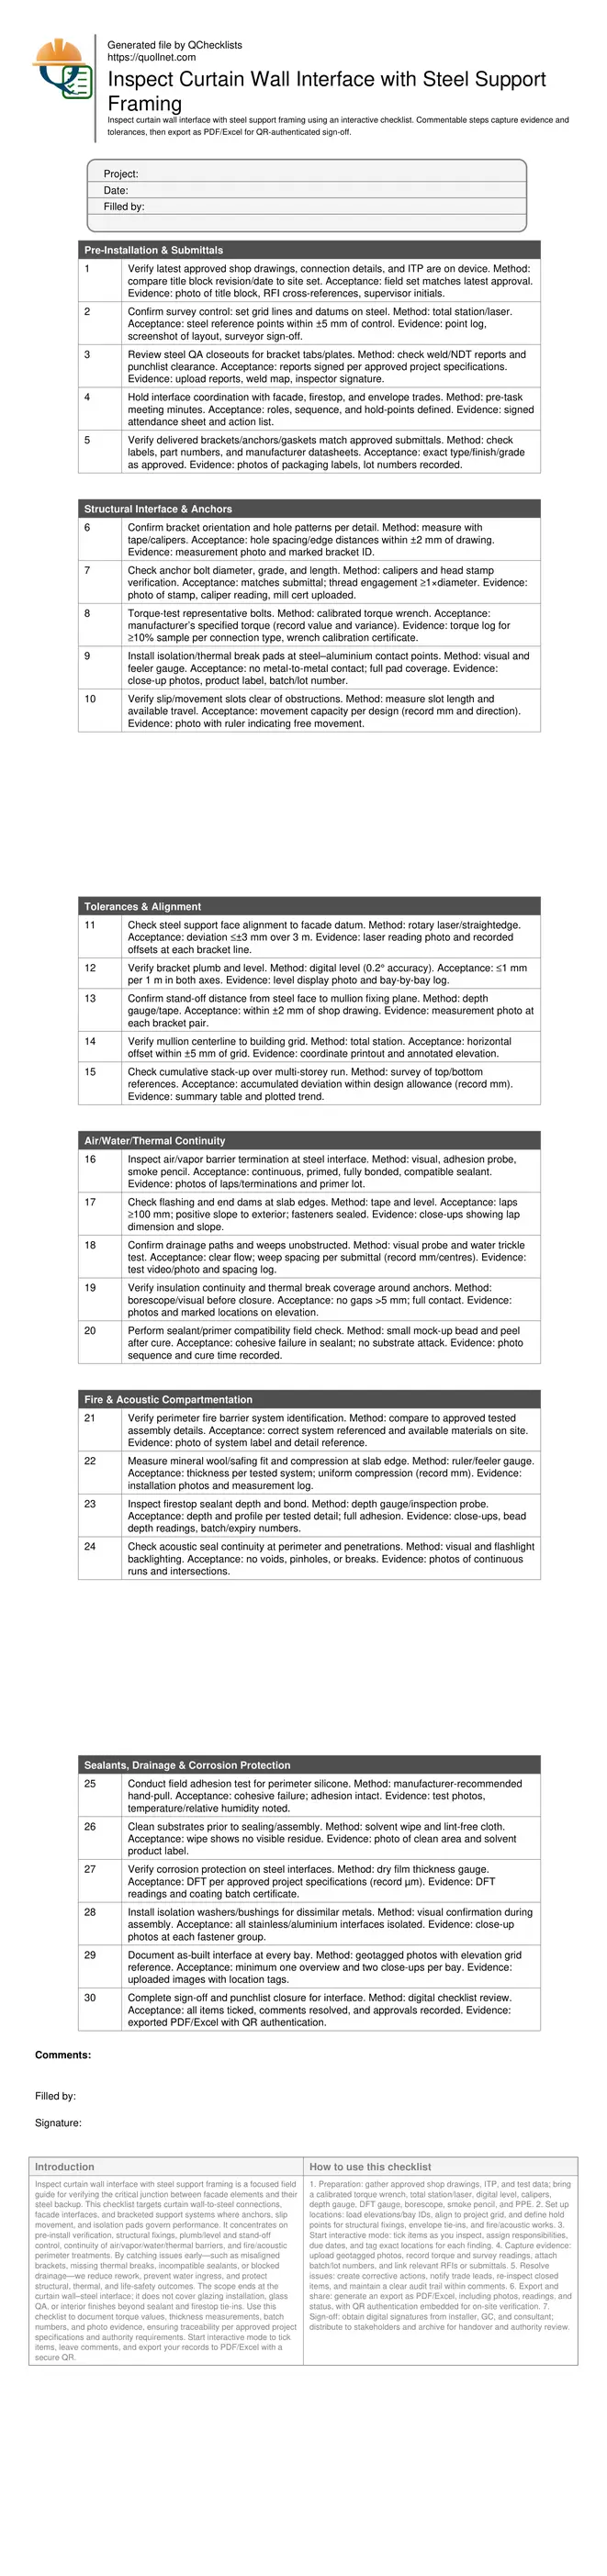
Curtain Wall–Steel Support Framing Interface Inspection
Definition: Inspect curtain wall interface with steel support framing is a site-ready checklist for facade supervisors and engineers verifying structural fixings, envelope continuity, tolerances, and documentation before glazing and sealing proceed.
- Verify anchors, brackets, and thermal breaks match approved submittals.
- Control plumb, level, and stand-off within tight millimetre tolerances.
- Ensure air, water, fire, and acoustic barriers remain continuous.
- Interactive, commentable steps with export and QR code verification.
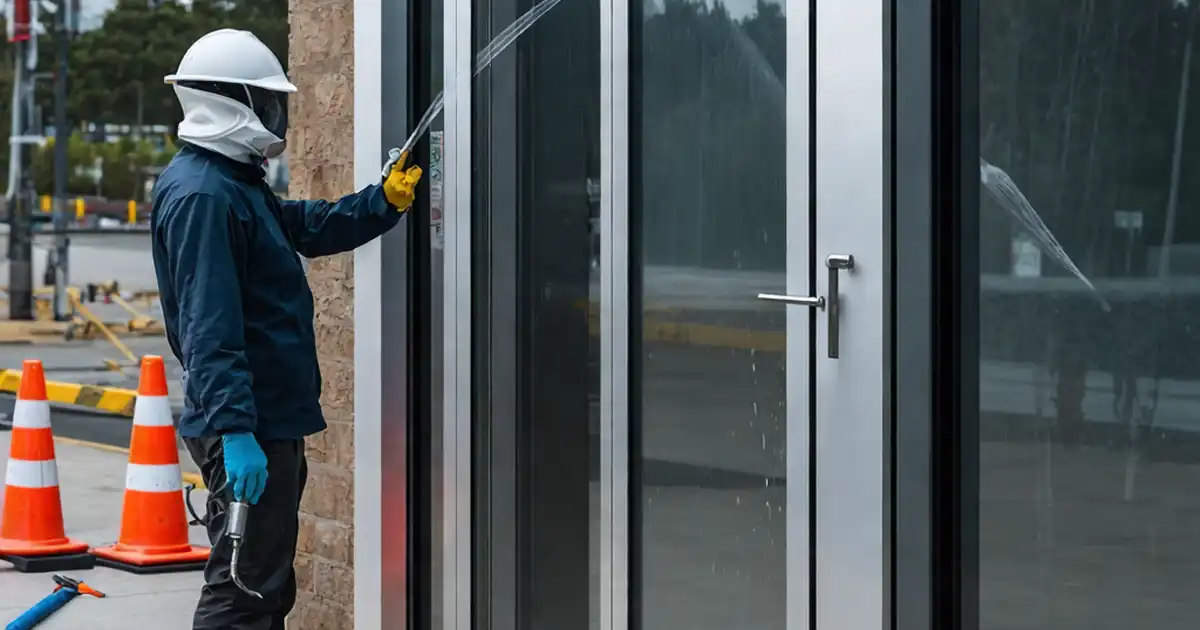
Inspect curtain wall interface with steel support framing is a focused field guide for verifying the critical junction between facade elements and their steel backup. This checklist targets curtain wall-to-steel connections, facade interfaces, and bracketed support systems where anchors, slip movement, and isolation pads govern performance. It concentrates on pre-install verification, structural fixings, plumb/level and stand-off control, continuity of air/vapor/water/thermal barriers, and fire/acoustic perimeter treatments. By catching issues early—such as misaligned brackets, missing thermal breaks, incompatible sealants, or blocked drainage—we reduce rework, prevent water ingress, and protect structural, thermal, and life-safety outcomes. The scope ends at the curtain wall–steel interface; it does not cover glazing installation, glass QA, or interior finishes beyond sealant and firestop tie-ins. Use this checklist to document torque values, thickness measurements, batch numbers, and photo evidence, ensuring traceability per approved project specifications and authority requirements. Start interactive mode to tick items, leave comments, and export your records to PDF/Excel with a secure QR.
- Ensure structural brackets, anchors, and isolation components match approved drawings and submittals before facade bays are erected. Capture torque values, lot certifications, and photographic evidence to prove compliance and maintain traceable records throughout installation sequencing and subsequent glazing activities.
- Control geometry at the interface using total station, laser levels, and calipers to hold plumb, level, and stand-off within tight millimetre tolerances. Early correction limits panel stress, prevents binding in expansion joints, and supports reliable weather and movement performance.
- Maintain continuous air, water, thermal, fire, and acoustic barriers at steel transitions. Verify compatible primers and sealants, intact thermal breaks, clear drainage paths, tested perimeter fire assemblies, and documented batch labels to avoid moisture intrusion and life-safety nonconformities.
- Interactive online checklist with tick, comment, and export features secured by QR code.
Pre-Installation & Submittals
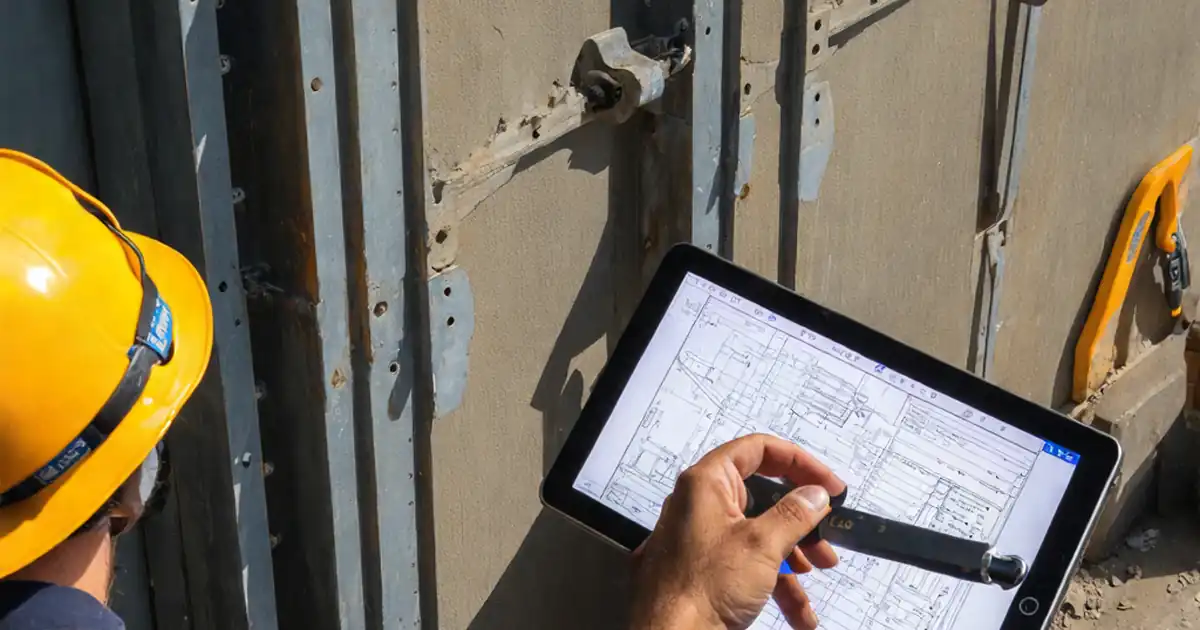
Structural Interface & Anchors
Tolerances & Alignment
Air/Water/Thermal Continuity
Fire & Acoustic Compartmentation
Sealants, Drainage & Corrosion Protection
Structural fixings, movement, and tolerance at the steel interface
The curtain wall–to–steel interface transfers dead, live, wind, and seismic actions, so fixings and geometry must be correct before panels arrive. Start by confirming bracket type, hole patterns, and anchor grades match approved submittals. Use calibrated torque wrenches to achieve manufacturer torque, logging values and wrench certificates. Verify isolation pads prevent galvanic contact, and that slip slots provide the designed movement in the correct direction. Control geometry using total stations and rotary lasers: face alignment, stand-off, and plumb/level must remain within tight millimetre limits to avoid glazing stress and binding in expansion joints. Survey cumulative deviations over multiple storeys to catch stack-up early. Record measurements, photos, and lot numbers as evidence. Clear hold points enable correction before irreversible works continue, reducing rework and programme risk while keeping performance on target per approved project specifications and authority requirements.
- Match anchors and brackets to approved submittals.
- Torque-test and log values with calibration proof.
- Keep plumb, level, and stand-off within millimetre limits.
- Provide slip capacity without obstructions.
- Record geometry and lot data for traceability.
Maintaining envelope continuity: air, water, thermal, and drainage
Performance failures frequently originate at transitions. At steel interfaces, confirm air/vapor barriers are compatible, fully bonded, and terminated with primers and sealants per the manufacturer. Flashings require ≥100 mm laps and outward falls; end dams stop lateral leakage. Thermal continuity depends on intact thermal breaks and insulation, including around anchors; borescope checks help before closure. Ensure drainage paths and weeps are unobstructed, and verify with a controlled trickle test. Field adhesion tests on primers/sealants validate compatibility and bond without relying solely on paperwork. Document batch numbers, cure times, and site conditions, as these influence outcomes. Capturing photos of laps, terminations, weeps, and isolation pads builds a robust record and reduces disputes later.
- Prime and terminate membranes to compatible substrates.
- Lap flashings generously and slope outward.
- Maintain continuous thermal breaks and insulation.
- Test drainage with a small controlled flow.
- Record batch numbers and cure conditions.
Fire and acoustic perimeter protection with clear documentation
Perimeter joints at slab edges must achieve tested fire ratings and specified acoustic performance. Verify the correct tested assembly is selected, and that mineral wool/safing thickness and compression match the detail. Check sealant depth and bond with a depth gauge and probe; continuity at corners and penetrations is essential. Coordinate sequence so fire and acoustic works do not block drainage paths or interfere with movement joints. Maintain traceability by photographing labels, recording batch numbers, and storing data alongside torque logs and survey results. Close the loop with digital sign-offs, ensuring every comment is resolved and each bay has sufficient as-built photos. This disciplined documentation supports compliance per approved project specifications and authority requirements and streamlines handover.
- Match installed work to a tested perimeter system.
- Measure safing thickness and consistent compression.
- Verify firestop depth and full adhesion.
- Avoid blocking drainage or movement joints.
- Capture labels, batches, and sign-offs.
How to Use This Curtain Wall–Steel Interface Inspection Checklist
- Preparation: gather approved shop drawings, ITP, and test data; bring a calibrated torque wrench, total station/laser, digital level, calipers, depth gauge, DFT gauge, borescope, smoke pencil, and PPE.
- Set up locations: load elevations/bay IDs, align to project grid, and define hold points for structural fixings, envelope tie-ins, and fire/acoustic works.
- Start interactive mode: tick items as you inspect, assign responsibilities, due dates, and tag exact locations for each finding.
- Capture evidence: upload geotagged photos, record torque and survey readings, attach batch/lot numbers, and link relevant RFIs or submittals.
- Resolve issues: create corrective actions, notify trade leads, re-inspect closed items, and maintain a clear audit trail within comments.
- Export and share: generate an export as PDF/Excel, including photos, readings, and status, with QR authentication embedded for on-site verification.
- Sign-off: obtain digital signatures from installer, GC, and consultant; distribute to stakeholders and archive for handover and authority review.
Call to Action
- Start Checklist Tick off tasks, leave comments on items or the whole form, and export your completed report to PDF or Excel—with a built-in QR code for authenticity.
- Download Excel - Curtain Wall–Steel Support Framing Interface Inspection
- Download PDF - Curtain Wall–Steel Support Framing Interface Inspection
- View Image - Curtain Wall–Steel Support Framing Interface Inspection
Cite & Embed
“Curtain Wall–Steel Support Framing Interface Inspection by Quollnet”
with a link to
this source page.
FAQ
Question: What tolerances should I hold at the curtain wall–steel interface?
Question: How many bolts should I torque test and how do I document it?
Question: How do I confirm air/vapor barrier compatibility at the steel interface?
Question: When should perimeter firestopping be installed relative to curtain wall works?
Related Articles
Broader reading and guidance connected to this checklist topic.


Is The Crack You See On Your Wall Serious Or Minor Cosmetic Issue?


Improve Your Project Handover Process With Snag List Tracking App
Related Checklists
Keep the workflow moving with nearby templates chosen from similar checklist content.