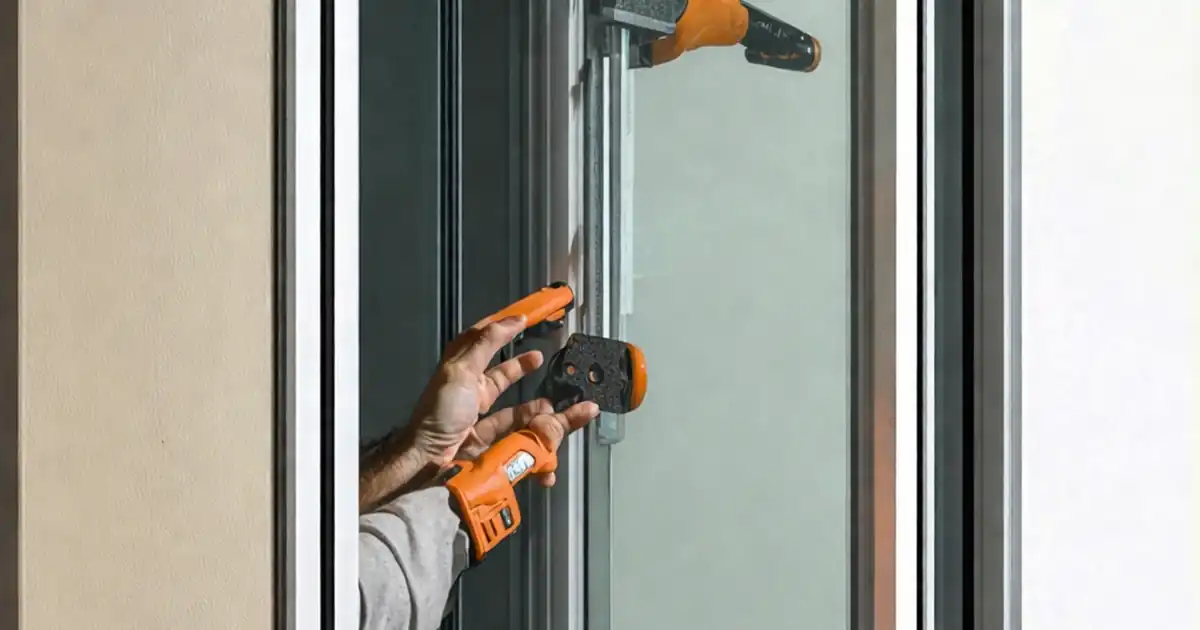
Curtain Wall Glass Setting Blocks and Edge Clearances Inspection
Definition: Inspect curtain wall glass setting blocks and edge clearances equips façade teams to verify support, centering, movement allowance, and compatibility for durable, safe glazing installations on new builds and replacements.
- Confirm block location, hardness, and size match approved shop drawings.
- Measure uniform edge clearances to prevent edge contact and stress cracks.
- Verify movement allowance for thermal, sway, and live-load deflection.
- Interactive, commentable, export options with QR code for field sign-offs.
Inspect curtain wall glass setting blocks and edge clearances is a precision task that safeguards glass from stress, contact, and premature failure. This checklist focuses on the glazing packers (setting pads) that carry dead load and the consistent edge clearance that preserves glass bite and movement. It addresses monolithic and insulating glass units (IGUs) within curtainwall framing, without extending into unrelated pressure-plate or anchor inspections. You will verify setting block hardness, placement at quarter points, length and thickness per approved drawings, and uniform clearances around the glass perimeter. The outcome is stable support, centered lites, and protected edges for durable performance, watertightness, and thermal movement. By documenting measurements, photos, and batch data, you reduce risks like edge contact, chipping, sealant incompatibility, frame racking transfer, and warranty disputes. Use this interactive checklist to tick items, add comments, and export your record as PDF/Excel with a QR for traceable sign-off.
- Ensure setting blocks match approved material, hardness, and dimensions, and sit at correct quarter-point locations to carry dead load without inducing stress. Record measurements and photographs for traceability, preventing premature edge damage and warranty challenges.
- Measure and document uniform edge clearances around the lite using feeler gauges and calipers. Consistent clearances preserve specified bite and prevent frame contact, reducing fracture risks from thermal movement, building sway, and live-load deflection.
- Verify compatibility among glass, setting blocks, spacers, sealants, and gaskets. Proper materials and movement allowance prevent chemical attack, migration, or stress concentration, supporting long-term performance and watertightness per approved project specifications and authority requirements.
- Interactive online checklist with tick, comment, and export features secured by QR code.
Documentation & Conditions
Tools & Materials Verification
Setting Blocks Installation
Edge Clearances & Centering
Movement, Contact & Protection
Records & Sign-off
Why setting blocks matter and how to place them
Setting blocks transfer the glass dead load into the curtain wall frame while protecting the vulnerable lower edge from contact and stress. Proper hardness prevents creep or point loading; correct thickness and width deliver the specified edge clearance and bite. Place two blocks at quarter points to avoid cantilevering and distribute load. Blocks must sit flat on clean, stable substrates, secured per manufacturer guidance. Dimensional checks with calipers and durometer readings confirm conformance before the lite is set. For IGUs, compatibility with sealants and edge spacers is critical to avoid chemical attack or migration. Photographs, batch labels, and measurement logs create a defensible record that supports warranty and handover. If the frame is not plumb or level, rework before glazing to avoid compensating with blocks, which can mask misalignment but cause uneven clearances and long-term problems.
- Two blocks at quarter points distribute dead load evenly.
- Hardness and dimensions must match approved drawings.
- Blocks must sit flat; no rocking or gaps under load.
- Compatibility with sealants and IGU spacers is essential.
- Record photos, labels, and measurements for traceability.
Measuring edge clearances and preserving uniform bite
Uniform edge clearances prevent glass-to-frame contact during thermal movement, building sway, and live-load deflection. After placing the lite on blocks, measure clearances at multiple positions on each side using feeler gauges and record minimum and maximum values. Centering is checked by comparing opposing sides; large deltas indicate misplacement or frame issues. Maintaining the specified bite protects the edge and supports weather seals. Use templates or depth gauges for repeatable bite checks, and verify that temporary spacers are removed if not part of the design. Any point contact, snagging gaskets, or twisted tapes must be corrected immediately. IGUs require special care to avoid compressing the edge spacer. Final documentation should tie readings to unit IDs and elevation references to make future audits simple and defensible.
- Measure each side’s minimum and maximum clearance.
- Confirm centering by comparing opposing side values.
- Maintain specified edge bite using repeatable gauges.
- Eliminate any glass-to-frame point contact immediately.
- Link measurements to unit and elevation IDs.
Movement allowance, compatibility, and field evidence
Curtain walls experience thermal changes, interstorey drift, and live-load deflection, so gaps must provide the movement allowance detailed in the design. Sum the edge clearances and confirm they meet or exceed the specified requirement. Check that gaskets are seated without twist and that compatible materials are used throughout the glazing pocket. Rubber hardness, sealant chemistry, and IGU edge constructions must align with vendor approvals to prevent staining, embrittlement, or delamination. Evidence capture is more than photos: include durometer readings, caliper logs, tool calibration dates, and material batch numbers. Finally, secure digital sign-offs and a QR-authenticated export to close the loop, enabling quick retrieval during commissioning, maintenance, or incident reviews. This disciplined approach reduces disputes and accelerates approvals.
- Verify movement allowance from summed clearances.
- Seat gaskets evenly; avoid twists and pinches.
- Use materials with documented compatibility approvals.
- Capture readings, calibrations, and batch data.
- Finalize with QR-authenticated digital sign-off.
How to Use This Interactive Curtain Wall Glazing Checklist
- Preparation: stage calibrated calipers, feeler gauges, durometer (Shore A), spirit level, borescope/mirror, lint-free cloths, approved cleaners, PPE (gloves, eye protection), access equipment, and current shop drawings/specifications.
- Create a new inspection in the app, select elevation and unit IDs, and preload manufacturer datasheets, compatibility reports, and environmental limits relevant to the glazing scope.
- Using Interactive Mode: tick each item as you measure, attach photos with scales, enter readings to the nearest 0.5 mm/Shore A, and log batch numbers. Add comments and assign corrective tasks if deviations appear.
- Coordinate fixes: re-center glass, replace blocks, or clean seats as required. Re-measure affected points, update evidence, and close tasks with responsible party, due date, and verification photos.
- Export and share: generate a commentable report and export as PDF/Excel including photos, readings, and drawings. Enable QR on the cover page for field retrieval and verification.
- Sign-Off: capture installer and inspector digital signatures, confirm compliance per approved project specifications and authority requirements, archive the QR-authenticated record, and distribute to stakeholders.
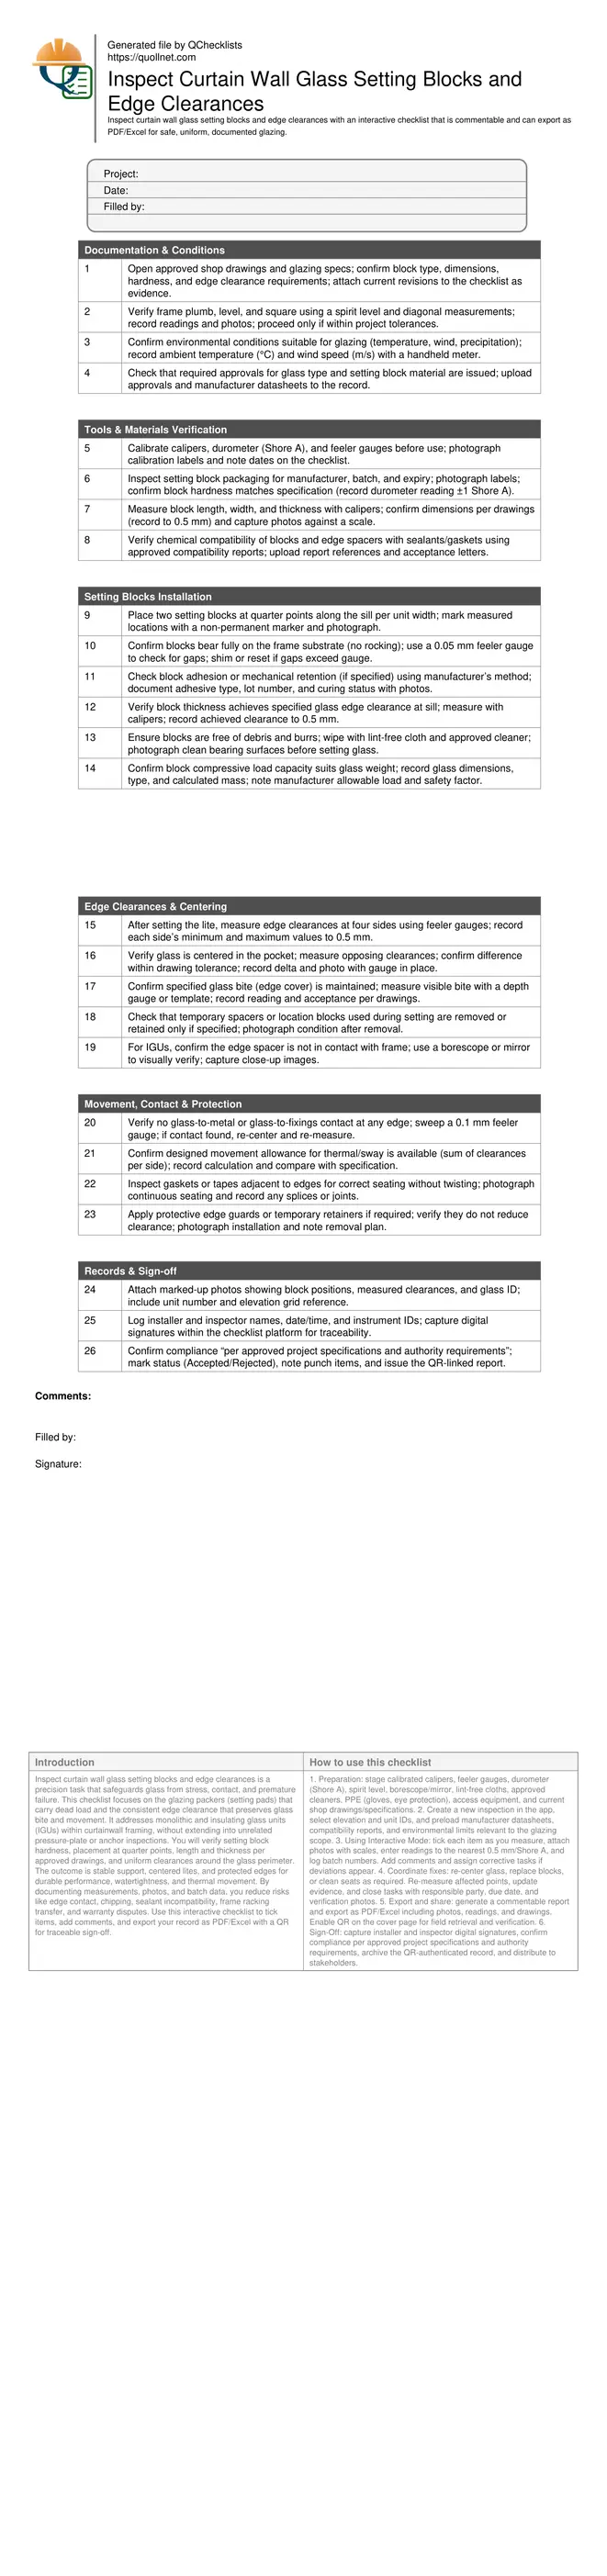
Call to Action
- Start Checklist Tick off tasks, leave comments on items or the whole form, and export your completed report to PDF or Excel—with a built-in QR code for authenticity.
- Download Excel - Curtain Wall Glass Setting Blocks & Edge Clearances Inspection
- Download PDF - Curtain Wall Glass Setting Blocks & Edge Clearances Inspection
- View Image - Curtain Wall Glass Setting Blocks & Edge Clearances Inspection
Cite & Embed
“Curtain Wall Glass Setting Blocks & Edge Clearances Inspection by Quollnet”
with a link to
this source page.

FAQ
Question: What durometer hardness should setting blocks have for curtain wall glass?
Question: How do I confirm adequate edge clearances without removing the glass?
Question: Where should setting blocks be placed to support the glass correctly?
Question: What risks arise if edge clearances are inconsistent around the perimeter?
Question: How should I document compatibility among blocks, sealants, and IGU spacers?
Related Articles
Broader reading and guidance connected to this checklist topic.

Concrete Truck Arrival & Delivery Record Template

Download Excel Format Snag List


Master Construction Project Cashflow With Cashflowpot
Related Checklists
Keep the workflow moving with nearby templates chosen from similar checklist content.