Inspect Façade Panels and Glazing for Transport Damage
Definition: Inspect façade panels and glazing for transport damage upon delivery gives site engineers and QA managers a structured receiving inspection to verify condition, document evidence, and decide accept/hold actions before unloading or storage.
- Prevent installing damaged cladding or IGUs that risk leaks and failures.
- Standardize receiving checks with tools, tolerances, tags, and photo evidence.
- Interactive, commentable, export capable checklist with QR code verification.
- Accelerate supplier claims using organized, time‑stamped logs and images.
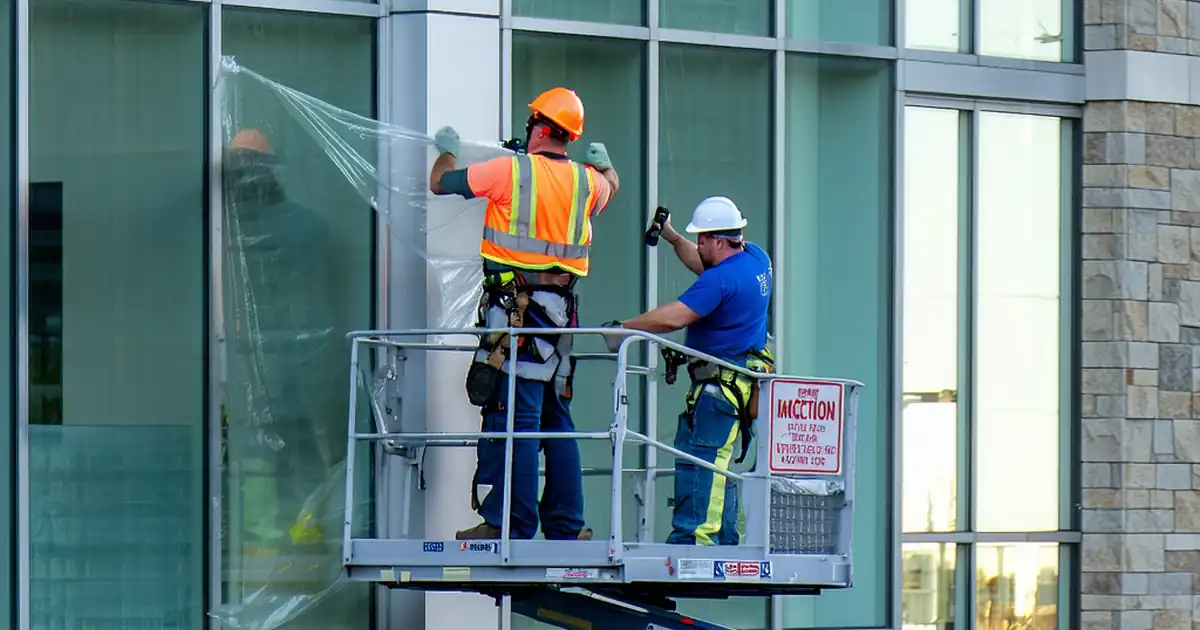
Inspect façade panels and glazing for transport damage upon delivery is a focused receiving inspection that safeguards curtain wall units, cladding panels, and insulated glass units before installation. By confirming identity, crate integrity, handling orientation, and visible condition at the receiving bay, teams prevent hidden cracks, edge chips, coating scuffs, spacer/seal failures, and warped panels from entering the workfront. This checklist stays strictly at the delivery stage: it covers documentation, unloading readiness, raking‑light visuals, dimensional checks, and quarantine/reporting—without duplicating in‑process installation controls. The outcome is a traceable pass/hold/reject decision that avoids rework, warranty disputes, safety hazards from compromised glass, and schedule delays caused by late discoveries. Use simple tools—straightedge, calipers, flashlights, coating detectors, and a thermo‑hygrometer—to capture measurable evidence per approved project specifications and authority requirements. Start in interactive mode to tick items, attach photos, leave comments, and export your signed record to PDF/Excel with a secure QR for fast sharing.
- Control quality at the earliest point by verifying packaging integrity, identification, and visible condition the moment façade panels and glazing arrive. Early detection avoids installing compromised units, protects warranties, and gives procurement the evidence needed to resolve issues quickly without impacting downstream activities or on‑site sequencing.
- Apply repeatable, tool‑based inspection methods under consistent lighting. Measure flatness with a straightedge, record chip sizes with calipers, confirm coating orientation with a detector, and log ambient conditions. The checklist standardizes acceptance cues so supervisors can make immediate accept/hold decisions and document everything with photos and signatures.
- Interactive online checklist with tick, comment, and export features secured by QR code.
- Quarantine defects decisively using hold tags, segregated storage, and time‑stamped notifications to suppliers. Centralized logs support rapid claims with serial numbers, crate indicators, and environmental readings, ensuring transparent accountability while keeping conforming materials safely stored and ready for installation without additional handling.
Receiving & Safety
Documentation & Identification
Visual Inspection – Façade Panels
Visual Inspection – Glazing Units
Segregation, Reporting & Storage
Receiving controls that prevent downstream failures
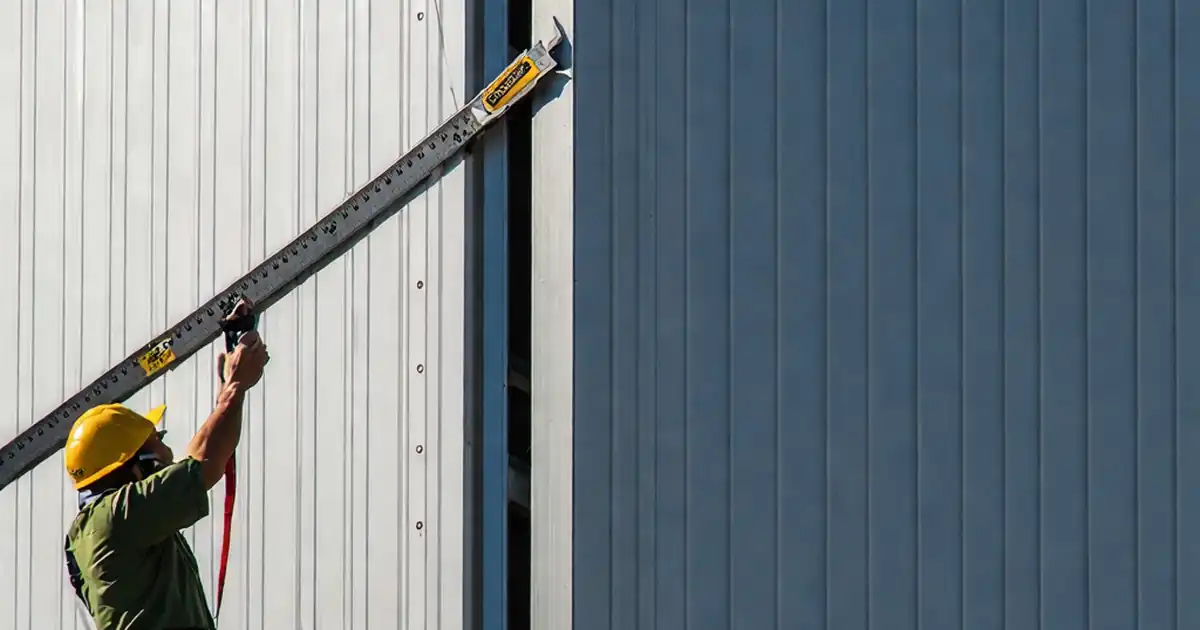
Transport can mask damage until crates are opened in the receiving bay. Start by validating the paperwork (purchase order, delivery note, packing list) and confirming lifting capacity and level, sheltered laydown. Read tilt and shock indicators before moving crates; if tripped, set the shipment to hold. Capture ambient temperature and humidity because exposure outside storage limits can swell timber crates, compromise sealants, or fog insulated glass units later. Use consistent raking light to reveal surface defects that overhead lighting can miss. Photograph labels, indicators, and any scuffs before removing packaging so supplier liability remains clear. These simple, early controls deliver strong evidence for fast claims and stop compromised façade components from entering the installation stream. Keep the scope strictly to delivery: no drilling, test‑fitting, or installation activities here—only identification, condition, and segregation decisions per approved project specifications and authority requirements.
- Photograph indicators and labels before moving crates.
- Record temperature and humidity at time of receipt.
- Confirm SWL of slings, forks, and spreader bars.
- Use raking light to make fine scratches visible.
- Place tripped indicators on immediate hold.
Practical methods for panel defects and acceptance cues
Façade panels demand disciplined, repeatable checks. Examine visible faces under 500–1000 lux raking light to reveal scratches, dents, and coating blisters that disappear under diffuse light. Measure chips on edges and corners with calipers and capture a clear scale in photos. Use a 1.5 m straightedge with feeler gauges to quantify flatness/warp and inspect inserts or fixing points with a thread gauge for deformation. Log every reading with the unit ID so evidence remains traceable. Acceptance decisions should reference approved project specifications; where numbers are not prescribed, record precise measurements and set the item to hold for engineering review. These methods give supervisors fast go/no‑go clarity and airtight records for suppliers, minimizing rehandling and preventing damaged panels from reaching the façade line.
- Use a straightedge and feeler gauges for warp.
- Measure chips; avoid subjective descriptions.
- Check inserts and threads for deformation.
- Light at a shallow angle to reveal scuffs.
- Tie all photos to unit IDs.
Glazing specifics: edges, coatings, and sealed unit integrity
Glass behaves differently from metal/composite panels, so tailor inspection to glazing risks. Scan both surfaces under raking light for cracks, scratches, or roller marks. Inspect edgework and arrises with a mirror; note chip size and proximity to corners where stress concentrates. For insulated glass units, confirm spacer alignment and continuous primary/secondary seals; look for desiccant spills, fogging, or moisture between panes. Verify Low‑E or solar control coating orientation using a coating detector and cross‑check labels against shop drawings. Any uncertainty goes to quarantine to avoid safety hazards and warranty issues. Document all observations with close‑ups and sketches that pinpoint locations, then notify the supplier promptly with a time‑stamped evidence pack per approved project specifications and authority requirements.
- Use a coating detector to confirm orientation.
- Check spacer corners for seal continuity.
- Record chip sizes and corner proximity.
- Capture raking‑light photos of any scratches.
- Quarantine questionable units immediately.
How to use this interactive delivery inspection checklist
- Preparation: clear a level, sheltered laydown; gather PPE, raking light, 1.5 m straightedge, feeler gauges, calipers, mirror, coating detector, thermo‑hygrometer, barcode/QR tags, and a camera‑enabled tablet.
- Open the checklist on your device and select the delivery lot. Start interactive mode, scan or enter crate/unit IDs, and auto‑load relevant items based on façade panels or glazing.
- Work through items sequentially. Tick pass steps, add measurements in SI units, and attach time‑stamped photos. Use comments to note context, packaging details, or handling observations.
- For defects, set status to Hold/Reject, print or apply QR quarantine tags, and move items to a segregated zone. Link tags to unit IDs for traceability.
- Generate a supplier notification with embedded photos and readings. Export the running report as PDF/Excel and share the QR link with stakeholders for quick verification.
- Sign‑off: capture digital signatures from the receiving supervisor and QA. Archive the lot record in your document control system with QR authentication for audits.

Call to Action
- Start Checklist Tick off tasks, leave comments on items or the whole form, and export your completed report to PDF or Excel—with a built-in QR code for authenticity.
- Download Excel - Façade Delivery Damage Inspection
- Download PDF - Façade Delivery Damage Inspection
- View Image - Façade Delivery Damage Inspection
Cite & Embed
“Façade Delivery Damage Inspection by Quollnet”
with a link to
this source page.

FAQ
Question: What lighting is best for spotting glass and panel surface defects at delivery?
Question: How should I decide accept versus hold if project tolerances are unclear?
Question: What evidence do suppliers typically require to honor a transport damage claim?
Question: When should I quarantine glazing units instead of accepting with remarks?
Related Articles
Broader reading and guidance connected to this checklist topic.


Open Ncrs At Taking-over / Dlp: What Happens At Handover And How To Escalate
Related Checklists
Keep the workflow moving with nearby templates chosen from similar checklist content.