Test Façade Drainage Performance at Sills, Channels, and Weeps
Definition: Test façade drainage performance at sills, channels, and weep outlets for construction QA teams, verifying outflow capacity, residual head, and leak-free paths using controlled dosing, timing, and visual inspection.
- Confirm sill, channel, and weep drainage capacity under controlled flow.
- Prevent interior leaks, freeze-thaw damage, staining, and mold formation.
- Measure flow, residual head, leak absence; capture photo/video evidence.
- Interactive, commentable checklist with export options and QR code verification.
Test façade drainage performance at sills, channels, and weep outlets to prove that water sheds outwards quickly and safely. This checklist guides façade water discharge verification, sill drainage assessment, and weep hole performance testing using controlled dosing, flow timing, and moisture monitoring. Scope is limited to field testing at window and door sills, sub-sill channels/flashings, and weep outlets on completed exterior faces; it excludes full curtain wall air leakage testing, dynamic spray rack calibration, or structural evaluation. By confirming adequate outflow capacity, correct slopes, and zero interior wetting, teams avoid hidden moisture, efflorescence, rot, freeze–thaw spalls, and warranty disputes. Outcomes include measured drain-down times, residual head, outlet flow rates, photographic evidence, and documented retest actions where needed, all aligned with approved project specifications and authority requirements. Use this interactive checklist to tick steps, add comments, attach media, and export to PDF/Excel; finish each location with a QR-linked record for audit-ready traceability.
- Verify sill, channel, and weep drainage with measured dosing volumes, timed outflow, residual head checks, and moisture readings. Acceptance focuses on rapid discharge, correct falls, and zero interior wetting, providing objective evidence and clear pass/fail criteria tied to project specifications.
- Reduce leak callbacks and staining by identifying blockages, undersized weeps, or poor slopes before handover. Practical tools—graduated cylinder, stopwatch, dye, borescope, and moisture meter—deliver repeatable field results in SI units and support immediate remediation and retesting.
- Interactive online checklist with tick, comment, and export features secured by QR code. Capture geotagged photos, videos, and signatures, then distribute compliant, searchable records to stakeholders and archive them for warranty, commissioning, and regulatory verification.
Pre-Test Conditions
Instrumentation & Calibration
Sill Drainage Testing
Channel & Flashing Testing
Weep Outlet Testing
Post-Test Verification & Documentation
Purpose, scope, and acceptance cues
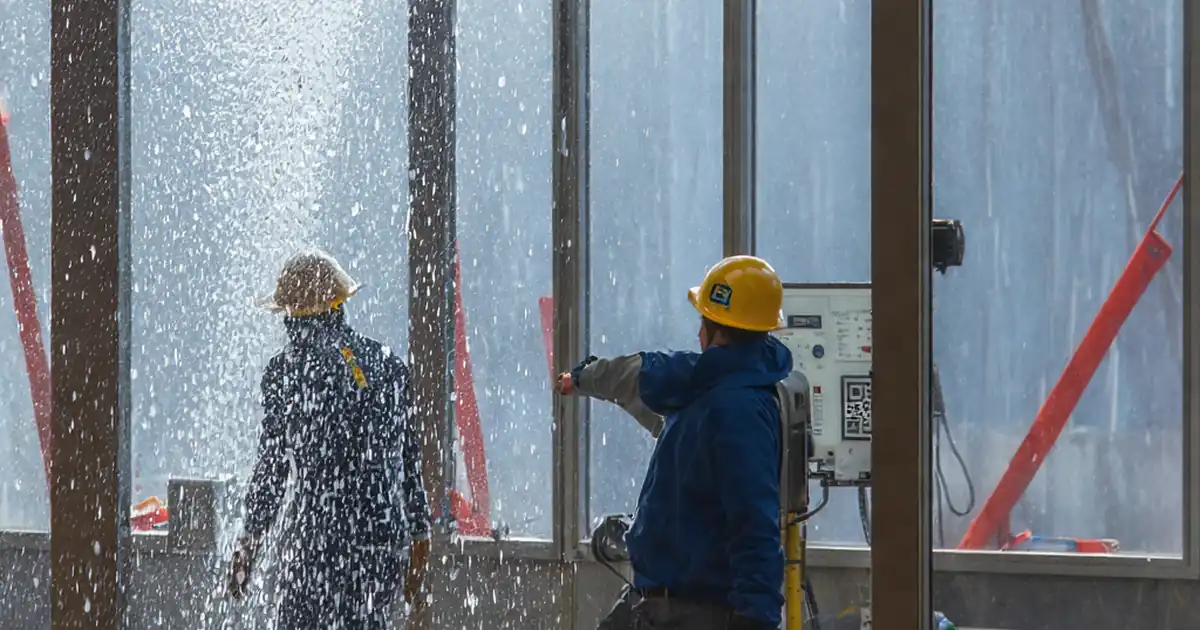
This field test validates that window and door sills, sub-sill channels, and weep outlets evacuate water rapidly to the exterior without leaking inside. Using measured dosing, timing, and moisture monitoring yields objective, repeatable results across elevations. Focus on the drainage path only; do not conflate with air leakage or structural checks. Acceptance hinges on quick first outflow, full drain-down within a minute, minimal residual head, and zero interior wetting. Borescope inspection verifies falls and end-dam integrity that drawings intend but site conditions can compromise. On a recent mid-rise, a blocked weep behind a snap-on trim created a 120 s drain-down; borescope confirmation and a 2 mm shim at the end dam restored the intended slope and a 35 s clear discharge on retest.
- Target full drain-down within 60 s of dosing 0.5 L.
- Residual water head should be ≤ 5 mm after 60 s.
- Moisture increase ≤ 1% WME indicates no interior wetting.
- Slope at channels ≥ 10 mm/m toward exterior.
Methods, tools, and practical measurements
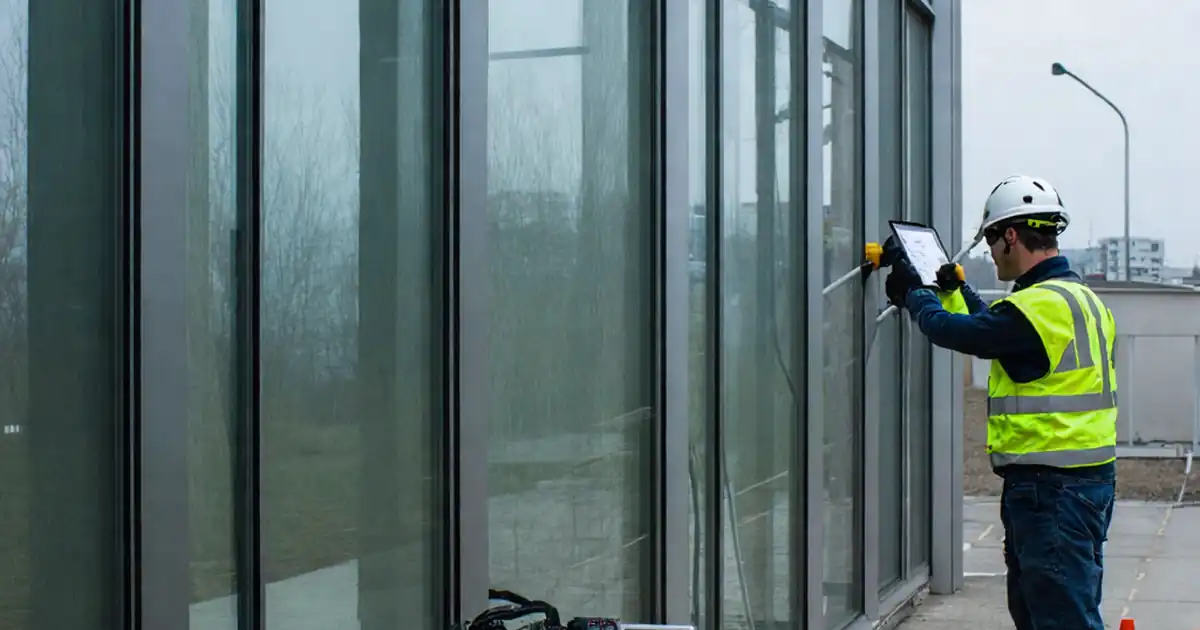
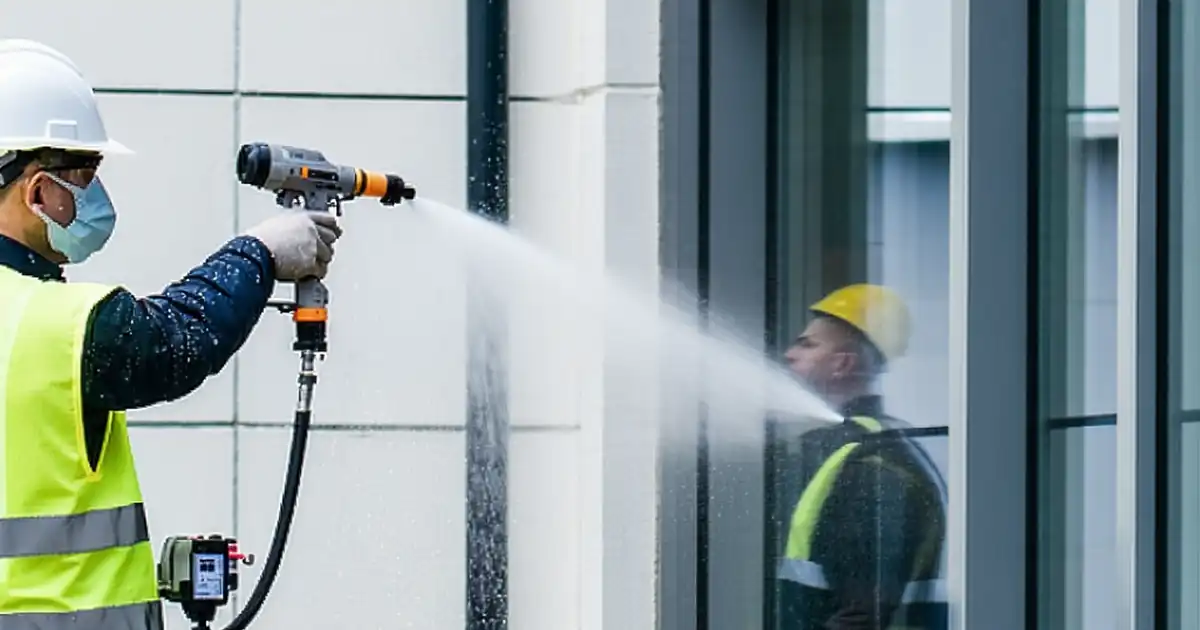
Apply dyed water in known volumes with a graduated cylinder to standardize results, then record first outflow time, total drain-down time, and residual head with a ruler. Use a stopwatch synced to network time for consistency. Measure outlet capacity by collecting discharge over a set interval and calculating L/min. A borescope inserted through a weep confirms unobstructed paths and outward fall, while a moisture meter verifies interiors remain dry. For example, dosing 0.25 L at a sub-sill channel that yields 0.35 L/min meets many project targets, but always compare against approved project specifications. Dye concentration should be low to avoid staining; rinse surfaces after testing.
- Use non-staining dye at ~0.1% concentration.
- Record ambient temperature, RH, wind for each test.
- Collect discharge to calculate L/min at outlets.
- Borescope checks confirm fall and obstructions.
Troubleshooting, documentation, and retesting
If timing is slow or interiors dampen, sequence troubleshooting: confirm weep diameter and depth, clear debris, verify channel fall with a borescope, and inspect end dams and sealant laps. Avoid drilling or invasive work unless approved; escalate to the designer when geometry conflicts arise. Document every change and retest to demonstrate improvement. Photos with scales, videos with timestamps, and geotagging help build a reliable audit trail. Assign unique IDs per opening, link to QR codes on-site, and store approvals from the contractor, consultant, and owner. When acceptance criteria depend on authority requirements, note the clause in the log and attach correspondence to eliminate ambiguity.
- Tackle blockages before geometry corrections.
- Retest within 24–48 h after remediation.
- Link each location to a QR-coded record.
- Capture photos and videos with timestamps.
How to Use This Façade Drainage Test Checklist
- Preparation: Gather graduated cylinder, stopwatch, dye, borescope, moisture meter, PPE, access equipment, low-tack tape, absorbent pads, QR labels. Review drawings and test locations; brief the team on safety and roles.
- Open the checklist, select the elevation and location ID, and switch to interactive mode. Confirm ambient conditions and tools; preload drawing references and photos of existing conditions.
- Execute tests while ticking each step, adding timed notes, and attaching media. Use comments to flag anomalies and tag responsible parties for corrective actions.
- Export results to PDF/Excel for distribution. Apply a QR label at the location and link it to the digital record for quick future retrieval and verification.
- Sign-off: Capture digital signatures from contractor, consultant, and owner reps. Archive the set in your project folder structure; lock records to preserve the audit trail.

Call to Action
- Start Checklist Tick off tasks, leave comments on items or the whole form, and export your completed report to PDF or Excel—with a built-in QR code for authenticity.
- Download Excel - Façade Drainage Testing – Sills, Channels, Weeps
- Download PDF - Façade Drainage Testing – Sills, Channels, Weeps
- View Image - Façade Drainage Testing – Sills, Channels, Weeps
Cite & Embed
“Façade Drainage Testing – Sills, Channels, Weeps by Quollnet”
with a link to
this source page.
FAQ
Question: How much water should I use to test a sill or weep outlet?
Question: What are typical acceptance criteria for façade drainage at sills and weeps?
Question: How do I avoid staining or damage during dyed water testing?
Question: When should drainage tests be performed in the construction sequence?
Related Articles
Broader reading and guidance connected to this checklist topic.


Master Construction Project Cashflow With Cashflowpot


Open Ncrs At Taking-over / Dlp: What Happens At Handover And How To Escalate
Related Checklists
Keep the workflow moving with nearby templates chosen from similar checklist content.