Test Façade Stone Cladding Anchors for Load and Restraint
Definition: Test façade stone cladding anchors for load transfer and restraint behavior with structured, field-ready checks for contractors and inspectors verifying pull-out capacity, shear restraint, alignment, and evidence capture on new or existing façades.
- Verify anchor capacity, shear restraint, and displacement under controlled loading.
- Use calibrated pull testers, LVDTs, and alignment checks for accuracy.
- Capture photos, readings, approvals; acceptance per approved project specifications.
- Interactive, commentable checklist; export, QR code-secured evidence trail.
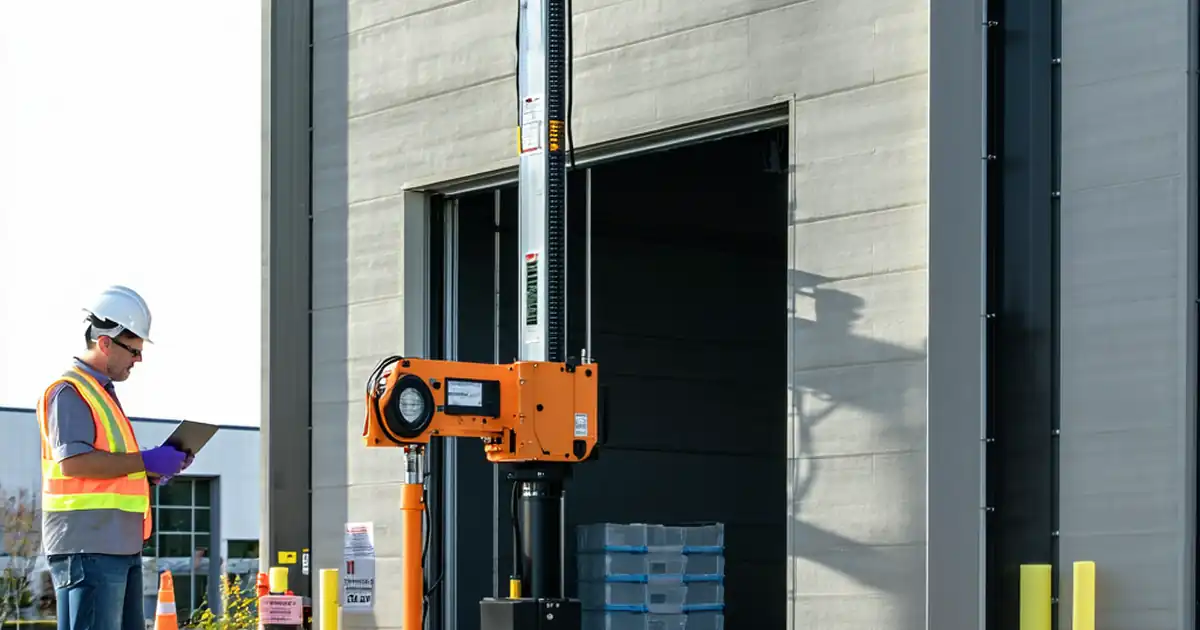
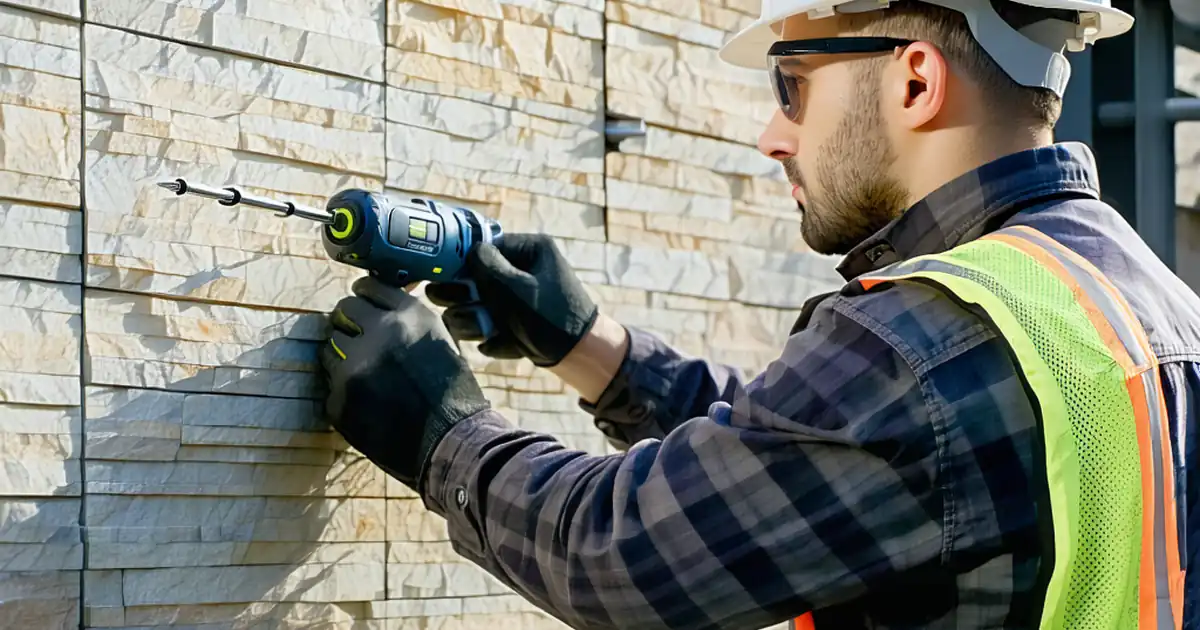
Test façade stone cladding anchors for load transfer and restraint behavior. This focused checklist guides proof load testing, pull-out assessment, and shear restraint evaluation for stone cladding fixings, ensuring anchors safely transfer panel weight and control in-plane movement. You will set up calibrated hydraulic pull testers, LVDTs, and shear rigs to measure displacement, slip, and rotation while preventing damage to stone and backup structure. The scope covers field verification of anchor capacity, bracket stiffness, and restraint functionality on completed bays or mock-ups, excluding structural design, laboratory testing, or unrelated façade systems. Following this process reduces risks such as brittle stone breakout, anchor pull-out, excessive slip, water ingress from cracked joints, and unverified substitutions. Outcomes include traceable force–displacement curves, clear acceptance decisions per approved project specifications and authority requirements, and a defensible as-tested record. Start in interactive mode to tick items, add comments, attach photos and readings, then export PDF/Excel with a QR-secured audit trail.
- Interactive online checklist with tick, comment, and export features secured by QR code. This creates a tamper-evident audit trail linking anchors, readings, photos, and approvals, enabling quick verification during inspections and handover without rework or data loss across teams and shifts.
- Structured field testing improves safety and quality by validating pull-out capacity, shear restraint, and allowable movement before full façade release. Crews capture alignment, torque, and displacement data, reducing risks of stone spall, anchor failure, and warranty disputes during operation and maintenance.
- Clear acceptance cues, practical tolerances, and evidence prompts minimize ambiguity. Each step specifies the tool, increment, hold time, and documentation required—producing consistent force–displacement plots, creep checks, failure mode logs, and sign-offs per approved project specifications and authority requirements.
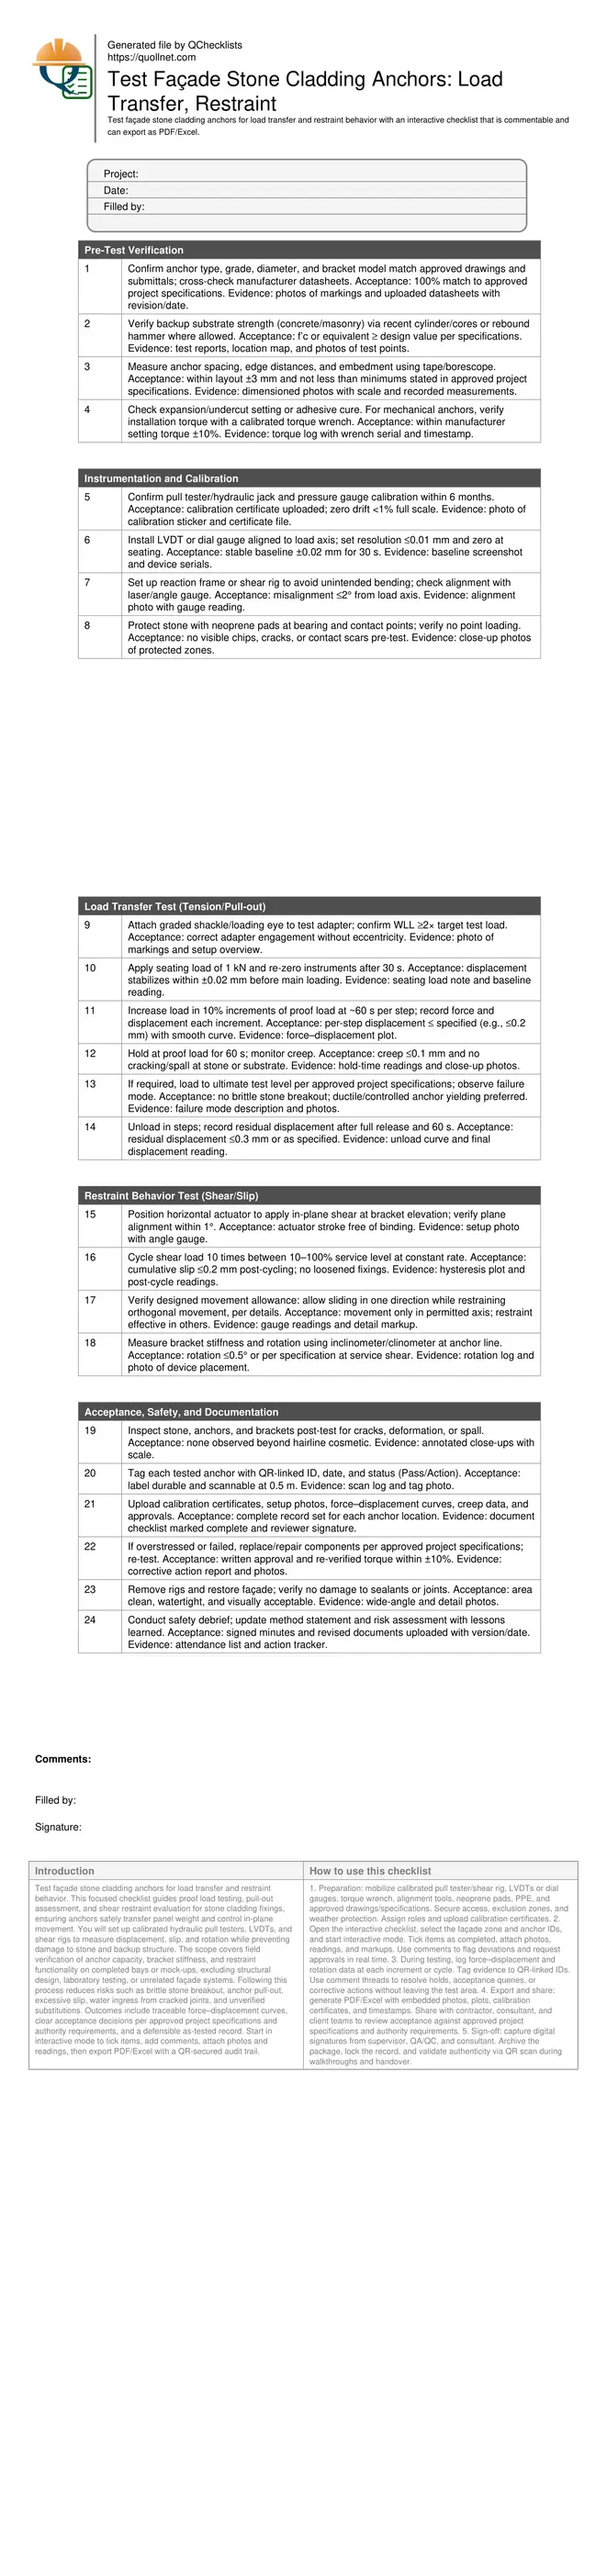
Pre-Test Verification
Instrumentation and Calibration
Load Transfer Test (Tension/Pull-out)
Restraint Behavior Test (Shear/Slip)
Acceptance, Safety, and Documentation
What Load Transfer and Restraint Mean on Stone Façades
Load transfer is the anchor-bracket system’s ability to carry vertical actions (self-weight, imposed proof loads) into the backup structure without undue displacement or damage. Restraint behavior addresses in-plane control of the panel—allowing designed movement in one axis (thermal, creep) while restraining others to prevent racking, joint opening, or stone edge chipping. Field tests validate both: pull-out and proof load checks characterize capacity and stiffness; shear/slip cycles confirm restraint and bracket rotation limits. Acceptance cues are displacement limits per approved project specifications and observable integrity of stone and fixings. Real jobsite examples include validating kerf brackets on limestone panels after a resin anchor substitution, and confirming undercut anchors in granite maintain slip within allowable limits after 10 service cycles. Evidence must be traceable: calibration, setup alignment, force–displacement curves, creep readings, and post-test visuals tied to anchor IDs.
- Measure along the load axis to avoid cosine error.
- Document failure mode with annotated photos.
- Hold at proof load to capture creep stability.
- Confirm rotation stays within bracket design limits.
Field Methods, Tolerances, and Practical Acceptance Cues
Use a calibrated hydraulic pull tester for tension and a purpose-built shear rig for in-plane restraint. Begin with a 1 kN seating load and incremental loading at ~10% steps to proof. Maintain 60 s holds to observe creep. Typical acceptance: step displacement ≤0.2 mm, proof hold creep ≤0.1 mm, residual ≤0.3 mm, and rotation ≤0.5°, unless project documents state otherwise. For restraint testing, cycle 10 times between 10–100% service load to reveal slip and bracket bedding-in. Avoid eccentricity by aligning adapters; protect stone edges with neoprene pads. Acceptance is always project-specific and must align with approved project specifications and authority requirements. Record environmental conditions—temperature can influence slip and readings. Example: a travertine bay passed after replacing an over-length shim that induced rotation, reducing residual displacement from 0.45 mm to 0.18 mm.
- Align within 1–2° to minimize bending effects.
- Use LVDTs with ≤0.01 mm resolution for accuracy.
- Record temperature and humidity at each test.
- Cycle shear loads to capture bedding-in slip.
Evidence Capture and Common Pitfalls to Avoid
Most issues arise from poor alignment, uncalibrated gauges, or missing traceability. Always photograph anchor markings, bracket types, and stone conditions before loading. Use dimensioned images to prove edge distances and embedment. Label each anchor with a QR-linked ID to map force–displacement curves, creep plots, and rotation logs to specific locations. Avoid testing on cracked panels—stabilize or replace first. Never exceed ultimate loads without explicit approval. Prevent damage by padding contact points and inspecting for micro-cracking after holds. Secure sign-offs immediately to avoid data gaps when teams rotate. On a marble retrofit, adding a lateral stabilizer to the shear rig removed unintended torsion, turning erratic hysteresis into consistent, narrow loops within slip limits.
- Tie every photo and plot to a unique anchor ID.
- Verify calibration dates before mobilizing equipment.
- Pad all contact points to protect stone edges.
- Get approvals before escalating beyond proof loads.
- Capture post-test close-ups to confirm integrity.
How to Use This Anchor Testing Checklist
- Preparation: mobilize calibrated pull tester/shear rig, LVDTs or dial gauges, torque wrench, alignment tools, neoprene pads, PPE, and approved drawings/specifications. Secure access, exclusion zones, and weather protection. Assign roles and upload calibration certificates.
- Open the interactive checklist, select the façade zone and anchor IDs, and start interactive mode. Tick items as completed, attach photos, readings, and markups. Use comments to flag deviations and request approvals in real time.
- During testing, log force–displacement and rotation data at each increment or cycle. Tag evidence to QR-linked IDs. Use comment threads to resolve holds, acceptance queries, or corrective actions without leaving the test area.
- Export and share: generate PDF/Excel with embedded photos, plots, calibration certificates, and timestamps. Share with contractor, consultant, and client teams to review acceptance against approved project specifications and authority requirements.
- Sign-off: capture digital signatures from supervisor, QA/QC, and consultant. Archive the package, lock the record, and validate authenticity via QR scan during walkthroughs and handover.
Call to Action
- Start Checklist Tick off tasks, leave comments on items or the whole form, and export your completed report to PDF or Excel—with a built-in QR code for authenticity.
- Download Excel - Façade Stone Cladding Anchor Testing
- Download PDF - Façade Stone Cladding Anchor Testing
- View Image - Façade Stone Cladding Anchor Testing
Cite & Embed
“Façade Stone Cladding Anchor Testing by Quollnet”
with a link to
this source page.

FAQ
Question: How many façade anchors should be tested on a project?
Question: What loads and hold times should be used for proof and shear tests?
Question: Can anchors on finished façades be tested without damaging stone panels?
Question: What indicates a failure or rejection during testing?
Related Articles
Broader reading and guidance connected to this checklist topic.


Related Checklists
Keep the workflow moving with nearby templates chosen from similar checklist content.