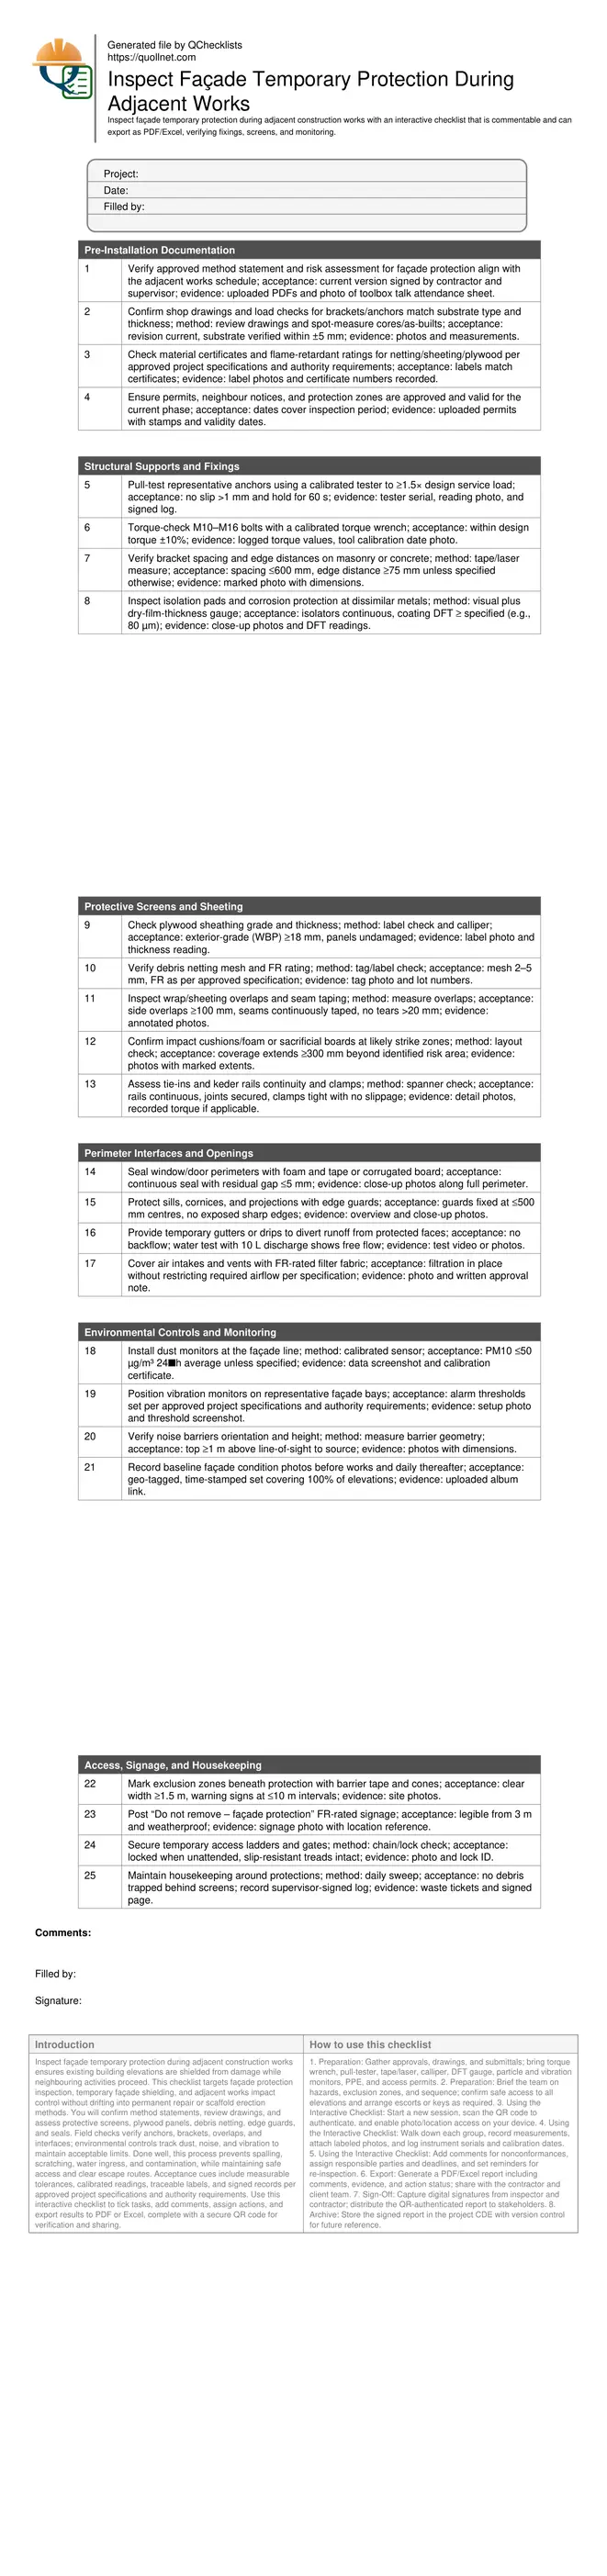
Inspect Façade Temporary Protection During Adjacent Works
Definition: Inspect façade temporary protection during adjacent construction works is a practical checklist for site engineers and façade managers to verify shielding, fixings, and monitoring that protect existing elevations from impact, debris, dust, noise, and vibration.
- Verify method statements, drawings, and material certifications onsite.
- Measure fixings, overlaps, and seals against quantified tolerances.
- Capture photos, readings, and sign-offs for audit-ready evidence.
- Interactive, commentable, export options with QR code verification.
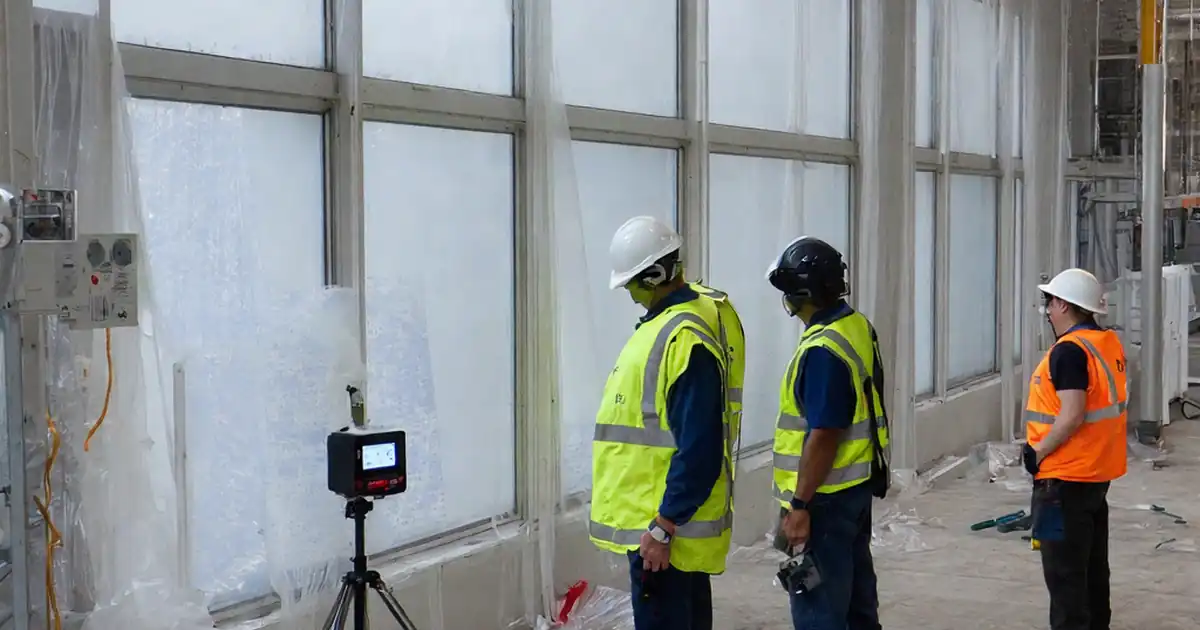
Inspect façade temporary protection during adjacent construction works ensures existing building elevations are shielded from damage while neighbouring activities proceed. This checklist targets façade protection inspection, temporary façade shielding, and adjacent works impact control without drifting into permanent repair or scaffold erection methods. You will confirm method statements, review drawings, and assess protective screens, plywood panels, debris netting, edge guards, and seals. Field checks verify anchors, brackets, overlaps, and interfaces; environmental controls track dust, noise, and vibration to maintain acceptable limits. Done well, this process prevents spalling, scratching, water ingress, and contamination, while maintaining safe access and clear escape routes. Acceptance cues include measurable tolerances, calibrated readings, traceable labels, and signed records per approved project specifications and authority requirements. Use this interactive checklist to tick tasks, add comments, assign actions, and export results to PDF or Excel, complete with a secure QR code for verification and sharing.
- Protecting an existing façade during adjacent works demands verifiable controls. This checklist focuses on documented methods, quantified tolerances, and calibrated measurements. Teams can validate anchors, sheeting, and seals while capturing labeled photographs and instrument readings, producing defensible evidence that prevents damage, claims, and programme delays.
- Interactive online checklist with tick, comment, and export features secured by QR code. It supports real-time collaboration in the field, embeds photo evidence, logs calibration details, and timestamps sign-offs, enabling faster close-out and clear accountability between principal contractor, façade manager, and client representatives.
- Quantified acceptance criteria simplify decisions: torque within ±10%, plywood ≥18 mm, overlaps ≥100 mm, residual gaps ≤5 mm, and anchor pull-tests at ≥1.5× design service load. Environmental controls frame dust, noise, and vibration with traceable baselines and alarms, providing early warnings that trigger targeted corrective actions.
- A structured flow—documents, fixings, screens, interfaces, monitoring, and housekeeping—keeps inspections consistent across phases. By aligning with approved project specifications and authority requirements, the checklist translates design intent into site evidence, reducing disputes while ensuring protections remain effective through weather, shifting site logistics, and evolving risks.
Pre-Installation Documentation
Structural Supports and Fixings
Protective Screens and Sheeting
Perimeter Interfaces and Openings
Environmental Controls and Monitoring
Access, Signage, and Housekeeping
Plan First: Documents, Scope, and Risk Controls
Effective façade protection starts on paper. Confirm the method statement defines substrates, load paths, access, and interfaces with adjoining trades. Drawings should show bracket spacing, edge distances, overlap details, and water-shedding features. Material traceability matters—plywood grades, FR netting classes, and fixing types must match the submittals. Capture sign-offs and calibration certificates before field checks; this prevents rework and dispute later. On complex frontages, walk off drawing dimensions against as-built conditions, measuring offsets and projections that can compromise coverage. Where the adjacent works sequence changes, verify the protection phasing still shields the right elevations. Close the loop by briefing crews on exclusion zones and signage. The goal is simple: align intent with measurable, photographed execution so you can demonstrate that the façade is protected and safe throughout neighbouring activities.
- Use current, signed method statements and drawings.
- Verify materials and FR ratings match approvals.
- Measure critical dimensions against as-built conditions.
- Brief crews on access, signage, and zones.
Fixings and Physical Barriers—What Good Looks Like
In the field, look for predictable, quantified outcomes. Anchors should be pull-tested to at least 1.5× design service load with no measurable slip. Bolts must sit within ±10% of specified torque, with isolators preventing bimetallic corrosion. Plywood should be exterior-grade and undamaged, with overlaps in sheeting measured and taped continuously. Debris netting needs tagged FR ratings and appropriate mesh that contains fragments without becoming a sail. Interfaces are common weak points—seal perimeter gaps to ≤5 mm, protect edges, and divert water with temporary drips. When you see clamps uniformly tightened, panels aligned, and seams neat, you can be confident wind and incidental impacts won’t compromise protection. Always back visual checks with photos, marked dimensions, and tool readings logged against location references.
- Pull-test anchors and record readings.
- Hold torque within ±10% of specification.
- Overlaps ≥100 mm and seams fully taped.
- Residual gaps at interfaces ≤5 mm.
Monitoring, Maintenance, and Records
Adjacent activities evolve; your protection must respond. Establish a clean baseline with geo-tagged façade photos before works, then update daily. Place dust and vibration monitors at representative bays, set alarms per approved project specifications and authority requirements, and keep calibration records. Noise barriers should break line-of-sight; check heights after scaffold adjustments. Housekeeping prevents hidden debris from loading screens or blocking temporary gutters. After heavy rain or winds >10 m/s, run focused re-inspections on seams, fixings, and seals. Use comments to assign corrective actions with deadlines, and track closures in exported reports. A tidy, timestamped trail of measurements, photos, and signatures is your best defence against claims and keeps protections effective through changing site logistics.
- Create and maintain a photo baseline.
- Monitor dust, noise, and vibration.
- Reinspect after wind or heavy rain.
- Assign actions and close them out.
How to Use This Façade Protection Inspection Checklist
- Preparation: Gather approvals, drawings, and submittals; bring torque wrench, pull-tester, tape/laser, calliper, DFT gauge, particle and vibration monitors, PPE, and access permits.
- Preparation: Brief the team on hazards, exclusion zones, and sequence; confirm safe access to all elevations and arrange escorts or keys as required.
- Using the Interactive Checklist: Start a new session, scan the QR code to authenticate, and enable photo/location access on your device.
- Using the Interactive Checklist: Walk down each group, record measurements, attach labeled photos, and log instrument serials and calibration dates.
- Using the Interactive Checklist: Add comments for nonconformances, assign responsible parties and deadlines, and set reminders for re-inspection.
- Export: Generate a PDF/Excel report including comments, evidence, and action status; share with the contractor and client team.
- Sign-Off: Capture digital signatures from inspector and contractor; distribute the QR-authenticated report to stakeholders.
- Archive: Store the signed report in the project CDE with version control for future reference.
Call to Action
- Start Checklist Tick off tasks, leave comments on items or the whole form, and export your completed report to PDF or Excel—with a built-in QR code for authenticity.
- Download Excel - Façade Temporary Protection Inspection
- Download PDF - Façade Temporary Protection Inspection
- View Image - Façade Temporary Protection Inspection
Cite & Embed
“Façade Temporary Protection Inspection by Quollnet”
with a link to
this source page.

FAQ
Question: How often should façade temporary protection be inspected during adjacent works?
Question: What materials are acceptable for protective screens and edge shielding?
Question: How do I demonstrate that the protection is adequate and compliant?
Question: What triggers upgrading or modifying the façade protection scheme?
Related Articles
Broader reading and guidance connected to this checklist topic.


Related Checklists
Keep the workflow moving with nearby templates chosen from similar checklist content.