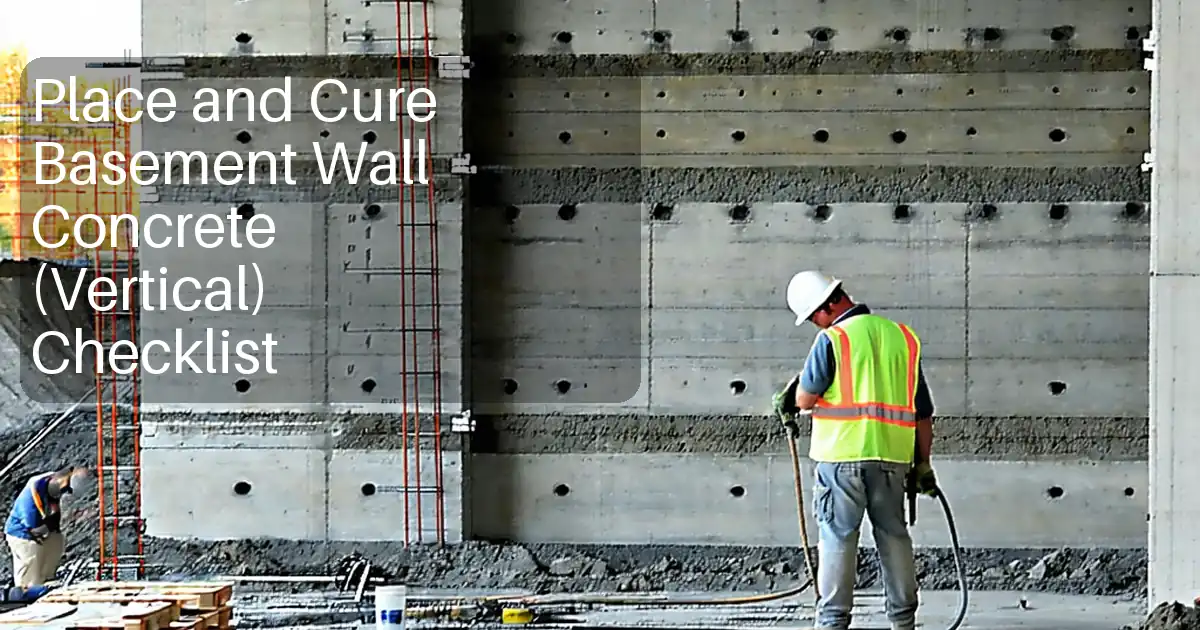
Basement Wall Formwork and Ties Inspection (Vertical)
Definition: Inspect basement wall formwork and ties (vertical) with a practical, pre-pour checklist for contractors and inspectors to confirm alignment, dimensions, tie/cone spacing, surface condition, and release agents—excluding reinforcement checks.
- Confirm plumb, line, and thickness with laser, levels, and gauges.
- Verify tie capacities, spacing, and cone seating against approved submittals.
- Ensure tight panel joints and correct, uniform release agent application.
- Interactive, commentable, export, QR code for authenticated field records.
Inspect basement wall formwork and ties (vertical) is a targeted pre-pour procedure that focuses on vertical wall formwork alignment, dimensions, and tie/cone arrangements. This checklist supports vertical wall formwork inspection by guiding crews through confirmation of plumb, straightness, panel joints, and release agent application, while verifying form ties and cones meet approved submittals. It deliberately excludes reinforcement, concentrating solely on the temporary works that shape the wall. Getting these details right prevents blowouts, honeycombing from leaky joints, stuck forms due to over-application of release agents, and dimensional nonconformances that complicate fit-out. It also reduces rework, improves finish quality, and preserves safety by ensuring stable bracing and hardware. The outcome is consistent geometry, better surface finishes, and verifiable records aligned with project specifications and authority requirements. Use this interactive checklist on-site: tick off steps, add comments for deviations or approvals, attach photos, and export your inspection as PDF/Excel with a secure QR link.
- Focused on vertical basement wall formwork only, this checklist validates plumb, alignment, thickness, and panel joint integrity while confirming tie types, capacities, spacing, and cone seating per approved submittals. It excludes reinforcement to keep scope precise and auditable.
- Release agent readiness is verified by product approval, batch records, application method, and substrate conditions. Tight joints, clean faces, sound bracing, and controlled bases help prevent grout leakage, surface blemishes, and movement during the pour, reducing rework and defects.
- Interactive online checklist with tick, comment, and export features secured by QR code. Capture photos, measurements, and signatures in the field; produce time-stamped, traceable reports that align with approved project specifications and authority requirements ahead of concrete placement.
Formwork Alignment and Plumb
Formwork Dimensions and Layout
Ties and Cones
Formwork Hardware and Surfaces
Release Agents and Cleanliness
Pre-Pour Verification and Documentation
Plumb, Alignment, and Dimensional Control
Vertical wall formwork must be true to line and plumb to avoid dimensional drift, misaligned interfaces, and pressure concentrations during placing. Use a laser and 2 m level to check plumb at regular intervals, corners, and near openings. A stringline or laser can quickly reveal waviness across panel faces; correct with shims, clamps, or brace adjustments. Thickness is governed by spacers and spreaders; verify with calibrated gauges to avoid thin sections or bulges that lead to rework. Stop-ends and keys should be straight and tight to control grout leakage and create sound construction joints. Mark control elevations on the forms using a laser to maintain consistent heights and simplify finishing. Document measurements on a layout sketch and attach photos of readings. These acceptance cues—plumb within 5 mm per 2 m, tight joints within 3 mm, and thickness within ± 5 mm—provide practical thresholds while deferring to approved project specifications and authority requirements.
- Use laser and 2 m level for plumb and line checks.
- Confirm thickness with calibrated spreaders or gauges.
- Keep panel joints tight; limit visible gaps to 3 mm.
- Mark elevations from benchmarks to the form face.
- Record readings on plans with photo evidence.
Tie Systems, Cones, and Load Paths
Ties and cones resist hydrostatic pressure and keep forms at the correct spacing. Verify the tie system matches approved submittals, with capacities suitable for pour rates and head pressures. Inspect for bent or damaged ties, stripped threads, or corrosion; replace compromised items immediately. Layout accuracy is crucial—confirm spacing and edge distances to prevent leakage at corners and around openings. Cones should seat flush for consistent architectural finishes and to simplify later removal where applicable. Centering ties within the wall thickness avoids asymmetric pressures that can cause bulges or misalignment. Bracing transfers loads to the base and substrate—check anchorages and witness-mark clamp tightness. Record lot numbers, spacing measurements, anchor photos, and any deviations for review and sign-off per approved project specifications and authority requirements.
- Match tie type and capacity to approved submittals.
- Measure spacing and edge distances to drawings.
- Replace bent, damaged, or corroded ties immediately.
- Seat cones flush and consistent across the wall.
- Document lots, measurements, and anchor photos.
Panel Surfaces, Joints, and Release Agents
Surface condition controls finish quality and release performance. Clean form faces thoroughly; dust, laitance, and hardened splatter create blemishes. Keep panel joints tight and gasketed where specified to avoid honeycombing and grout streaks. Apply the approved release agent as a thin, uniform film using a sprayer or roller at the recommended coverage. Over-application can stain, print, or trap dust; under-application can cause sticking and damage during stripping. Protect tie hardware, tapes, and gaskets from release agent where bonding or sealing is required. Confirm substrate and ambient temperatures are within the product’s application range and that no standing water is present on form faces. Photograph labels, application sheen, masked areas, and representative joints to provide traceable confirmation before placing concrete.
- Clean faces; remove laitance and debris before application.
- Maintain tight, gasketed joints to prevent leakage.
- Apply a thin, uniform release agent film.
- Keep release off hardware and sealing components.
- Record batch, coverage, and environmental conditions.
How to Use This Vertical Basement Wall Formwork Inspection Checklist
- Preparation: equip laser level, 2 m level, stringline, tape, feeler gauges, torque wrench, tie locator/template, sprayer/roller, thermometer, camera/tablet, PPE, and current drawings/submittals.
- Set site conditions: establish safe access, adequate lighting, dry form faces, and stable bases. Mark benchmarks and control lines visible on the formwork.
- Open the interactive checklist on your device, select the work area/chainage, and start a new inspection session with project, location, and date metadata.
- Work through items in sequence. Tick each step when compliant, attach photos of measurements, and add comments for deviations or corrective actions.
- For ties and cones, reference the approved submittal within the checklist, scan labels, and log lot numbers and spacing confirmations directly in the fields provided.
- For release agents, record product name, batch, application method, and environmental readings. Add photos of sheen and masked hardware before proceeding.
- On completion, review unresolved comments, assign actions, and obtain digital signatures from responsible parties per approved project specifications and authority requirements.
- Export the signed report as PDF/Excel. Share via a QR-authenticated link and archive in the project document management system.

Call to Action
- Start Checklist Tick off tasks, leave comments on items or the whole form, and export your completed report to PDF or Excel—with a built-in QR code for authenticity.
- Download Excel - Basement Wall Formwork & Ties Inspection (Vertical)
- Download PDF - Basement Wall Formwork & Ties Inspection (Vertical)
- View Image - Basement Wall Formwork & Ties Inspection (Vertical)
Cite & Embed
“Basement Wall Formwork & Ties Inspection (Vertical) by Quollnet”
with a link to
this source page.

FAQ
Question: What tolerances should I use for plumb, alignment, and thickness?
Question: How do I verify tie spacing and edge distances on irregular or curved walls?
Question: What release agent issues most often cause finish defects, and how can I avoid them?
Question: When should the formwork and ties inspection occur relative to the pour?
Related Articles
Broader reading and guidance connected to this checklist topic.


Is The Crack You See On Your Wall Serious Or Minor Cosmetic Issue?


Related Checklists
Keep the workflow moving with nearby templates chosen from similar checklist content.