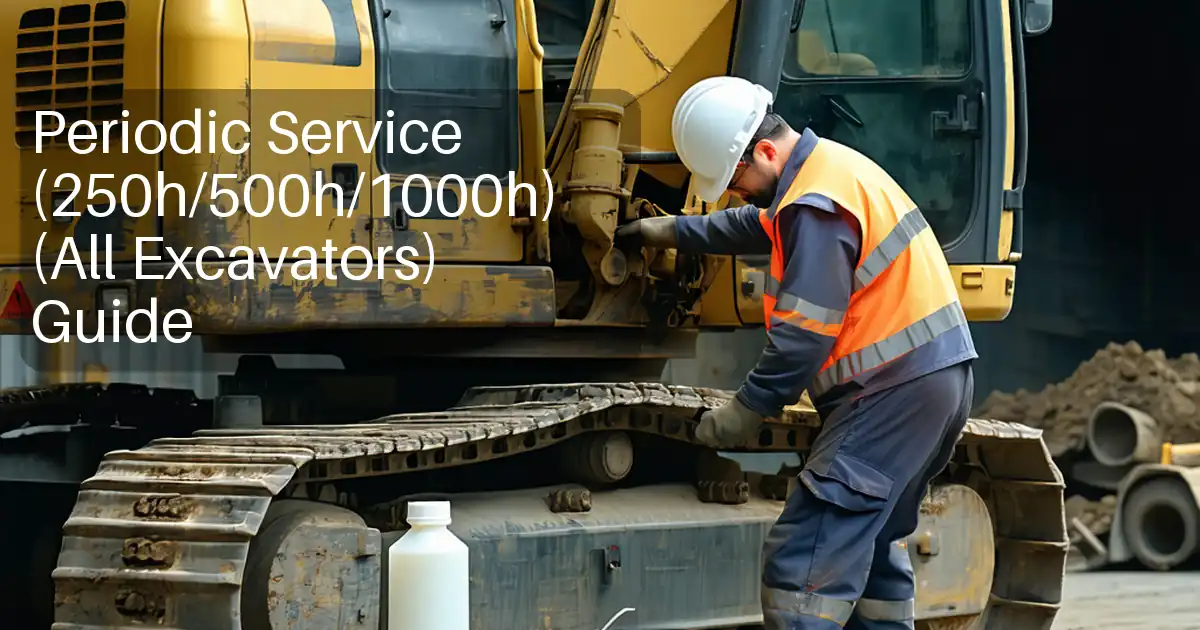
Weekly/50h Excavator Preventive Maintenance Checklist
Definition: Preventive Maintenance (Weekly / 50h) (All Excavators) is a standardized, field-ready checklist for operators and mechanics covering lubrication, filtration, cooling, undercarriage, fasteners, battery, and basic fluid condition to reduce failures.
- Targeted weekly tasks that extend component life and uptime.
- Clear tools, methods, and measurable acceptance criteria for all steps.
- Reduces overheating, dust ingress, and undercarriage wear on mixed fleets.
- Interactive, commentable, export with QR code for proof and sharing.
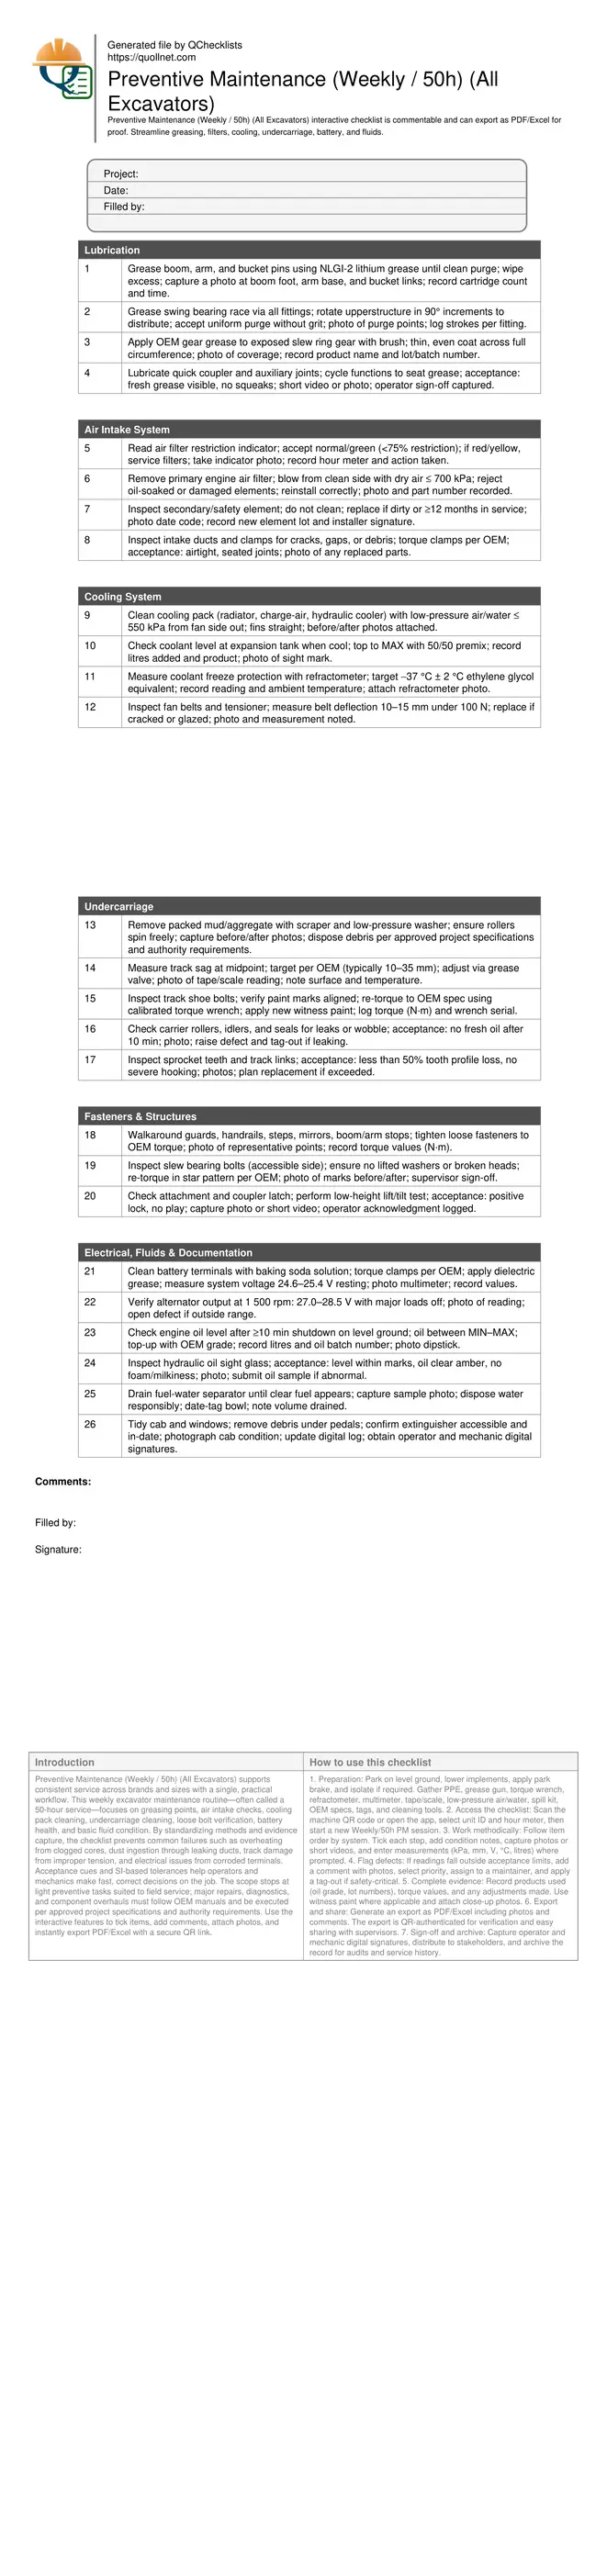
Preventive Maintenance (Weekly / 50h) (All Excavators) supports consistent service across brands and sizes with a single, practical workflow. This weekly excavator maintenance routine—often called a 50-hour service—focuses on greasing points, air intake checks, cooling pack cleaning, undercarriage cleaning, loose bolt verification, battery health, and basic fluid condition. By standardizing methods and evidence capture, the checklist prevents common failures such as overheating from clogged cores, dust ingestion through leaking ducts, track damage from improper tension, and electrical issues from corroded terminals. Acceptance cues and SI-based tolerances help operators and mechanics make fast, correct decisions on the job. The scope stops at light preventive tasks suited to field service; major repairs, diagnostics, and component overhauls must follow OEM manuals and be executed per approved project specifications and authority requirements. Use the interactive features to tick items, add comments, attach photos, and instantly export PDF/Excel with a secure QR link.
- Standardized 50-hour tasks keep excavator systems reliable: clean cooling cores to avoid overheating, maintain proper track sag to prevent accelerated wear, and grease high-load pivots to purge contaminants and extend pin and bushing life across varied site conditions.
- Actionable instructions specify tools and tolerances: kPa limits for blowing filters, belt deflection under a 100 N load, coolant refractometer readings to −37 °C, charging voltage at 1 500 rpm, and evidence requirements like photos, lot numbers, and calibrated torque marks.
- Interactive online checklist with tick, comment, and export features secured by QR code. This enables transparent sign-off, quick defect escalation, and auditable records that travel with the machine, simplifying shift handovers, rental returns, and compliance with site documentation control.
- Designed for mixed fleets and varied environments, the checklist emphasizes fast, repeatable tasks that fit a weekly window, reduces unplanned downtime, and supports safer operation by catching loose fasteners, leaks, and clogged airflow paths before they escalate into costly failures.
Lubrication
Air Intake System
Cooling System
Undercarriage
Fasteners & Structures
Electrical, Fluids & Documentation
Lubrication and Clean Air Keep Components Alive
Weekly lubrication purges grit from high-load joints, preventing fretting and pin/bushing wear. Apply NLGI-2 grease until clean purge is visible and wipe excess to avoid dust packing. For swing bearings and open slew gears, distribute grease evenly while rotating the upperstructure to ensure full coverage. Air system care is equally critical: read the restriction indicator first, then service the primary element with dry air under 700 kPa from the clean side only. Never clean the safety element—replace it when dirty or out-of-date. Inspect ducts and clamps for airtight seals, since even small leaks allow dust ingress that scours turbocharger and cylinder surfaces. Acceptance cues are practical: uniform grease purge with no squeaks during function tests, indicator within the green band, intact filter pleats, and fully seated clamps without cracking. Capture photos of purge points, indicator status, filter labels, and any replaced parts to create traceable, auditable service evidence.
- Grease to clean purge; wipe excess from joints.
- Dry air clean primaries only, ≤ 700 kPa.
- Do not clean safety elements; replace instead.
- Air ducts must be airtight with seated clamps.
- Photograph indicators, filters, and purge points.
Cooling Packs and Undercarriage: Control Heat and Wear
Cooling packs collect dust that insulates fins and spikes engine and hydraulic temperatures. Blow cores from the fan side out using ≤ 550 kPa to avoid fin damage, and confirm light passes through the core. Verify coolant level cold, then check refractometer readings around −37 °C for freeze/boil protection. Belt deflection between 10–15 mm under 100 N indicates healthy tension. On the undercarriage, remove packed material that blocks rollers and accelerates wear. Measure track sag at the midpoint and adjust per OEM—typical values sit between 10–35 mm depending on track type. Fasteners on shoes and slew bearings should show intact witness marks; re-torque with a calibrated wrench if disturbed. Acceptance signs include straight fins, visible core daylight, correct coolant reading, free-spinning rollers, and aligned paint marks. Photos before and after cleaning, and of measuring tapes and torque marks, provide unambiguous proof.
- Clean cores ≤ 550 kPa from fan side.
- Refractometer target: about −37 °C.
- Belt deflection: 10–15 mm under 100 N.
- Track sag within OEM range, typically 10–35 mm.
- Use calibrated wrench; renew witness marks.
Power, Fluids, and Records: Quick Checks, Big Payoffs
Electrical and fluid checks catch early failures. Battery terminals corrode and raise resistance; clean, torque per OEM, and confirm resting voltage around 24.6–25.4 V for 24 V systems. With the engine running near 1 500 rpm, alternator output should land between 27.0–28.5 V. Engine oil must sit between MIN–MAX after a 10-minute rest on level ground; top up using OEM-approved grade and record litres and batch. Hydraulic oil should appear clear amber in the sight glass without foam or milkiness; if abnormal, capture a sample for lab analysis. Drain the fuel-water separator until clear fuel flows to protect injectors. Finish by cleaning the cab and logging all actions. Acceptance cues are simple: correct voltages, correct levels within marks, clear fuel, and documented evidence. Photos of multimeter readings, dipsticks, sight glasses, and samples, plus signatures, complete a defensible trail.
- Resting 24 V systems: 24.6–25.4 V.
- Charging at 1 500 rpm: 27.0–28.5 V.
- Oil and hydraulic levels within marks.
- Drain water until clear fuel flows.
- Record litres, batches, and signatures.
How to Use the Weekly/50h Excavator PM Interactive Checklist
- Preparation: Park on level ground, lower implements, apply park brake, and isolate if required. Gather PPE, grease gun, torque wrench, refractometer, multimeter, tape/scale, low-pressure air/water, spill kit, OEM specs, tags, and cleaning tools.
- Access the checklist: Scan the machine QR code or open the app, select unit ID and hour meter, then start a new Weekly/50h PM session.
- Work methodically: Follow item order by system. Tick each step, add condition notes, capture photos or short videos, and enter measurements (kPa, mm, V, °C, litres) where prompted.
- Flag defects: If readings fall outside acceptance limits, add a comment with photos, select priority, assign to a maintainer, and apply a tag-out if safety-critical.
- Complete evidence: Record products used (oil grade, lot numbers), torque values, and any adjustments made. Use witness paint where applicable and attach close-up photos.
- Export and share: Generate an export as PDF/Excel including photos and comments. The export is QR-authenticated for verification and easy sharing with supervisors.
- Sign-off and archive: Capture operator and mechanic digital signatures, distribute to stakeholders, and archive the record for audits and service history.
Call to Action
- Start Checklist Tick off tasks, leave comments on items or the whole form, and export your completed report to PDF or Excel—with a built-in QR code for authenticity.
- Download Excel - Weekly/50h Excavator Preventive Maintenance
- Download PDF - Weekly/50h Excavator Preventive Maintenance
- View Image - Weekly/50h Excavator Preventive Maintenance
Cite & Embed
“Weekly/50h Excavator Preventive Maintenance by Quollnet”
with a link to
this source page.

FAQ
Question: How long should a Weekly/50h excavator preventive maintenance take on site?
Question: When should I replace the air filters instead of cleaning them weekly?
Question: What track sag should I set if the OEM range is unknown?
Question: Which charging voltage is acceptable for a 24 V excavator system?
Related Articles
Broader reading and guidance connected to this checklist topic.

Major Construction Defects That Needs Immediate Attention


Is It Important To Customize Your Qr Code And How To Do It?

Open Ncrs At Taking-over / Dlp: What Happens At Handover And How To Escalate
Related Checklists
Keep the workflow moving with nearby templates chosen from similar checklist content.