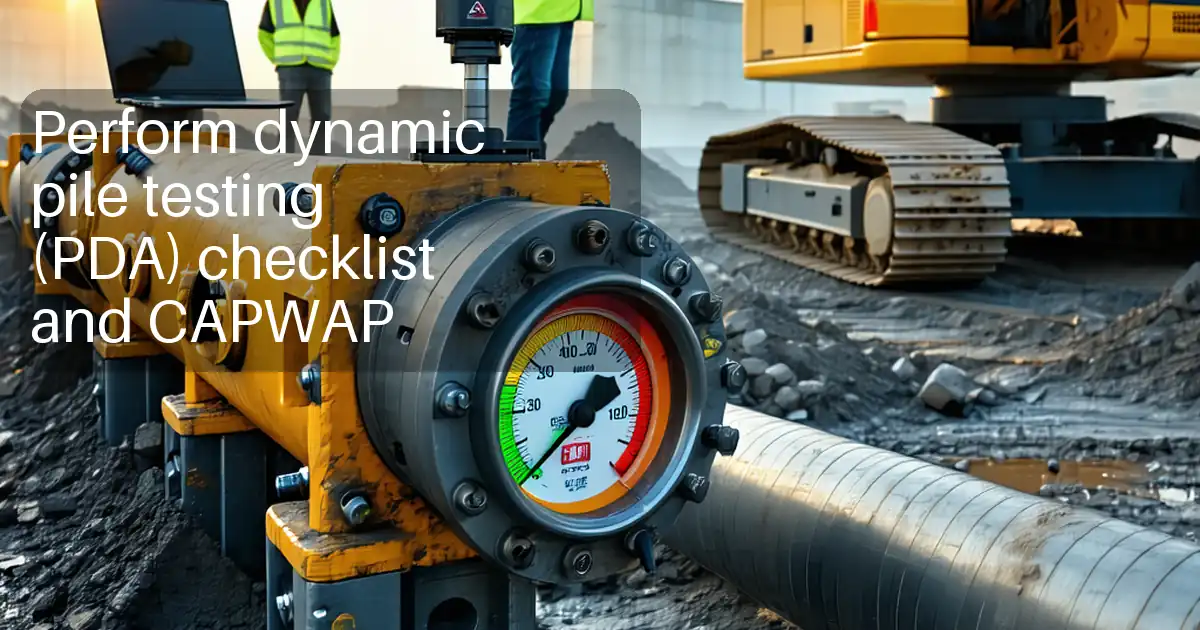
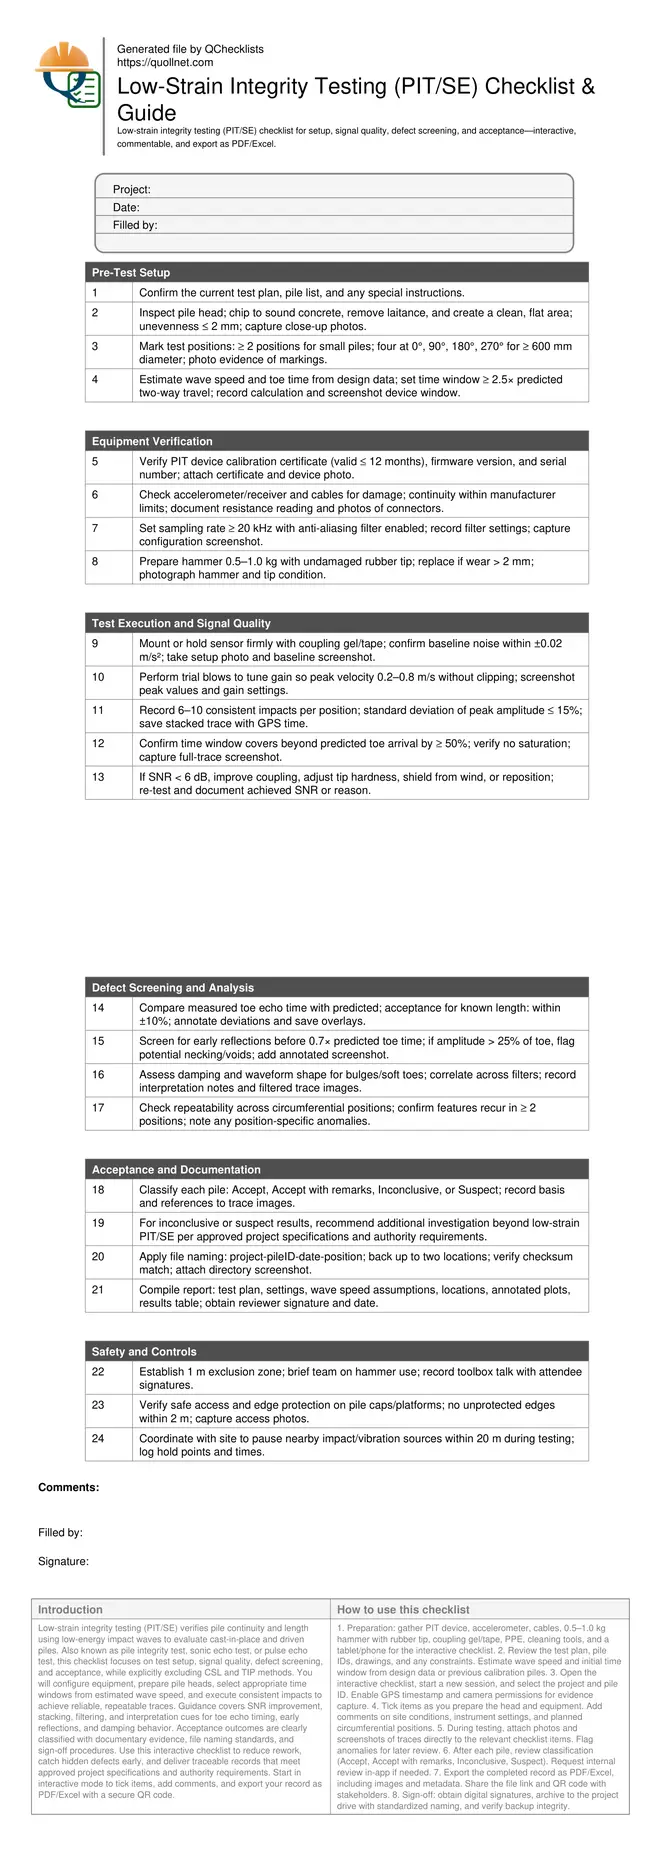
Low-Strain Integrity Testing (PIT/SE) Checklist
Definition: Low-strain integrity testing (PIT/SE) guides field engineers through setup, signal quality verification, defect screening, and acceptance of cast-in-place or driven piles, excluding CSL/TIP methods.
- What: field-ready process for PIT/SE on cast-in-place and driven piles.
- Why: reduce risk of hidden defects and costly rework early.
- How: optimize setup, signal-to-noise, screening, and acceptance documentation.
- Interactive: tickable, commentable, exportable with QR code security.
Low-strain integrity testing (PIT/SE) verifies pile continuity and length using low-energy impact waves to evaluate cast-in-place and driven piles. Also known as pile integrity test, sonic echo test, or pulse echo test, this checklist focuses on test setup, signal quality, defect screening, and acceptance, while explicitly excluding CSL and TIP methods. You will configure equipment, prepare pile heads, select appropriate time windows from estimated wave speed, and execute consistent impacts to achieve reliable, repeatable traces. Guidance covers SNR improvement, stacking, filtering, and interpretation cues for toe echo timing, early reflections, and damping behavior. Acceptance outcomes are clearly classified with documentary evidence, file naming standards, and sign-off procedures. Use this interactive checklist to reduce rework, catch hidden defects early, and deliver traceable records that meet approved project specifications and authority requirements. Start in interactive mode to tick items, add comments, and export your record as PDF/Excel with a secure QR code.
- This checklist streamlines PIT/SE practice from head preparation to acceptance, emphasizing signal quality, repeatability, and defensible interpretations. It reduces ambiguity in wave speed selection, time-window configuration, and gain settings, while standardizing documentary evidence such as photos, screenshots, calibration certificates, GPS timestamps, and reviewer sign-offs for each pile tested.
- Technicians gain practical controls for coupling, impact energy, stacking, and filtering so toe echoes and early reflections are readable without saturation. Repeatability across circumferential positions is highlighted, enabling confident screening of necking, voids, bulges, length anomalies, and soft toes, with clear thresholds for retest, remark, or escalation when results remain inconclusive.
- Project teams receive a consistent acceptance framework: Accept, Accept with remarks, Inconclusive, or Suspect, tied to measured timing, amplitude, and damping cues. Reporting guidance standardizes file naming, metadata capture, backup verification, and distribution, supporting transparent QA workflows and audit readiness per approved project specifications and authority requirements.
- Interactive online checklist with tick, comment, and export features secured by QR code.
Pre-Test Setup
Equipment Verification
Test Execution and Signal Quality
Defect Screening and Analysis
Acceptance and Documentation
Safety and Controls
Set up for reliable low-strain testing
Successful PIT/SE starts with head preparation and correct assumptions. A clean, flat, sound pile head reduces coupling losses and spurious reflections. Estimate wave speed from mix data, prior calibration piles, or back-analysis; then set a time window that comfortably captures the toe echo and any early reflections. Choose a hammer and tip that deliver repeatable, low-strain impacts without damaging the head or saturating the sensor. Configure sampling rate and filters to preserve phase and amplitude fidelity. Mark circumferential positions to cross-check repeatability. On congested sites, plan brief pauses in adjacent operations to limit vibration contamination. Document everything: serial numbers, settings, pile IDs, GPS timestamps, and photos of the setup. This discipline shortens troubleshooting and improves confidence in your interpretations, especially on variable soil profiles or mixed pile geometries, where damping and wave speed can change from location to location.
- Ensure head flatness within 2 mm and remove loose material.
- Set time window at least 2.5× predicted two-way travel.
- Use hammer 0.5–1.0 kg with undamaged rubber tip.
- Record device settings and capture configuration screenshots.
- Plan testing when site vibration sources are paused.
Maximize signal quality and interpret with intent
Signal quality drives interpretation. Target consistent impacts and stack multiple traces to suppress random noise. If signal-to-noise is low, improve coupling, adjust gain, or change tip hardness. Confirm that toe arrival lies within the window without clipping, then scan for early reflections suggesting necking, voids, or construction anomalies. Compare traces around the circumference; genuine features tend to repeat, while local coupling issues do not. Use filtering judiciously—confirm any interpretation across at least two filter settings to avoid creating artifacts. For length-known piles, compare measured toe time to predicted values; large deviations merit caution. For unknown lengths, use consistent, high-quality toe echoes to estimate length, noting the assumed wave speed. When results remain ambiguous, classify as inconclusive and recommend further investigation beyond low-strain PIT/SE per approved project specifications and authority requirements.
- Stack 6–10 consistent blows per position.
- Aim for SNR ≥ 6 dB without signal clipping.
- Confirm interpretations across multiple filter settings.
- Look for features repeating at multiple positions.
- Flag early reflections with annotated screenshots.
Acceptance, reporting, and traceable QA
Acceptance rests on repeatability, timing consistency, and the absence of strong early reflections. Classify each pile as Accept, Accept with remarks, Inconclusive, or Suspect. Tie every judgment to trace evidence: annotated plots, timing tables, and photos of the setup. Standardize file naming and maintain redundant backups to preserve chain-of-custody. Include assumptions for wave speed, filter settings, impact counts, and positions tested. Obtain reviewer sign-off and distribute to stakeholders per project protocols. If suspect or inconclusive, outline the reason and recommended next steps consistent with project specifications and authority requirements. Close out by exporting records to PDF/Excel and embedding a QR code for authentication so field and office teams can verify that published reports match the captured datasets.
- Classify results with clear, evidence-based rationale.
- Adopt consistent file naming and backup verification.
- Include settings, assumptions, and positions in reports.
- Secure reviewer sign-off and distribution logs.
- Embed QR for authenticity and easy retrieval.
How to Use This PIT/SE Checklist On Site
- Preparation: gather PIT device, accelerometer, cables, 0.5–1.0 kg hammer with rubber tip, coupling gel/tape, PPE, cleaning tools, and a tablet/phone for the interactive checklist.
- Review the test plan, pile IDs, drawings, and any constraints. Estimate wave speed and initial time window from design data or previous calibration piles.
- Open the interactive checklist, start a new session, and select the project and pile ID. Enable GPS timestamp and camera permissions for evidence capture.
- Tick items as you prepare the head and equipment. Add comments on site conditions, instrument settings, and planned circumferential positions.
- During testing, attach photos and screenshots of traces directly to the relevant checklist items. Flag anomalies for later review.
- After each pile, review classification (Accept, Accept with remarks, Inconclusive, Suspect). Request internal review in-app if needed.
- Export the completed record as PDF/Excel, including images and metadata. Share the file link and QR code with stakeholders.
- Sign-off: obtain digital signatures, archive to the project drive with standardized naming, and verify backup integrity.
Call to Action
- Start Checklist Tick off tasks, leave comments on items or the whole form, and export your completed report to PDF or Excel—with a built-in QR code for authenticity.
- Download Excel - Low-Strain Integrity Testing (PIT/SE)
- Download PDF - Low-Strain Integrity Testing (PIT/SE)
- View Image - Low-Strain Integrity Testing (PIT/SE)
Cite & Embed
“Low-Strain Integrity Testing (PIT/SE) by Quollnet”
with a link to
this source page.
FAQ
Question: How many test locations and blows should I record per pile for PIT/SE?
Question: What indicates a good PIT/SE signal, and how can I improve SNR?
Question: Which defects can low-strain PIT/SE detect, and what are its limits?
Question: How do I set the time window and wave speed assumptions?
Question: What acceptance criteria should I apply to PIT/SE results?
Related Articles
Broader reading and guidance connected to this checklist topic.


Master Construction Project Cashflow With Cashflowpot
Related Checklists
Keep the workflow moving with nearby templates chosen from similar checklist content.