Comprehensive Wall Surface Preparation Checklist for Tiling
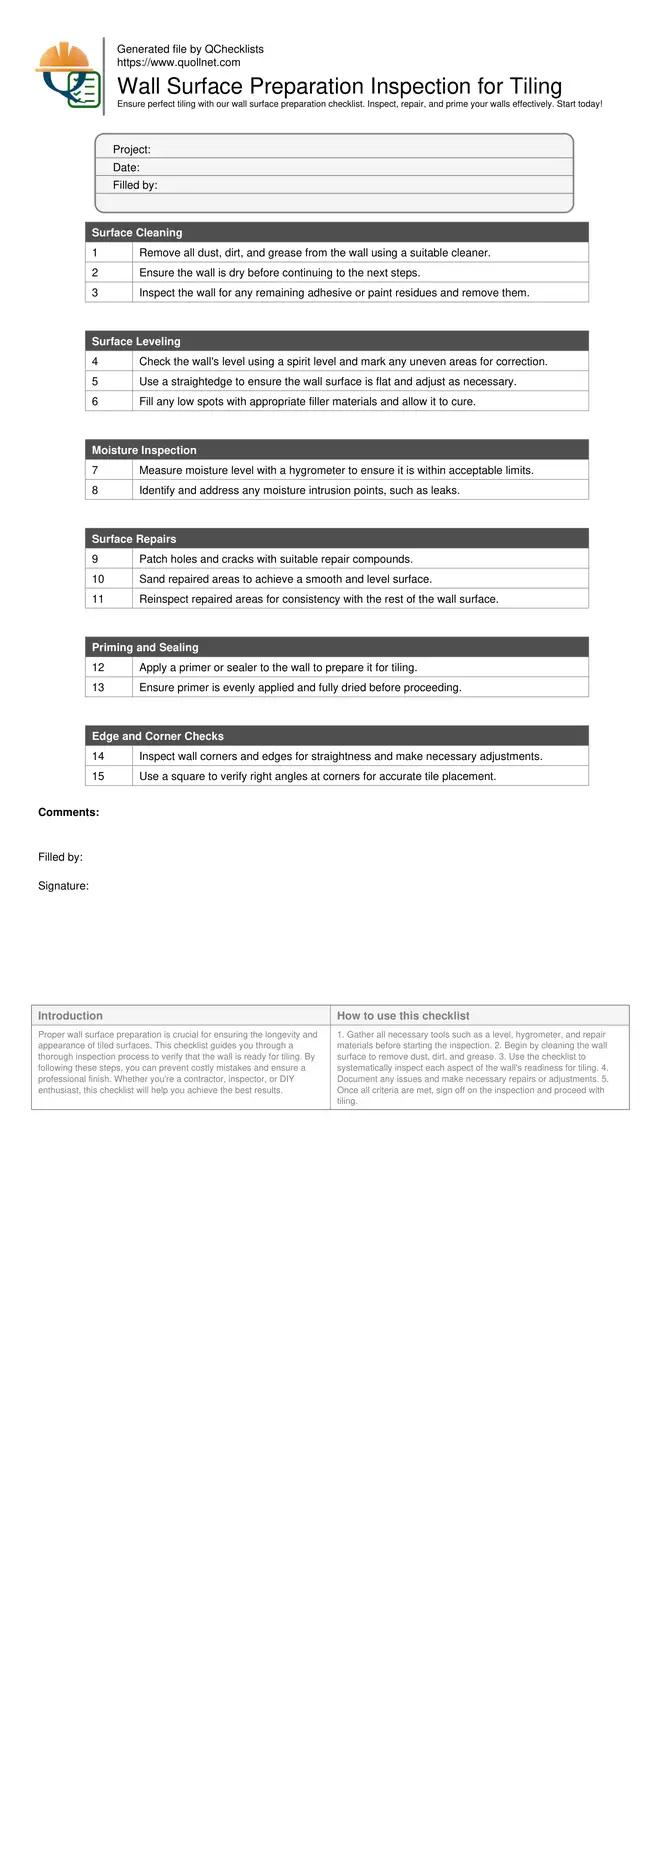
Proper wall surface preparation is crucial for ensuring the longevity and appearance of tiled surfaces. This checklist guides you through a thorough inspection process to verify that the wall is ready for tiling. By following these steps, you can prevent costly mistakes and ensure a professional finish. Whether you're a contractor, inspector, or DIY enthusiast, this checklist will help you achieve the best results.
- Ensure wall surfaces are level and free of debris before tiling to prevent uneven tiles.
- Check moisture levels using a hygrometer to avoid tile adhesion issues.
- Verify all repairs, such as patching holes and cracks, are completed for a smooth surface.
- Confirm that walls are primed or sealed as needed for optimal tile adhesion.
- Inspect wall corners and edges for straightness to maintain alignment during tiling.
Surface Cleaning
Surface Leveling
Moisture Inspection
Surface Repairs
Priming and Sealing
Edge and Corner Checks
Importance of Wall Surface Preparation
Preparing the wall surface is a key step in the tiling process. A well-prepared wall ensures that tiles adhere properly and maintain their appearance over time. Skipping this step can lead to tiles that are uneven, loose, or prone to damage. Proper inspection can identify potential issues before they become costly mistakes.
- Prevents tile misalignment and lippage.
- Ensures strong tile adhesion.
- Reduces the risk of moisture-related issues.
- Prolongs the lifespan of the tiled surface.
Common Mistakes in Surface Preparation
Many issues with tiled surfaces originate from inadequate wall preparation. Common mistakes include failing to clean the surface thoroughly, ignoring moisture levels, and skipping essential repairs. Recognizing these mistakes can save time and resources in the long run, ensuring a smooth and professional tiling outcome.
- Neglecting surface cleaning leads to poor adhesion.
- Overlooking moisture can cause tiles to lift.
- Ignoring surface irregularities affects tile alignment.
- Using improper primers or sealants compromises durability.
How to Use the Wall Surface Preparation Checklist
- Gather all necessary tools such as a level, hygrometer, and repair materials before starting the inspection.
- Begin by cleaning the wall surface to remove dust, dirt, and grease.
- Use the checklist to systematically inspect each aspect of the wall's readiness for tiling.
- Document any issues and make necessary repairs or adjustments.
- Once all criteria are met, sign off on the inspection and proceed with tiling.
Call to Action
- Start Checklist Tick off tasks, leave comments on items or the whole form, and export your completed report to PDF or Excel—with a built-in QR code for authenticity.
- Download Excel - Wall Surface Preparation Inspection Checklist for Tiling
- Download PDF - Wall Surface Preparation Inspection Checklist for Tiling
- View Image - Wall Surface Preparation Inspection Checklist for Tiling
Cite & Embed
“Wall Surface Preparation Inspection Checklist for Tiling by Quollnet”
with a link to
this source page.

FAQ
Question: How do I check for moisture in walls before tiling?
Question: What are common signs of a poorly prepared wall surface?
Question: Why is priming the wall important before tiling?
Related Articles
Broader reading and guidance connected to this checklist topic.

Is The Crack You See On Your Wall Serious Or Minor Cosmetic Issue?


Related Checklists
Keep the workflow moving with nearby templates chosen from similar checklist content.