Plaster Application Inspection Checklist
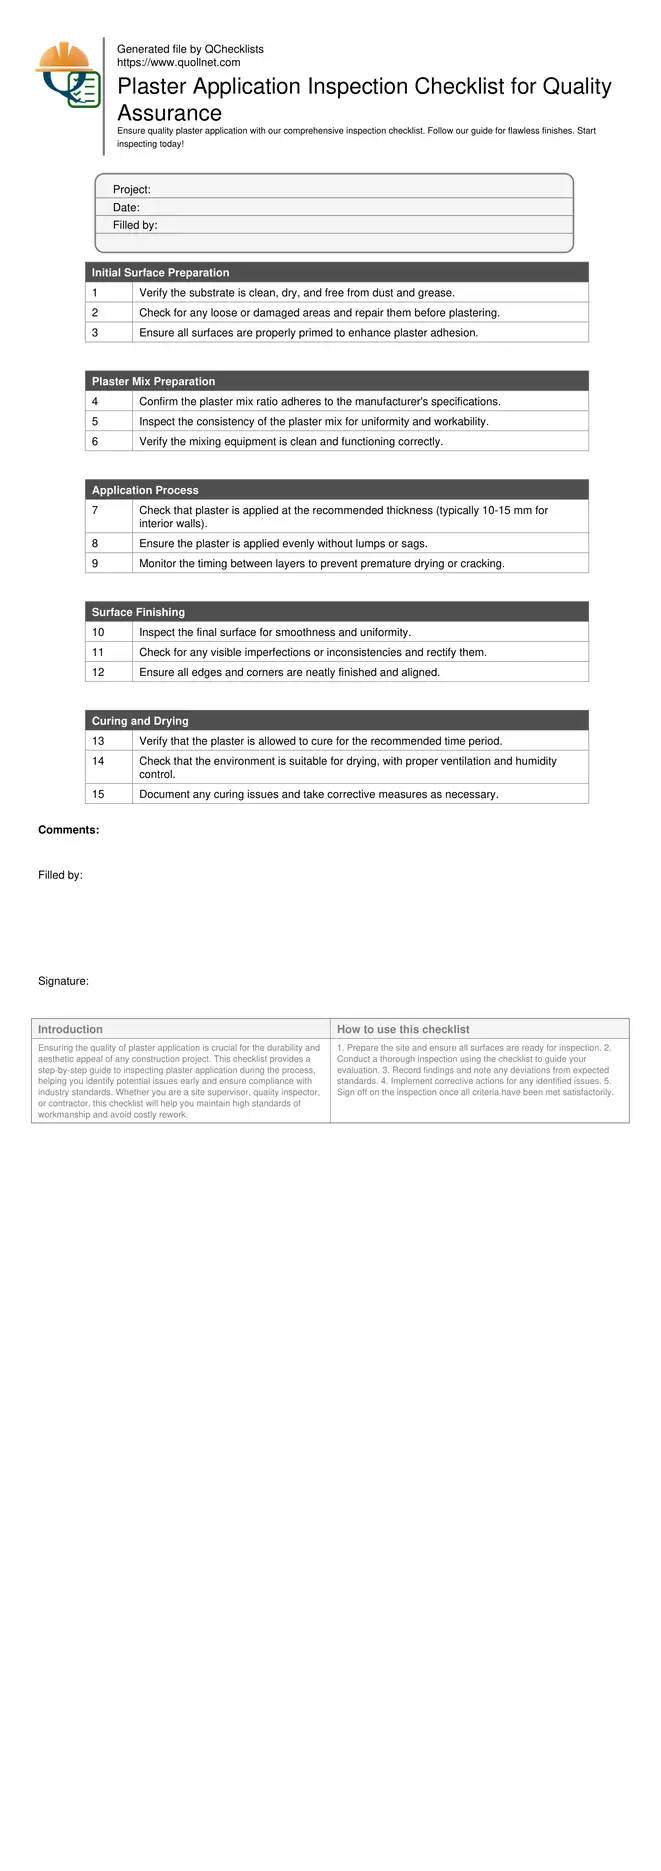
Ensuring the quality of plaster application is crucial for the durability and aesthetic appeal of any construction project. This checklist provides a step-by-step guide to inspecting plaster application during the process, helping you identify potential issues early and ensure compliance with industry standards. Whether you are a site supervisor, quality inspector, or contractor, this checklist will help you maintain high standards of workmanship and avoid costly rework.
- Ensure consistent plaster thickness by measuring at multiple points.
- Verify surface preparation for optimal plaster adhesion.
- Check mix consistency to prevent cracks and defects.
- Inspect application techniques to ensure smooth finishes.
- Document findings and corrective actions for quality assurance.
Initial Surface Preparation
Plaster Mix Preparation
Application Process
Surface Finishing
Curing and Drying
Importance of Surface Preparation
Proper surface preparation is the foundation of a successful plaster application. It ensures that the plaster adheres well and performs as expected over time. Inspectors should ensure that surfaces are clean, dry, and free from contaminants that could impair adhesion. Loose and damaged areas should be repaired before plastering begins, and all surfaces should be adequately primed.
- Clean and dry surfaces.
- Repair damaged areas.
- Prime for adhesion.
- Check for contaminants.
- Ensure surface integrity.
Ensuring Quality in Plaster Mix
The quality of the plaster mix is critical to the overall success of the application. Inspectors should confirm that the mix ratio is in line with the manufacturer's specifications, ensuring the right balance of materials for strength and workability. Consistency should be uniform to avoid issues like cracking or uneven drying.
- Check mix ratio.
- Ensure consistency.
- Use clean equipment.
- Monitor mix uniformity.
- Avoid over-mixing.
How to Use the Plaster Application Inspection Checklist
- Prepare the site and ensure all surfaces are ready for inspection.
- Conduct a thorough inspection using the checklist to guide your evaluation.
- Record findings and note any deviations from expected standards.
- Implement corrective actions for any identified issues.
- Sign off on the inspection once all criteria have been met satisfactorily.
Call to Action
- Start Checklist Tick off tasks, leave comments on items or the whole form, and export your completed report to PDF or Excel—with a built-in QR code for authenticity.
- Download Excel - Plaster Application Inspection Checklist
- Download PDF - Plaster Application Inspection Checklist
- View Image - Plaster Application Inspection Checklist
Cite & Embed
“Plaster Application Inspection Checklist by Quollnet”
with a link to
this source page.

FAQ
Question: What tools are needed for plaster inspection?
Question: How often should plaster inspections be conducted?
Question: What are common plastering problems to look for?
Related Articles
Broader reading and guidance connected to this checklist topic.

Top Plumbing Defects


Download Excel Format Snag List
Related Checklists
Keep the workflow moving with nearby templates chosen from similar checklist content.