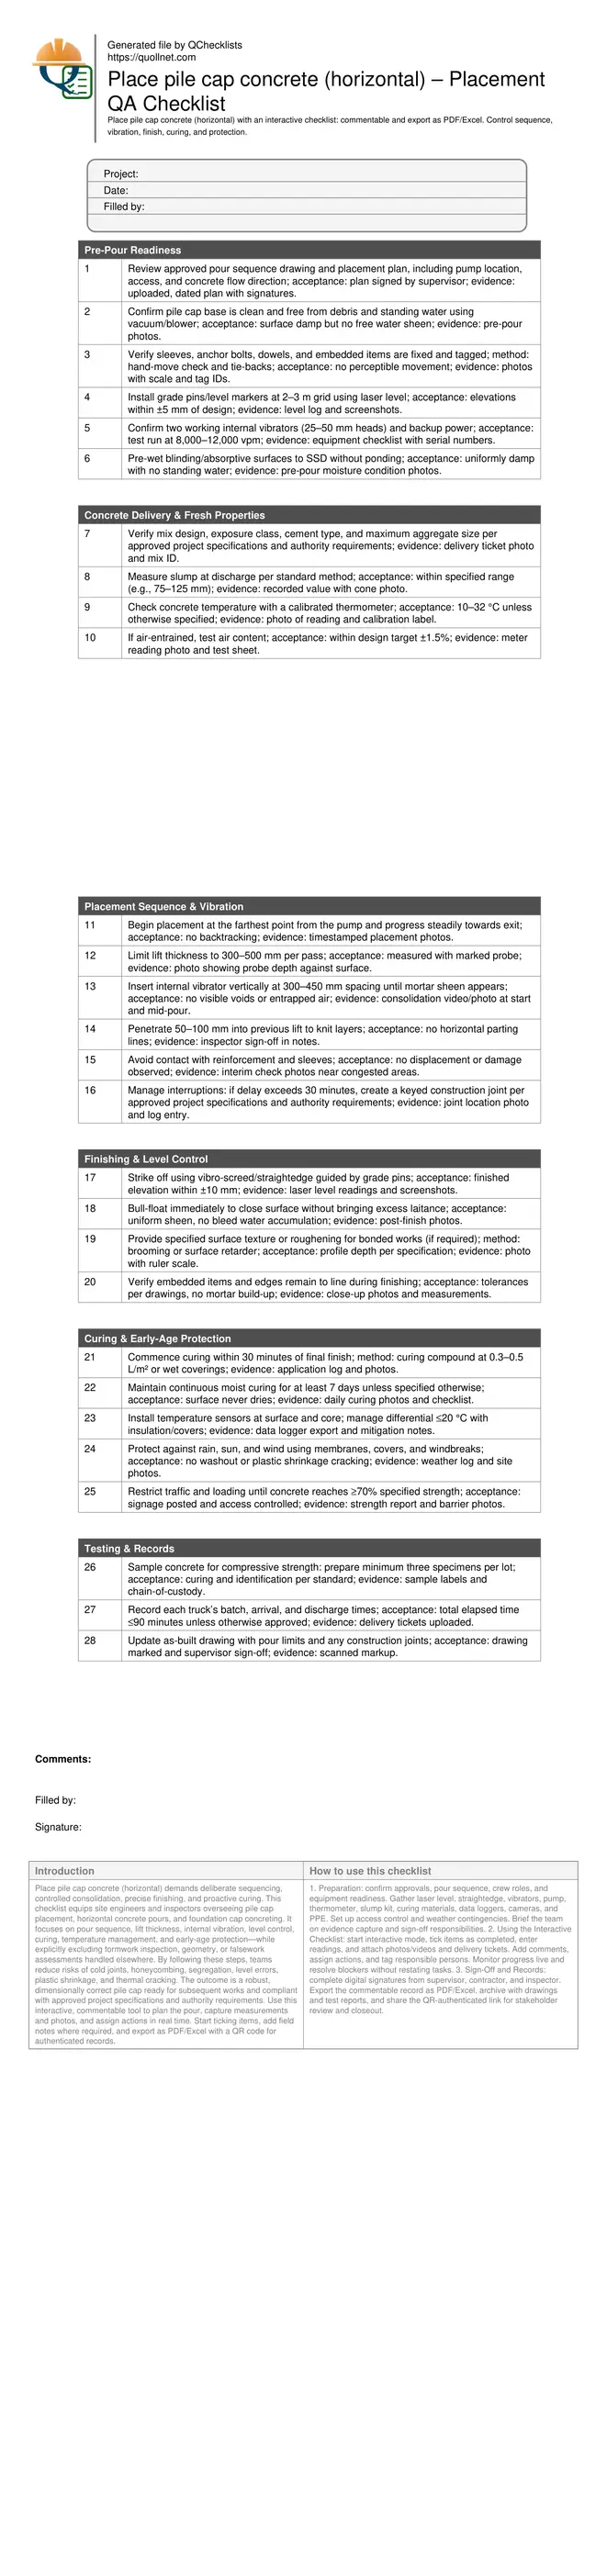
Pile Cap Concrete Placement (Horizontal) Checklist
Definition: Place pile cap concrete (horizontal) checklist guides site engineers through sequencing, vibration, finishing, curing, and protection for durable pile caps, excluding formwork inspection and aligning with project specifications.
- Confirms pour sequence, lift thickness, and cold joint controls.
- Specifies vibrator type, spacing, and rework criteria for consolidation.
- Defines finishing tolerances, curing durations, and temperature protection measures.
- Interactive, commentable checklist with export and QR code verification.
Place pile cap concrete (horizontal) demands deliberate sequencing, controlled consolidation, precise finishing, and proactive curing. This checklist equips site engineers and inspectors overseeing pile cap placement, horizontal concrete pours, and foundation cap concreting. It focuses on pour sequence, lift thickness, internal vibration, level control, curing, temperature management, and early-age protection—while explicitly excluding formwork inspection, geometry, or falsework assessments handled elsewhere. By following these steps, teams reduce risks of cold joints, honeycombing, segregation, level errors, plastic shrinkage, and thermal cracking. The outcome is a robust, dimensionally correct pile cap ready for subsequent works and compliant with approved project specifications and authority requirements. Use this interactive, commentable tool to plan the pour, capture measurements and photos, and assign actions in real time. Start ticking items, add field notes where required, and export as PDF/Excel with a QR code for authenticated records.
- Ensure a controlled, continuous pour with defined lift thickness, planned routes from the farthest point, and backup equipment on standby. The checklist guides consolidation using appropriate internal vibrators, preventing honeycombing, segregation, and cold joints while documenting acceptance cues and field measurements for defensible quality records.
- Achieve accurate levels and surface uniformity by establishing grade pins and using laser-guided screeding. Finishing requirements, surface texture for bonding, and tolerances are clearly stated. Evidence capture includes elevation logs, straightedge checks, and timestamped photos to verify compliance with approved project specifications and authority requirements.
- Protect early-age concrete by initiating curing promptly, maintaining moisture continuity, and managing temperature differentials with sensors and covers. The checklist prescribes practical thresholds, monitoring routines, and weather contingency measures so the pile cap avoids plastic shrinkage, rain washout, or thermal cracking, ensuring durable long-term performance.
- Interactive online checklist with tick, comment, and export features secured by QR code. Teams attach delivery tickets, test results, and photos; assign responsibilities; and generate authenticated PDF/Excel reports for stakeholders, improving traceability, accountability, and closeout efficiency without duplicating separate formwork inspections.
Pre-Pour Readiness
Concrete Delivery & Fresh Properties
Placement Sequence & Vibration
Finishing & Level Control
Curing & Early-Age Protection
Testing & Records
Sequencing the Pour for Uniform, Continuous Placement
Effective pile cap placement begins with a clear route: start at the farthest point from the pump and move steadily toward the exit to avoid backtracking and cold joints. Plan lift thickness between 300–500 mm so internal vibrators can consolidate the mass without segregation. Establish level control with grade pins on a 2–3 m grid and confirm pump reach, hose length, and contingency positions before trucks arrive. Maintain a steady supply by coordinating delivery intervals; if unavoidable delays exceed workable time, create a deliberate keyed construction joint per approved project specifications and authority requirements. Keep the base Surface Saturated Dry (SSD) to prevent rapid suction, and remove standing water that can dilute paste. Assign distinct roles—hose operator, vibrator operator, screed team, and quality recorder—to ensure real-time checks are captured with photos, readings, and signatures. This disciplined sequence reduces honeycombing, minimizes lift lines, and preserves designed elevations across the cap.
- Begin at farthest point and progress without backtracking.
- Target 300–500 mm lift thickness per placement pass.
- Grid grade pins at 2–3 m for level control.
- Plan contingency for pump repositioning and delays.
Controlled Vibration and Finish for Sound, Level Surfaces
Consolidation determines durability. Use 25–50 mm internal vibrator heads operating around 8,000–12,000 vpm. Insert vertically at 300–450 mm spacing until a light mortar sheen forms, then withdraw slowly to avoid voids. Penetrate 50–100 mm into the previous lift to knit layers, but avoid prolonged vibration that can cause segregation. Keep the head off reinforcement and sleeves to prevent displacement. Immediately strike off with a vibro-screed guided by pins, then bull-float to close the surface without drawing excess laitance. Confirm top elevation within ±10 mm using a laser level, and provide specified texture or roughening for future bonding where noted on drawings. Throughout, inspect edges and embedded items for alignment and cleanliness. Capture consolidation videos, elevation screenshots, and post-finish photos to create a traceable record of acceptance cues, ready for sign-off and future audits.
- Vibrate at 300–450 mm spacing to a light sheen.
- Knit lifts by penetrating 50–100 mm below.
- Finish to ±10 mm elevation tolerance.
- Avoid over-vibration and reinforcement contact.
Curing, Thermal Control, and Weather Protection
Begin curing within 30 minutes of final finishing to lock in moisture and mitigate plastic shrinkage. Apply curing compound at 0.3–0.5 L/m² or use wet hessian with polythene, ensuring the surface never dries during the first 7 days unless otherwise specified. For thicker caps, install temperature sensors near the surface and within the core; manage the differential to around 20 °C using insulated blankets, staged stripping of covers, or shading. Shield fresh concrete from wind, sun, and rain with barriers and membranes to prevent evaporation or washout. Restrict access until test results indicate at least 70% of specified strength. Maintain a weather log, curing application records, and data logger exports as objective evidence. These measures reduce early-age cracking, preserve finish quality, and ensure the pile cap develops the designed performance before it is loaded or built upon.
- Start curing within 30 minutes of finishing.
- Keep surfaces continuously moist for seven days.
- Limit temperature differential to about 20 °C.
- Protect from wind, sun, and rain exposure.
How to Use This Interactive Checklist
- Preparation: confirm approvals, pour sequence, crew roles, and equipment readiness. Gather laser level, straightedge, vibrators, pump, thermometer, slump kit, curing materials, data loggers, cameras, and PPE. Set up access control and weather contingencies. Brief the team on evidence capture and sign-off responsibilities.
- Using the Interactive Checklist: start interactive mode, tick items as completed, enter readings, and attach photos/videos and delivery tickets. Add comments, assign actions, and tag responsible persons. Monitor progress live and resolve blockers without restating tasks.
- Sign-Off and Records: complete digital signatures from supervisor, contractor, and inspector. Export the commentable record as PDF/Excel, archive with drawings and test reports, and share the QR-authenticated link for stakeholder review and closeout.
Call to Action
- Start Checklist Tick off tasks, leave comments on items or the whole form, and export your completed report to PDF or Excel—with a built-in QR code for authenticity.
- Download Excel - Pile Cap Concrete Placement (Horizontal)
- Download PDF - Pile Cap Concrete Placement (Horizontal)
- View Image - Pile Cap Concrete Placement (Horizontal)
Cite & Embed
“Pile Cap Concrete Placement (Horizontal) by Quollnet”
with a link to
this source page.

FAQ
Question: What lift thickness and vibration strategy should I use for a pile cap?
Question: How do I handle a delay or potential cold joint during placement?
Question: What curing approach is best in hot, windy, or rainy conditions?
Question: What evidence should I capture to verify finishing and level tolerance?
Related Articles
Broader reading and guidance connected to this checklist topic.


Is It Important To Customize Your Qr Code And How To Do It?

Related Checklists
Keep the workflow moving with nearby templates chosen from similar checklist content.