Locate Underground Utilities: GPR, Marking, Stand-Offs, Protection
Definition: Locate underground utilities for construction teams using records, electromagnetic locating, and GPR to identify, mark, stand-off, and protect existing services while explicitly excluding new utility construction activities.
- Review records, scan with GPR/EM, and reconcile discrepancies.
- Mark services with depth notes and set plant stand-off limits.
- Protect shallow assets with mats, barriers, and controlled excavation.
- Interactive, commentable checklist with export and QR code verification.
Locate underground utilities is the first safeguard against costly strikes, delays, and service outages. This checklist guides teams through utility detection using records review, electromagnetic locating, and ground-penetrating radar, then marking services, establishing stand-offs, and implementing protection. It focuses on avoidance and verification only—no new utility construction is included. You will plan from as-builts and GIS, validate with GPR and EM methods, reconcile conflicts, and confirm critical depths with safe potholing or vacuum excavation. The workflow aligns with subsurface utility engineering practices to improve accuracy and reduce excavation risk. Acceptance cues, tolerances, and photo evidence are specified to ensure consistent results and defensible documentation across shifts and contractors. Use this interactive tool on live projects to brief crews, control plant movement, and maintain exclusion zones as conditions change. Start in interactive mode to tick items, add comments, and export as PDF/Excel with a QR-secured record.
- Cut strike risk by combining records, electromagnetic locating, and GPR in a structured workflow. The checklist enforces coverage targets, cross-checks between methods, and photographic evidence, so supervisors can confidently approve excavation windows while maintaining auditable compliance with project specifications and authority requirements.
- Set clear, measurable acceptance criteria for each step: document record currency, log EM/GPR settings and tracks, tag marked utilities with depth and date, and verify critical depths by potholing. Evidence bundles—photos, readings, and signatures—enable traceability and fast dispute resolution across stakeholders.
- Implement practical protection: stand-off barriers for plant, exclusion corridors on site plans, load-spreading mats over shallow assets, and vibration monitoring near sensitive lines. These measures maintain service continuity, minimize rework, and allow safe progress when utilities cannot be relocated or de-energized.
- Interactive online checklist with tick, comment, and export features secured by QR code.
Pre-Planning & Records Review
Notifications & Permits
GPR & Locating Survey
Marking & Stand-Offs
Protection Measures & Controls
Documentation & Handover
Plan from Records and Site Intelligence
Effective utility avoidance starts with a disciplined review of available data. Source the most recent as-builts, GIS layers, and one-call responses, then verify their currency and coverage against the actual work footprint. A walkover identifies surface features—valve boxes, handholes, pedestals, and marker posts—that often reveal undocumented spurs or changes in alignment. Converting these inputs into a risk-based plan defines where to expect high-density corridors, where stand-offs must be conservative, and which unknowns demand field verification. Documenting assumptions and attaching evidence (maps, photos, approvals) builds a trail that withstands audits and site challenges. Acceptance cues include date-stamped records, geotagged walkover photos at logical intervals, and a signed plan that assigns responsibilities for locating, marking, and protecting assets. When gaps appear—missing records or mismatched features—flag them early so field methods can focus on those areas with tighter grids and planned test holes to close uncertainties before excavation.
- Use the latest records; verify dates and coverage limits.
- Capture geotagged photos of surface clues and boundaries.
- Write a risk plan assigning roles and confirmation points.
- Flag unknowns early and plan tighter survey grids.
- Attach all evidence and approvals to the checklist.
Field Locating with GPR and Electromagnetic Methods
Ground-penetrating radar and electromagnetic locating provide complementary detection. GPR reveals non-conductive and conductive utilities by interpreting hyperbolas, while EM detects conductive lines in passive or active modes. A tight, orthogonal grid with logged tracks ensures coverage; calibration on a known target sets confidence in depth conversions. Magnetometers can help identify ferrous pipelines or fittings that GPR or EM alone might miss. Cross-checking between methods and records reduces false positives and confirms true alignments. Acceptance cues include documented equipment models and settings, track coverage ≥95%, depth estimates noted to the nearest 0.1 m, and annotated screenshots for significant finds. Conflicts or unknowns should be escalated for targeted potholing, keeping excavation controlled and evidence-rich. Soil conditions, moisture, and reinforcement can limit GPR; in such cases, EM and selective test holes become the primary tools to maintain reliable outcomes without over-reliance on a single method.
- Run orthogonal grids with logged GNSS or total station tracks.
- Record equipment models, frequencies, and calibration evidence.
- Estimate depths from GPR fits; state confidence levels.
- Cross-check findings and escalate conflicts for potholing.
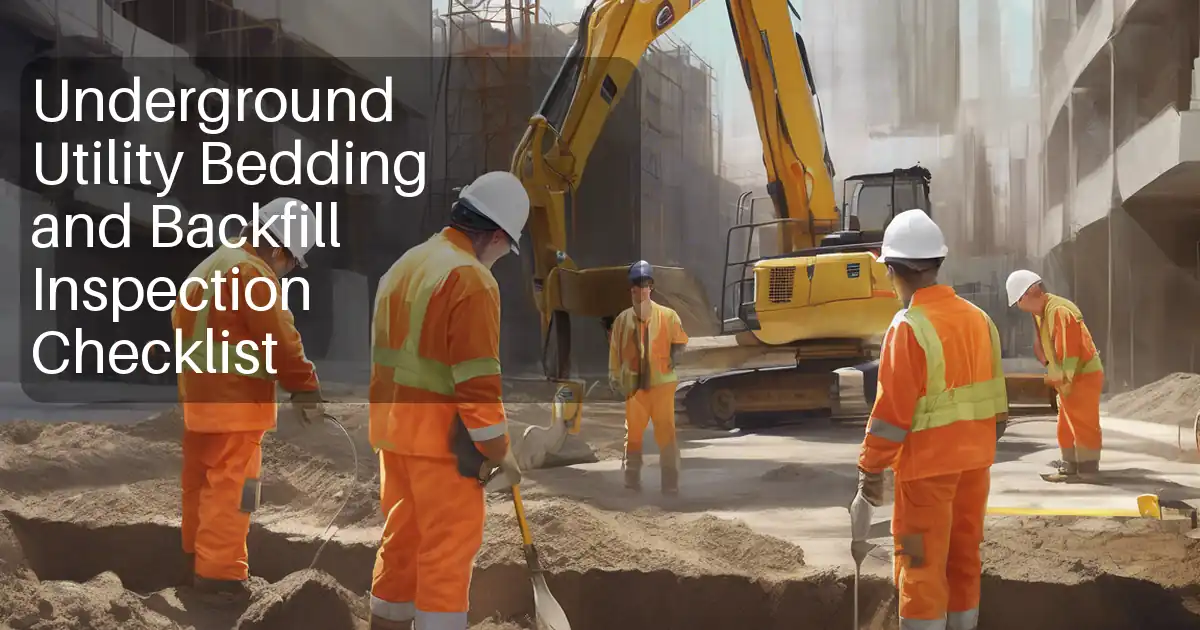
Marking, Stand-Offs, and Protection on Site
Clear, durable markings translate findings into actionable site controls. Each mark should include service type, owner, depth, and date, photographed with a scale for traceability. Stand-off barriers and no-go corridors keep heavy plant offset from utilities, while mats protect shallow services under unavoidable traffic. Where excavation must cross suspected lines, pre-plan vacuum excavation or hand-digging to expose and measure actual depth, then restore per approved requirements. Sensitive assets may also need vibration limits or temporary supports. Acceptance cues include visible markings from 10 m, verified barrier offsets to ±0.05 m, documented mat specifications, and signed briefings for operators. Refresh markings after rain, resurfacing, or heavy traffic, and re-verify alignment if site controls shift. The goal is a living control system that adapts as conditions change while maintaining evidence strong enough to support audits, client queries, or incident investigations without ambiguity.
- Mark utilities with depth, date, and initials.
- Maintain stand-offs and publish exclusion corridors.
- Use mats over shallow assets under plant routes.
- Confirm critical crossings with vacuum excavation.
How to Use This Interactive Utility Locating Checklist
- Preparation: Gather latest records (as-builts, GIS, one-call), calibrate GPR/EM locators, confirm permits, and brief the crew on hazards, stand-offs, and documentation requirements.
- Preparation: Set up the project in the app, define the survey grid boundaries, invite stakeholders, and enable location services for geotagged photos and track logging.
- Using the Interactive Checklist: Start interactive mode, tick items as completed, and attach photos, PDFs, and screenshots as evidence at each step.
- Using the Interactive Checklist: Use comments to flag conflicts or unknown utilities, tag responsible parties, and assign follow-up actions with due dates.
- Using the Interactive Checklist: Monitor completion status, verify acceptance criteria (coverage, depths, stand-offs), and adjust the plan based on findings.
- Sign-Off: Generate an export as PDF/Excel with embedded photos, maps, and readings; enable QR authentication to lock revisions.
- Sign-Off: Collect digital signatures from the supervisor and relevant utility representatives, distribute the export, and archive in project document control.

Call to Action
- Start Checklist Tick off tasks, leave comments on items or the whole form, and export your completed report to PDF or Excel—with a built-in QR code for authenticity.
- Download Excel - Locate Underground Utilities Checklist
- Download PDF - Locate Underground Utilities Checklist
- View Image - Locate Underground Utilities Checklist
Cite & Embed
“Locate Underground Utilities Checklist by Quollnet”
with a link to
this source page.

FAQ
Question: How accurate is GPR for locating and depth estimation?
Question: When should vacuum excavation be used during utility locating?
Question: What stand-off distances are appropriate for plant near marked utilities?
Question: How often should utility markings be refreshed on site?
Related Articles
Broader reading and guidance connected to this checklist topic.


Master Construction Project Cashflow With Cashflowpot

Related Checklists
Keep the workflow moving with nearby templates chosen from similar checklist content.