Install piezometers or observation wells – QA checklist
Definition: Install piezometers or observation wells with a field-ready checklist for contractors and inspectors, covering development, sealing, and baseline groundwater recording without pump test analysis.
- Select locations, verify utilities, and survey precise elevations and coordinates.
- Install screens, gravel pack, and seals to prevent cross-contamination.
- Develop wells to stabilize parameters and record baseline groundwater levels.
- Interactive, commentable checklist with export and QR code verification.
Install piezometers or observation wells is a specialized task requiring disciplined drilling, precise installation, proper sealing, and accurate baseline groundwater measurements. This checklist supports groundwater monitoring wells—standpipe piezometers and observation boreholes—ensuring the annulus is sealed, wells are developed effectively, and data quality is defensible. It focuses on construction and commissioning steps only; pump test analysis and long-term aquifer testing are intentionally excluded. By following these steps, teams mitigate risks such as formation collapse, inter-aquifer leakage, clogged screens, contaminated readings, and uncertain datums. You’ll confirm materials against submittals, track borehole conditions, place gravel filter packs and bentonite/grout seals via tremie, develop with surge-and-purge or low-rate pumping, and capture stabilized water levels with a surveyed reference. The outcome is a durable, verifiable installation ready for routine monitoring and compliance reporting per approved project specifications and authority requirements. Use this interactive checklist to tick items, add field comments, and export PDF/Excel—secured by QR.
- Deliver reliable groundwater monitoring by standardizing siting, drilling, screened interval placement, annular sealing, development, and baseline measurements. Each step includes methods, tolerances, and evidence capture to minimize construction errors and ensure traceable results acceptable to project owners and regulators.
- Interactive online checklist with tick, comment, and export features secured by QR code. Field teams can log readings, attach photos, record volumes, and generate verifiable as-built packages instantly. Supervisors can review changes, lock sign-offs, and archive a complete audit trail for handover.
- Reduce lifecycle risks such as cross-connection between aquifers, silting and poor recovery, misreported elevations, and non-conforming materials. The checklist enforces tremie placement, surveyed datums, calibrated instruments, and stabilization criteria so baseline groundwater levels are repeatable and defensible.
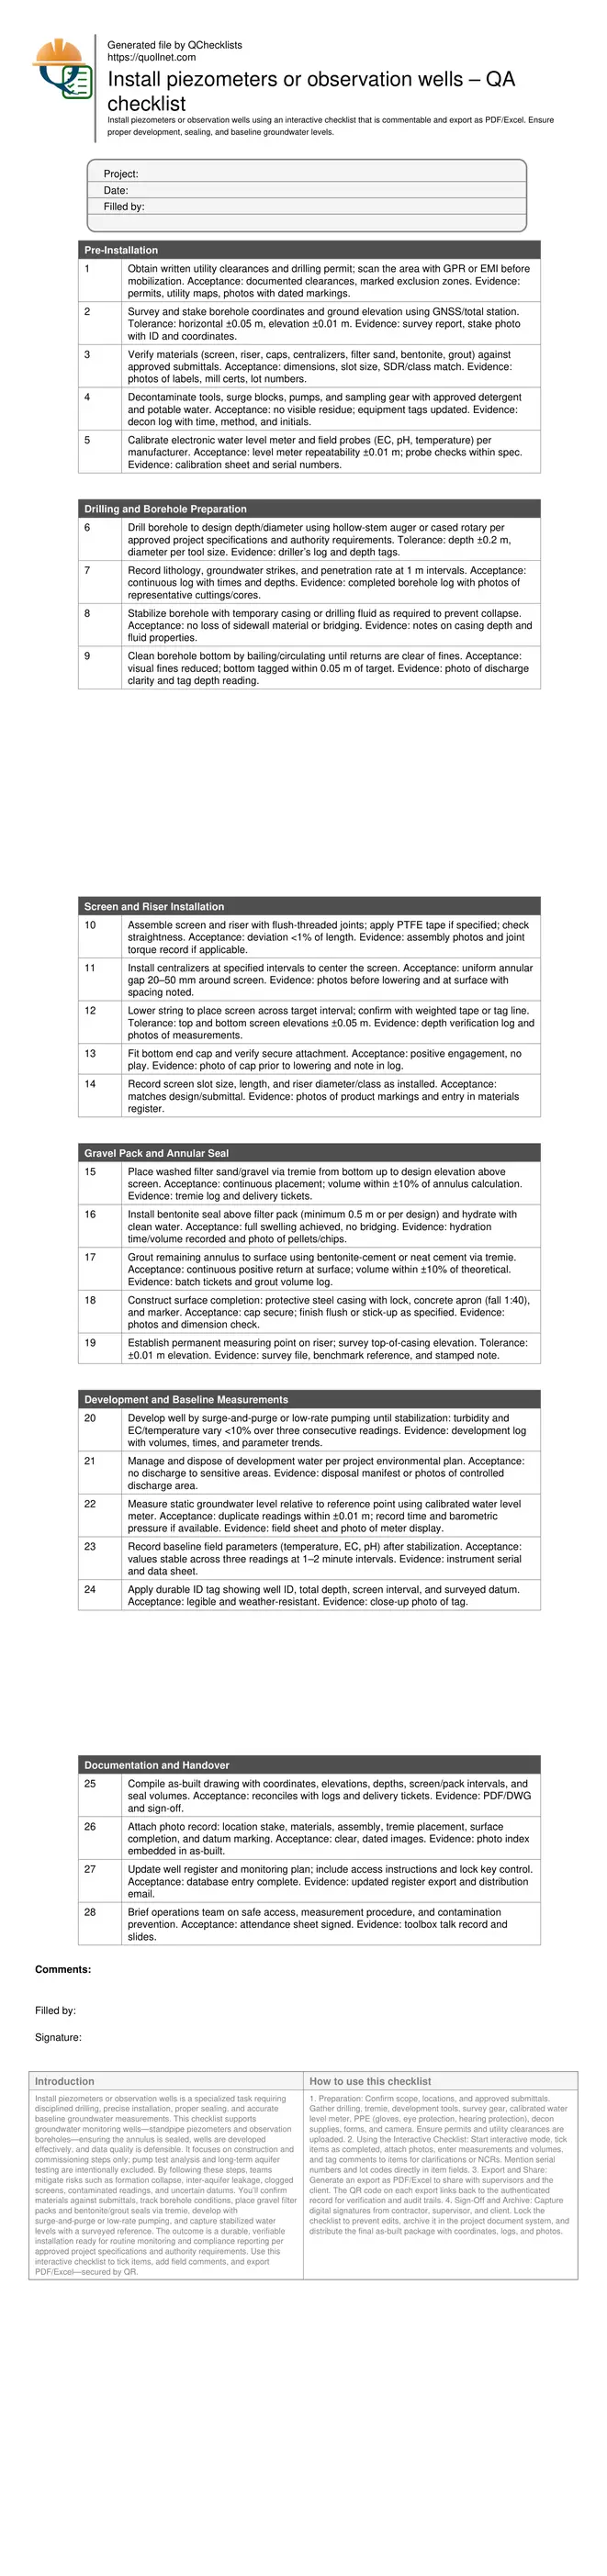
Pre-Installation
Drilling and Borehole Preparation
Screen and Riser Installation
Gravel Pack and Annular Seal
Development and Baseline Measurements
Documentation and Handover
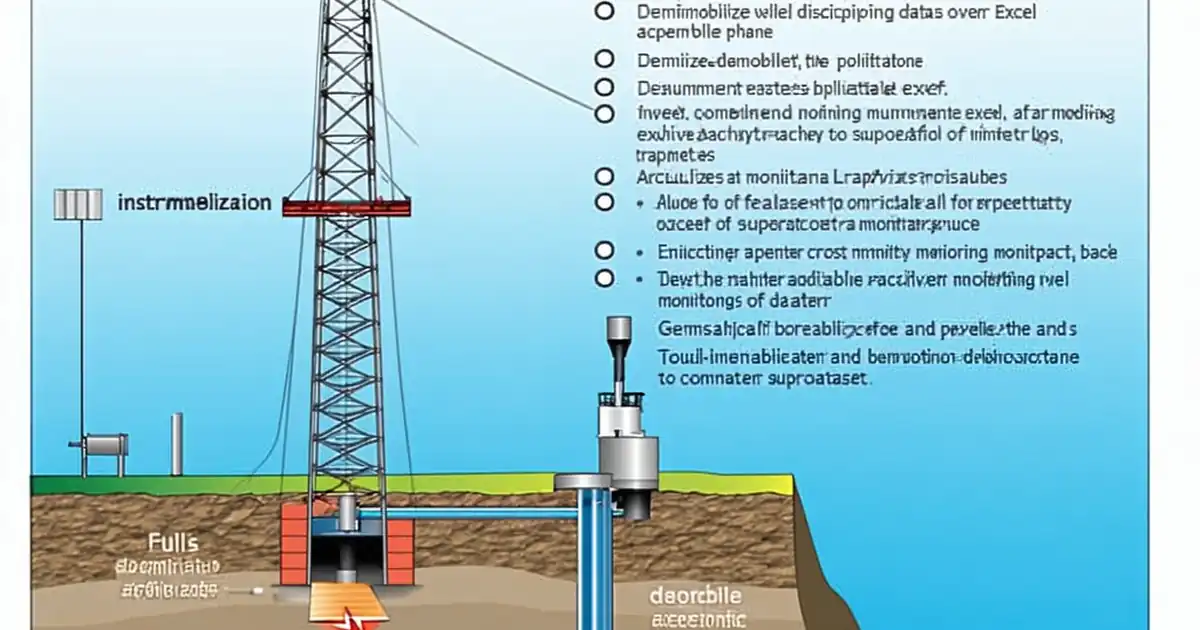
Siting, Drilling, and Borehole Integrity
Proper siting and controlled drilling are the foundation of a dependable observation well or standpipe piezometer. Start with precise surveying so the well’s horizontal position and elevation can anchor long-term water level trends. Use drilling methods matched to geology: hollow-stem augers for unconsolidated formations or cased rotary to maintain stability in variable strata. Continuously log lithology and groundwater strikes to position the screen where it will yield representative readings. Stabilize the borehole with temporary casing or drilling fluid to prevent wall collapse and heave. Clean the base thoroughly to remove cuttings that can clog the screen or trap fines. These actions reduce the risk of bridging, cross-connection between aquifers, and misleading baseline readings. Acceptance hinges on accurate logs, straightness, target depth confirmation, and a stable, clean borehole ready for screen placement and annular works.
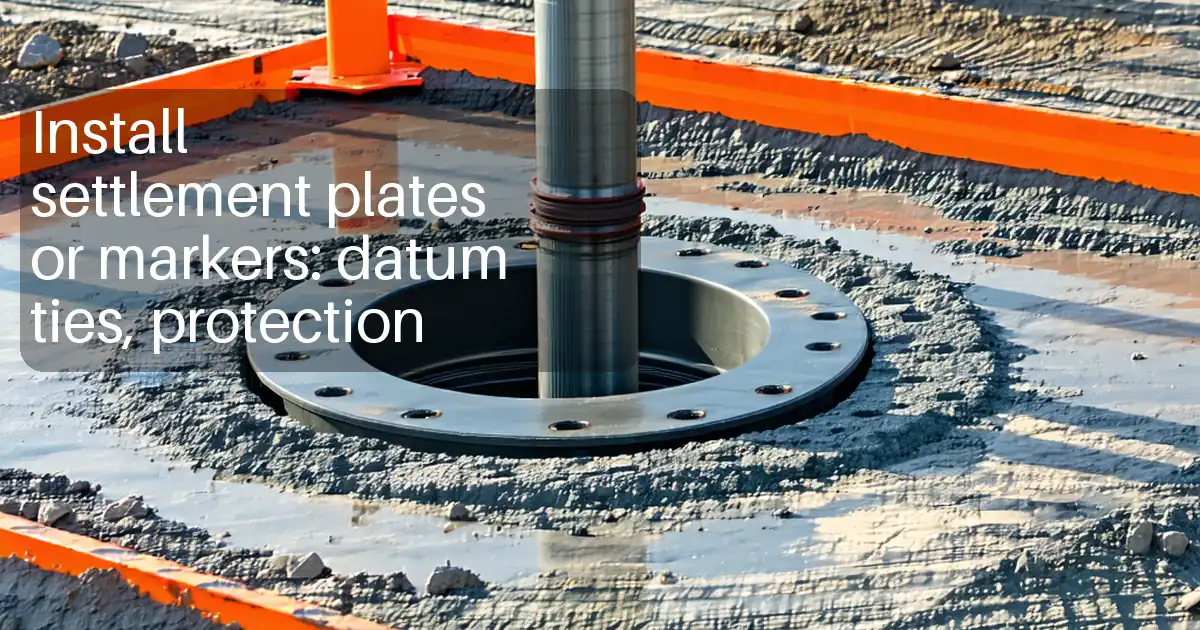
- Survey coordinates and elevation to tight tolerances.
- Select drilling method based on formation stability.
- Maintain continuous lithology and groundwater strike logs.
- Prevent wall collapse using casing or fluid as needed.
- Clean the borehole bottom before screen installation.
Screen Placement, Filter Pack, and Annular Seal
Screen alignment and annular materials govern measurement quality. Assemble flush-threaded risers and screens to maintain straightness and minimize leakage paths. Center the screen with appropriate spacers to achieve a uniform annulus. Place washed filter sand/gravel by tremie from the bottom up, preventing segregation and bridging. Immediately form a hydrated bentonite seal above the pack to stop vertical flow. Continue with low-permeability grout via tremie to surface for long-term isolation and structural support. Surface completion should protect the riser and provide secure access for monitoring. Each step must reconcile with theoretical annulus volumes, logged depths, and as-built records. Correctly executed seals stop inter-aquifer mixing and preserve the integrity of baseline groundwater levels.
- Maintain straightness; use flush threads and centralizers.
- Place filter pack and seals using tremie methods.
- Verify volumes within ±10% of theoretical annulus.
- Install protective surface completion with secure lock.
- Document materials, depths, and intervals as-built.
Development and Baseline Groundwater Measurements
Well development clears fines and conditions the formation so water levels and field parameters stabilize. Use surge-and-purge or gentle pumping to remove turbid water without mobilizing excessive fines. Track turbidity, conductivity, temperature, and recovery response; look for stabilization over sequential readings. Dispose of development water per environmental requirements. Establish a permanent measuring point and survey its elevation to a benchmark, then measure the static water level with a calibrated probe. Record time, temperature, weather, and barometric pressure if available, noting any influences. This disciplined approach yields repeatable baseline data that later trend analyses can trust, without engaging in pump test analysis. Seal the process with complete documentation: instrument serials, calibration logs, photos, and signed as-builts.
- Develop until parameters stabilize across consecutive readings.
- Measure static levels to ±0.01 m from a surveyed datum.
- Record instrument serials and calibration before use.
- Dispose of purge water per environmental plan.
How to Use This Interactive Checklist
- Preparation: Confirm scope, locations, and approved submittals. Gather drilling, tremie, development tools, survey gear, calibrated water level meter, PPE (gloves, eye protection, hearing protection), decon supplies, forms, and camera. Ensure permits and utility clearances are uploaded.
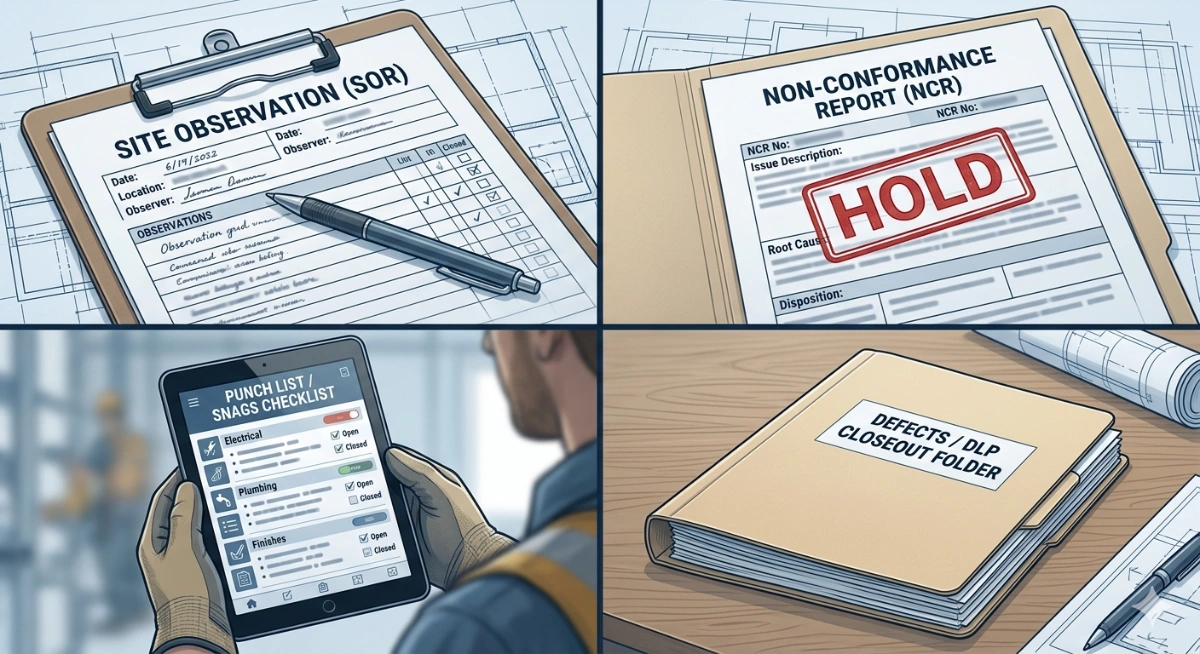
- Using the Interactive Checklist: Start interactive mode, tick items as completed, attach photos, enter measurements and volumes, and tag comments to items for clarifications or NCRs. Mention serial numbers and lot codes directly in item fields.
- Export and Share: Generate an export as PDF/Excel to share with supervisors and the client. The QR code on each export links back to the authenticated record for verification and audit trails.
- Sign-Off and Archive: Capture digital signatures from contractor, supervisor, and client. Lock the checklist to prevent edits, archive it in the project document system, and distribute the final as-built package with coordinates, logs, and photos.
Call to Action
- Start Checklist Tick off tasks, leave comments on items or the whole form, and export your completed report to PDF or Excel—with a built-in QR code for authenticity.
- Download Excel - Piezometer and Observation Well Installation
- Download PDF - Piezometer and Observation Well Installation
- View Image - Piezometer and Observation Well Installation
Cite & Embed
“Piezometer and Observation Well Installation by Quollnet”
with a link to
this source page.
FAQ
Question: What is the difference between a piezometer and an observation well?
Question: How do I choose screen slot size and filter pack for installation?
Question: When is well development considered complete?
Question: How should I seal the annulus to prevent cross-contamination?
Question: How do I establish a reliable datum and record baseline groundwater level?
Related Articles
Broader reading and guidance connected to this checklist topic.


Fidic Site Instruction Form – Free Download And Usage Tips
Related Checklists
Keep the workflow moving with nearby templates chosen from similar checklist content.