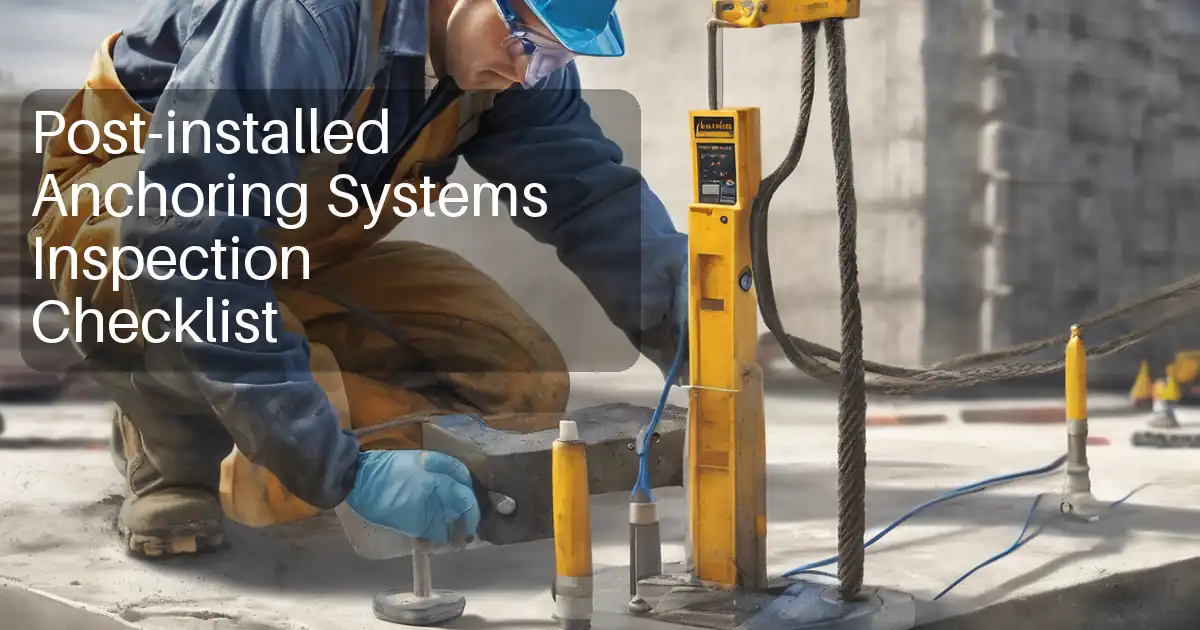
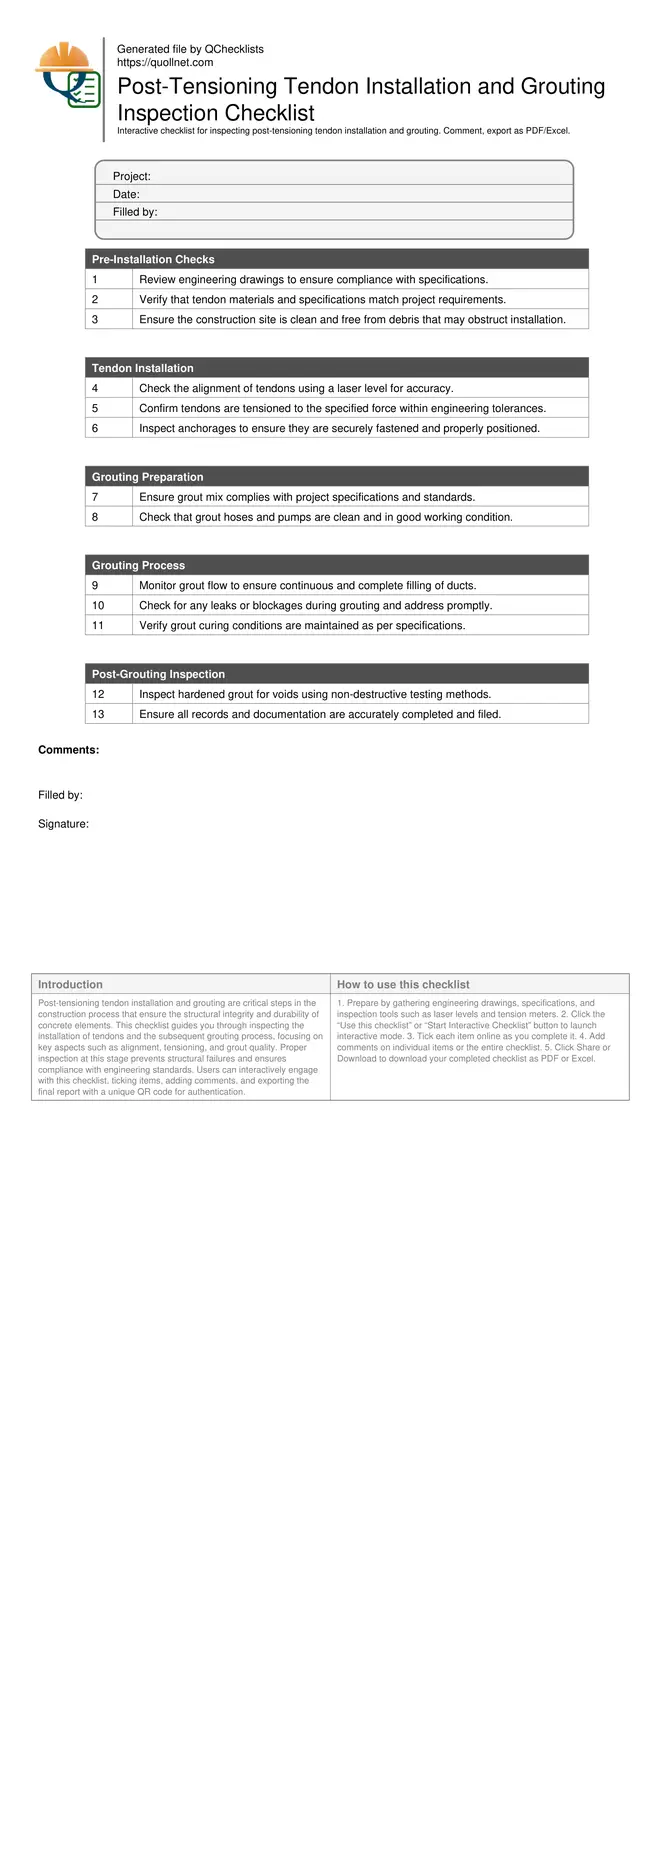
Post-Tensioning Installation and Grouting Inspection
Post-tensioning tendon installation and grouting are critical steps in the construction process that ensure the structural integrity and durability of concrete elements. This checklist guides you through inspecting the installation of tendons and the subsequent grouting process, focusing on key aspects such as alignment, tensioning, and grout quality. Proper inspection at this stage prevents structural failures and ensures compliance with engineering standards. Users can interactively engage with this checklist, ticking items, adding comments, and exporting the final report with a unique QR code for authentication.
- Ensure structural integrity by meticulously inspecting tendon placement and grouting.
- Prevent potential structural failures with thorough inspection processes.
- Interactive online checklist with tick, comment, and export features secured by QR code.
- Enhance construction quality assurance through detailed inspection steps.
Pre-Installation Checks
Tendon Installation
Grouting Preparation
Grouting Process
Post-Grouting Inspection
Understanding the Importance of Inspection
Inspection during post-tensioning tendon installation and grouting is crucial for ensuring the structural soundness of the building. By confirming that all elements are installed and grouted according to design and specifications, inspectors help prevent future structural issues. This process involves checking alignment, tension, and grout quality to ensure that the structure performs as expected under load.
- Confirm compliance with design specifications.
- Prevent future structural failures.
- Ensure proper load-bearing performance.
Key Inspection Techniques
Various techniques are employed to inspect post-tensioned structures effectively. These include visual inspections, non-destructive testing, and the use of precision instruments to measure alignment and tension. Understanding and applying these techniques ensures that all components meet the required standards and perform optimally.
- Use laser levels for alignment checks.
- Employ non-destructive testing for grout voids.
- Measure tension with calibrated devices.
Using the Interactive Checklist for Post-Tensioning Inspection
- Prepare by gathering engineering drawings, specifications, and inspection tools such as laser levels and tension meters.
- Click the “Use this checklist” or “Start Interactive Checklist” button to launch interactive mode.
- Tick each item online as you complete it.
- Add comments on individual items or the entire checklist.
- Click Share or Download to download your completed checklist as PDF or Excel.
Call to Action
- Start Checklist Tick off tasks, leave comments on items or the whole form, and export your completed report to PDF or Excel—with a built-in QR code for authenticity.
- Download Excel - Inspect Post-Tensioning Tendon Installation and Grouting
- Download PDF - Inspect Post-Tensioning Tendon Installation and Grouting
- View Image - Inspect Post-Tensioning Tendon Installation and Grouting
Cite & Embed
“Inspect Post-Tensioning Tendon Installation and Grouting by Quollnet”
with a link to
this source page.
FAQ
Question: How do I ensure tendon alignment during installation?
Question: What should I do if I find voids in the grout?
Question: Why is it important to inspect post-tensioning tendons?
Related Articles
Broader reading and guidance connected to this checklist topic.


Related Checklists
Keep the workflow moving with nearby templates chosen from similar checklist content.